On this page
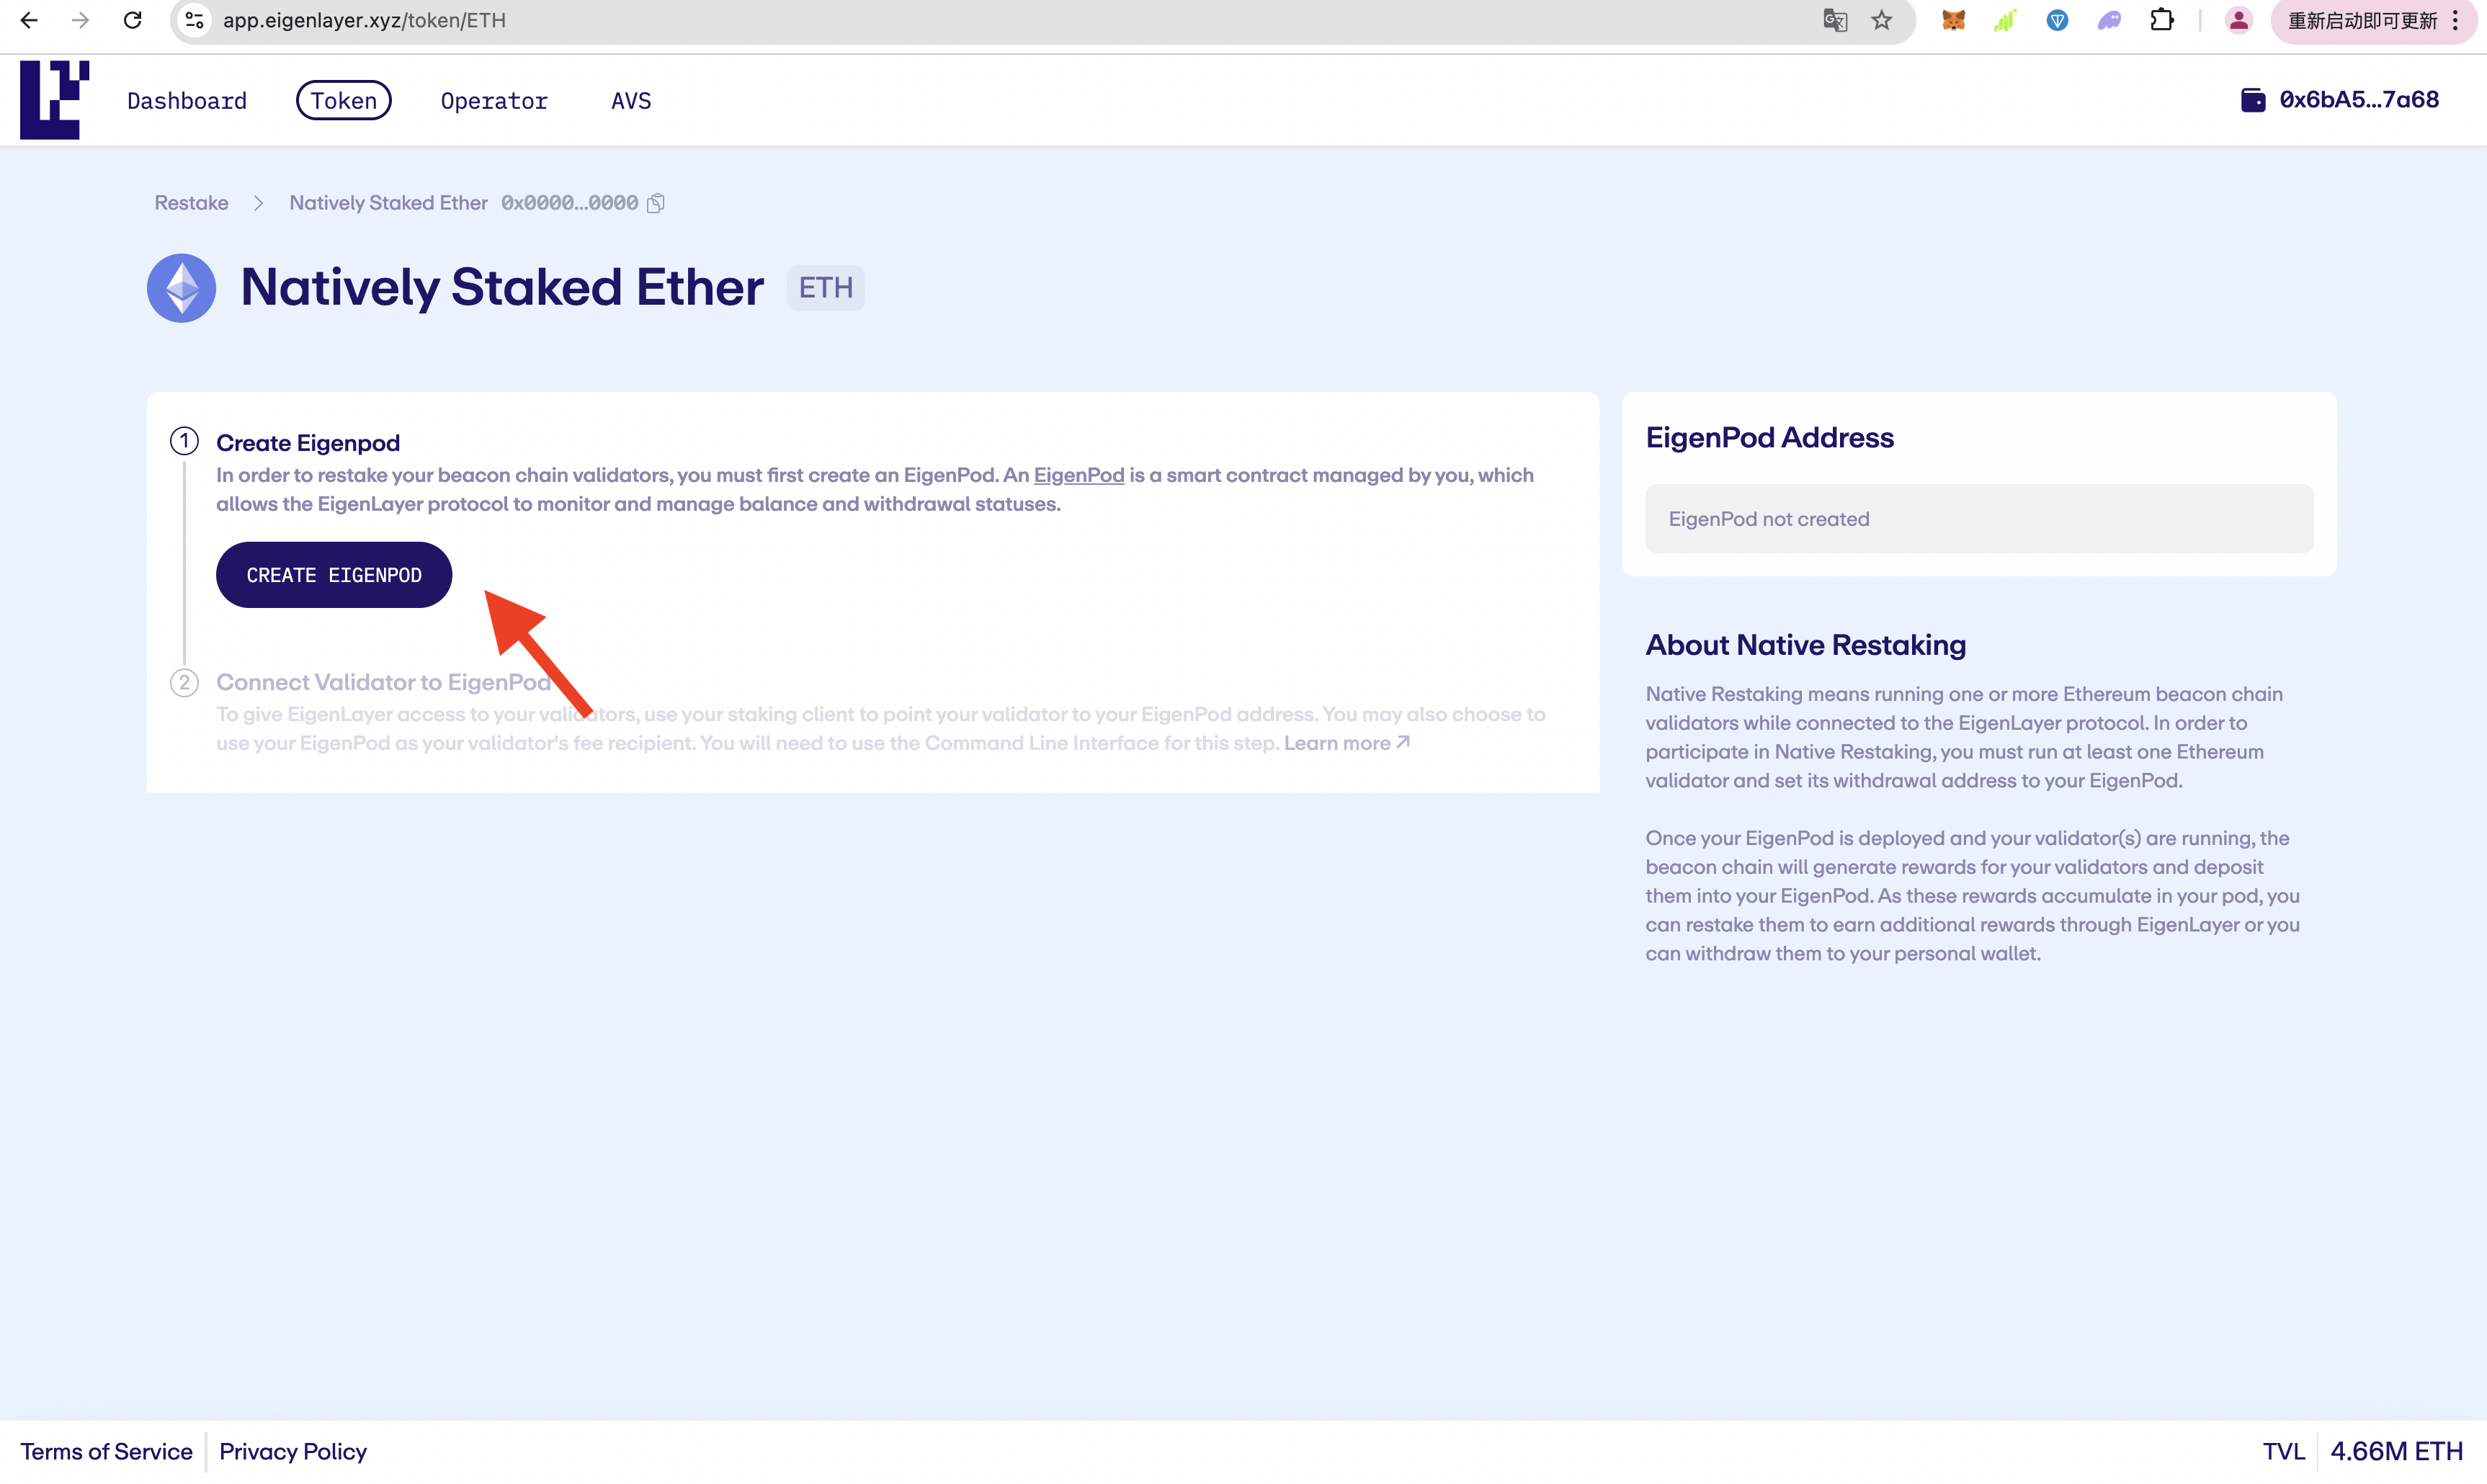
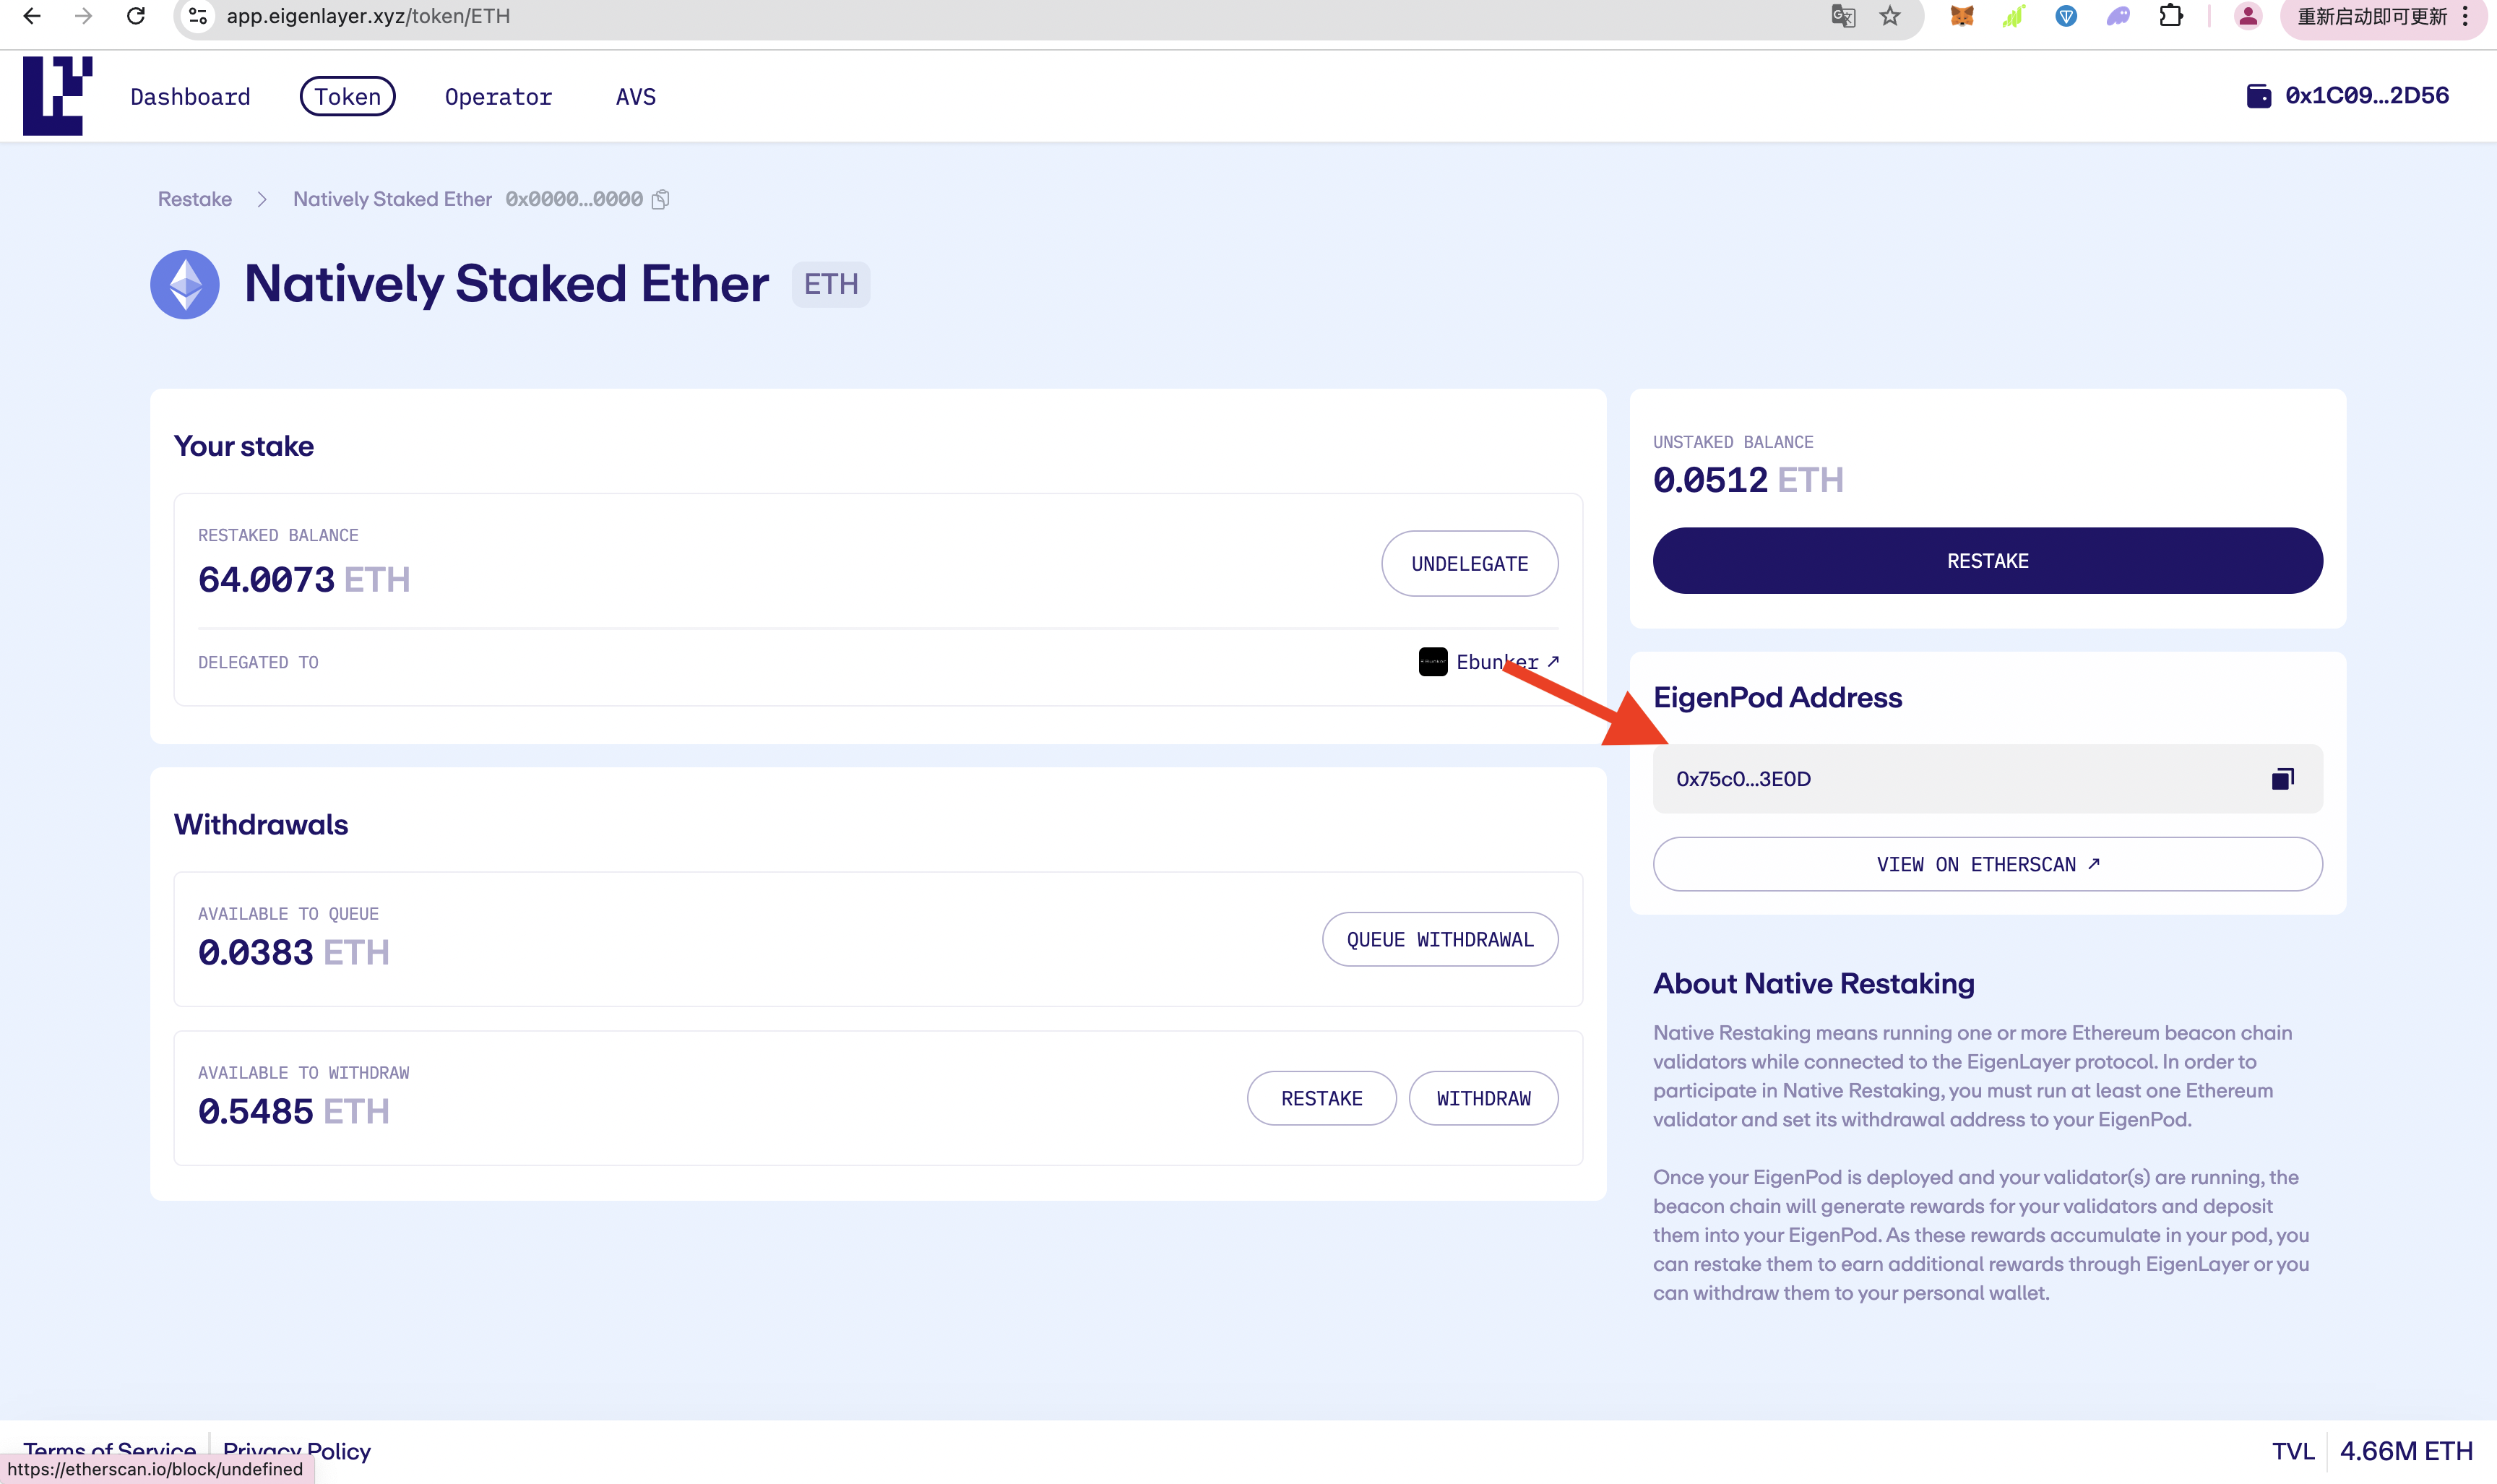
Eigenlayer Retake Operating Steps 1. Create Eigenpod Open Eigenlayer Official Website Connect Eigenlayer with Wallet A and sign Click [Create Eigenpod] Complete wallet signature (principal will enter Eigenpod address when the node exited, and can be withdrawn to Wallet A address after 7 days of unlocking) View Eigenpod Address and copy the address.
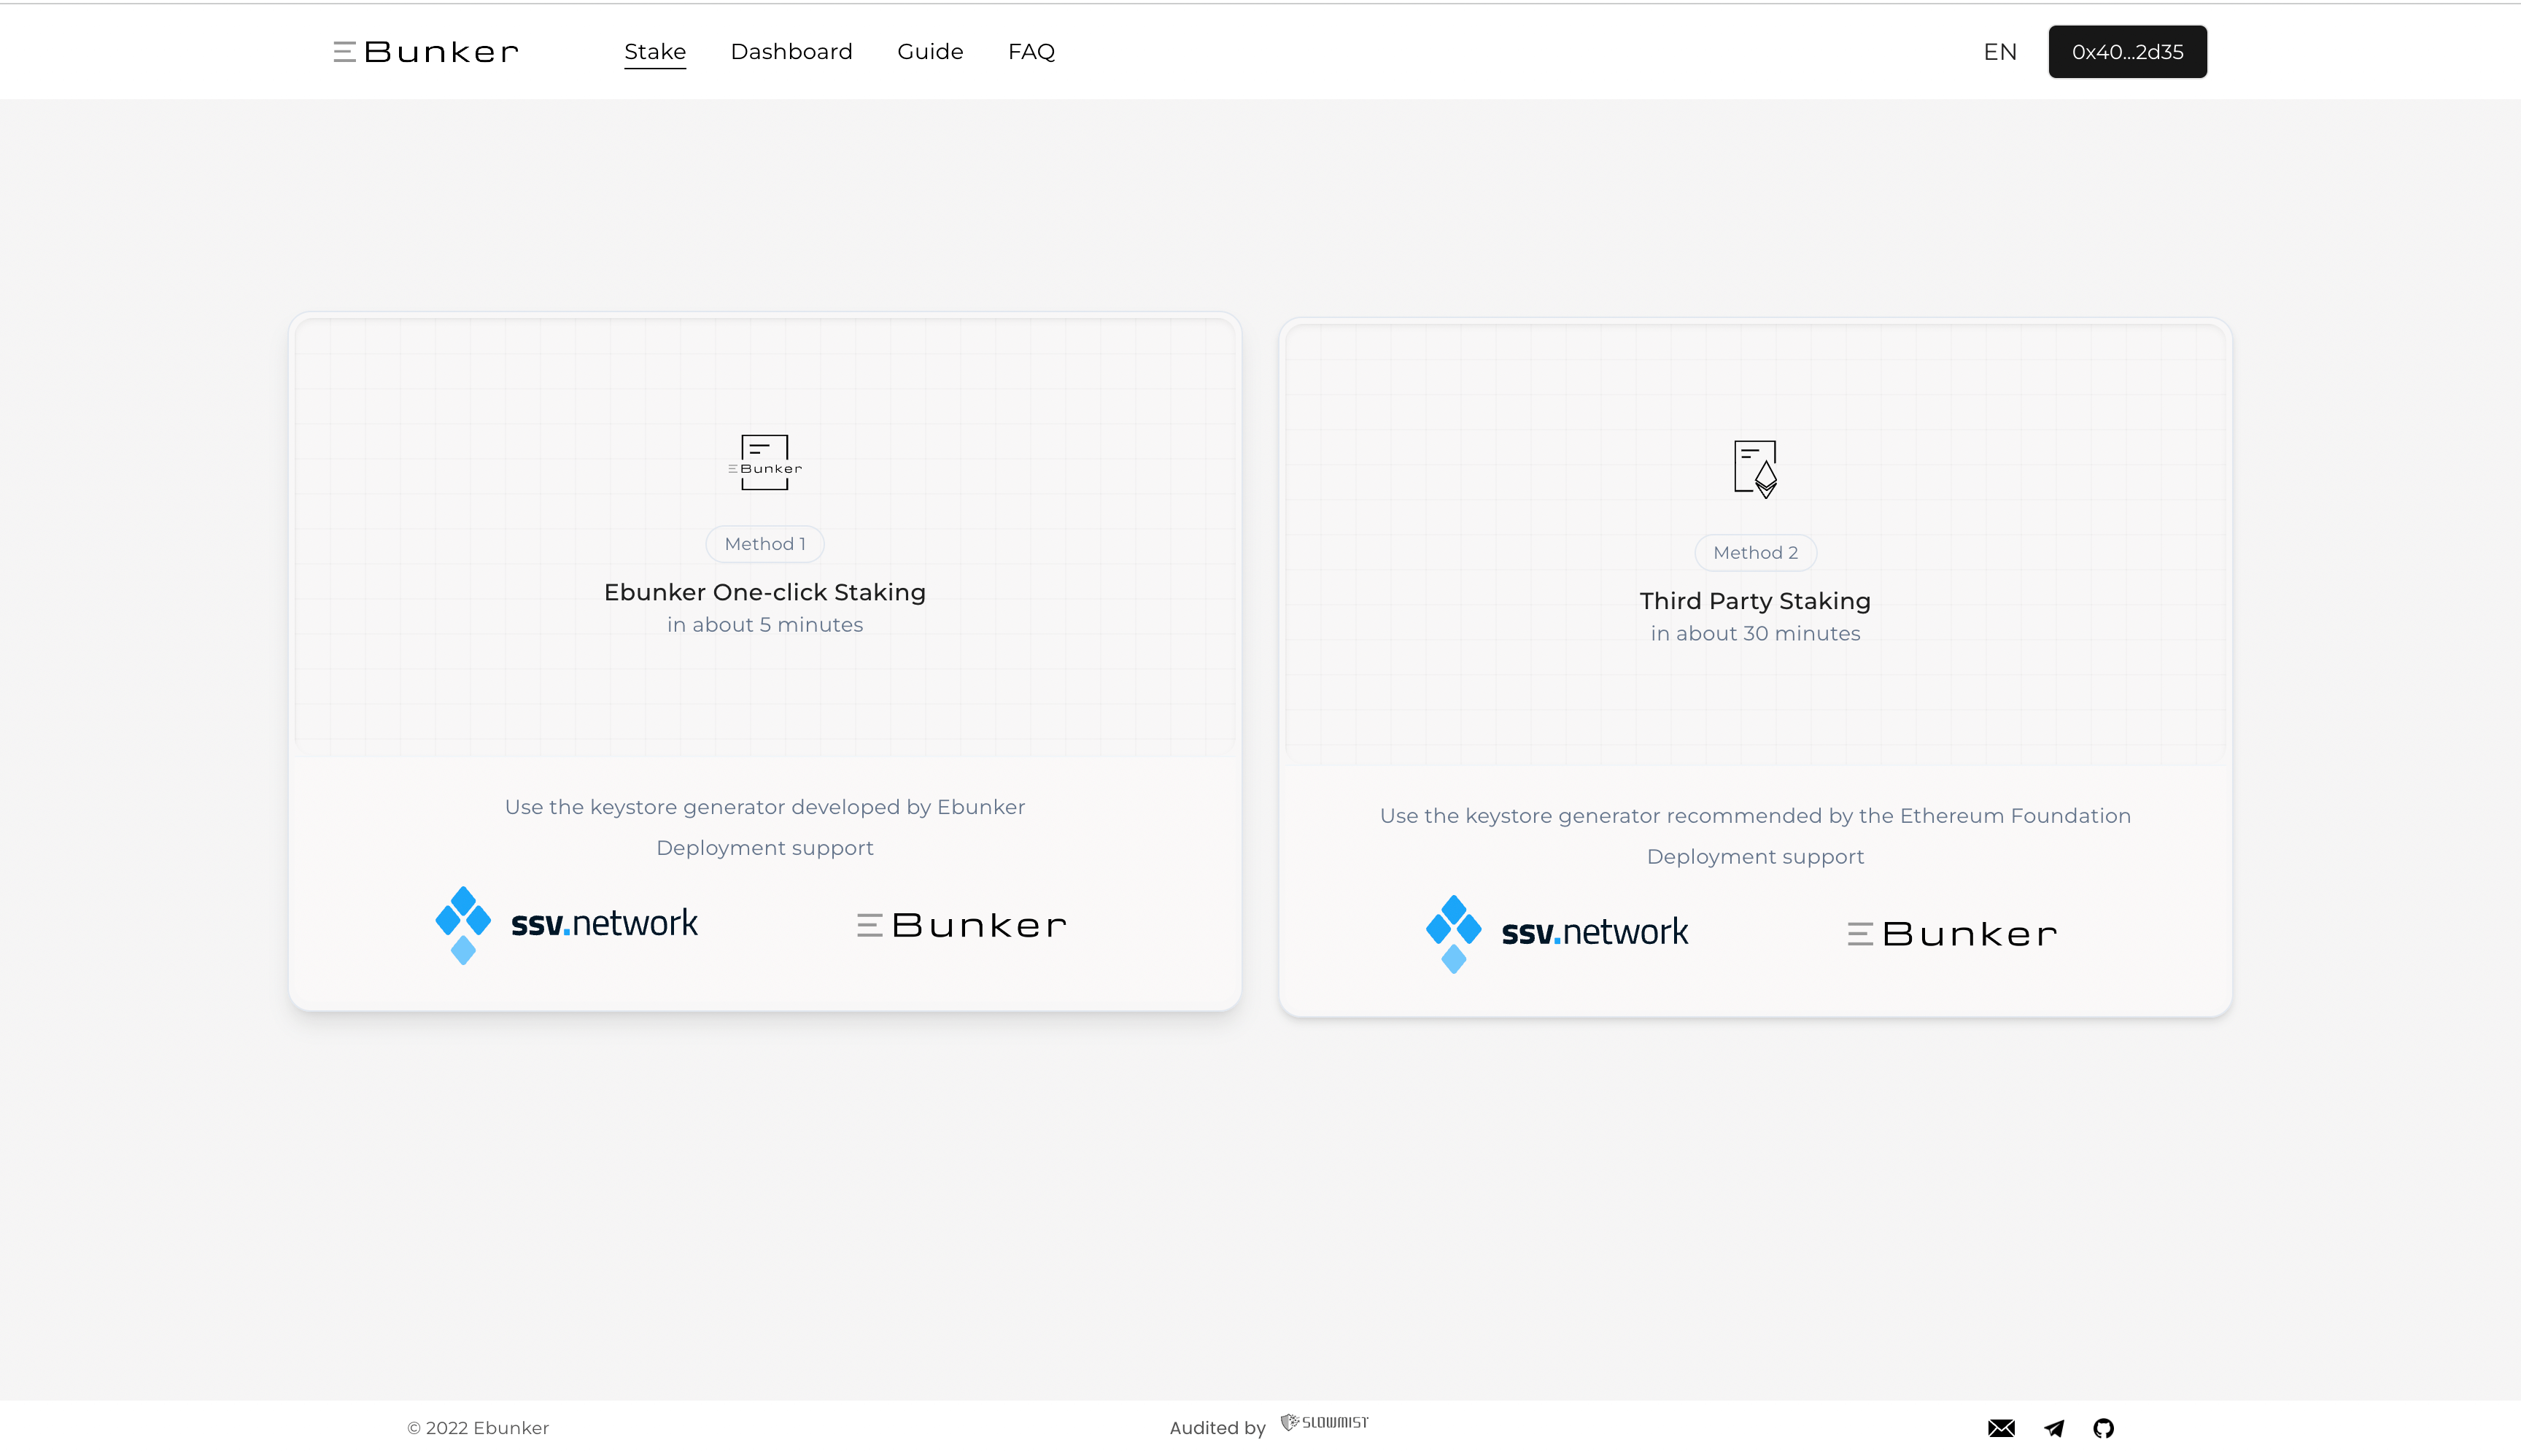
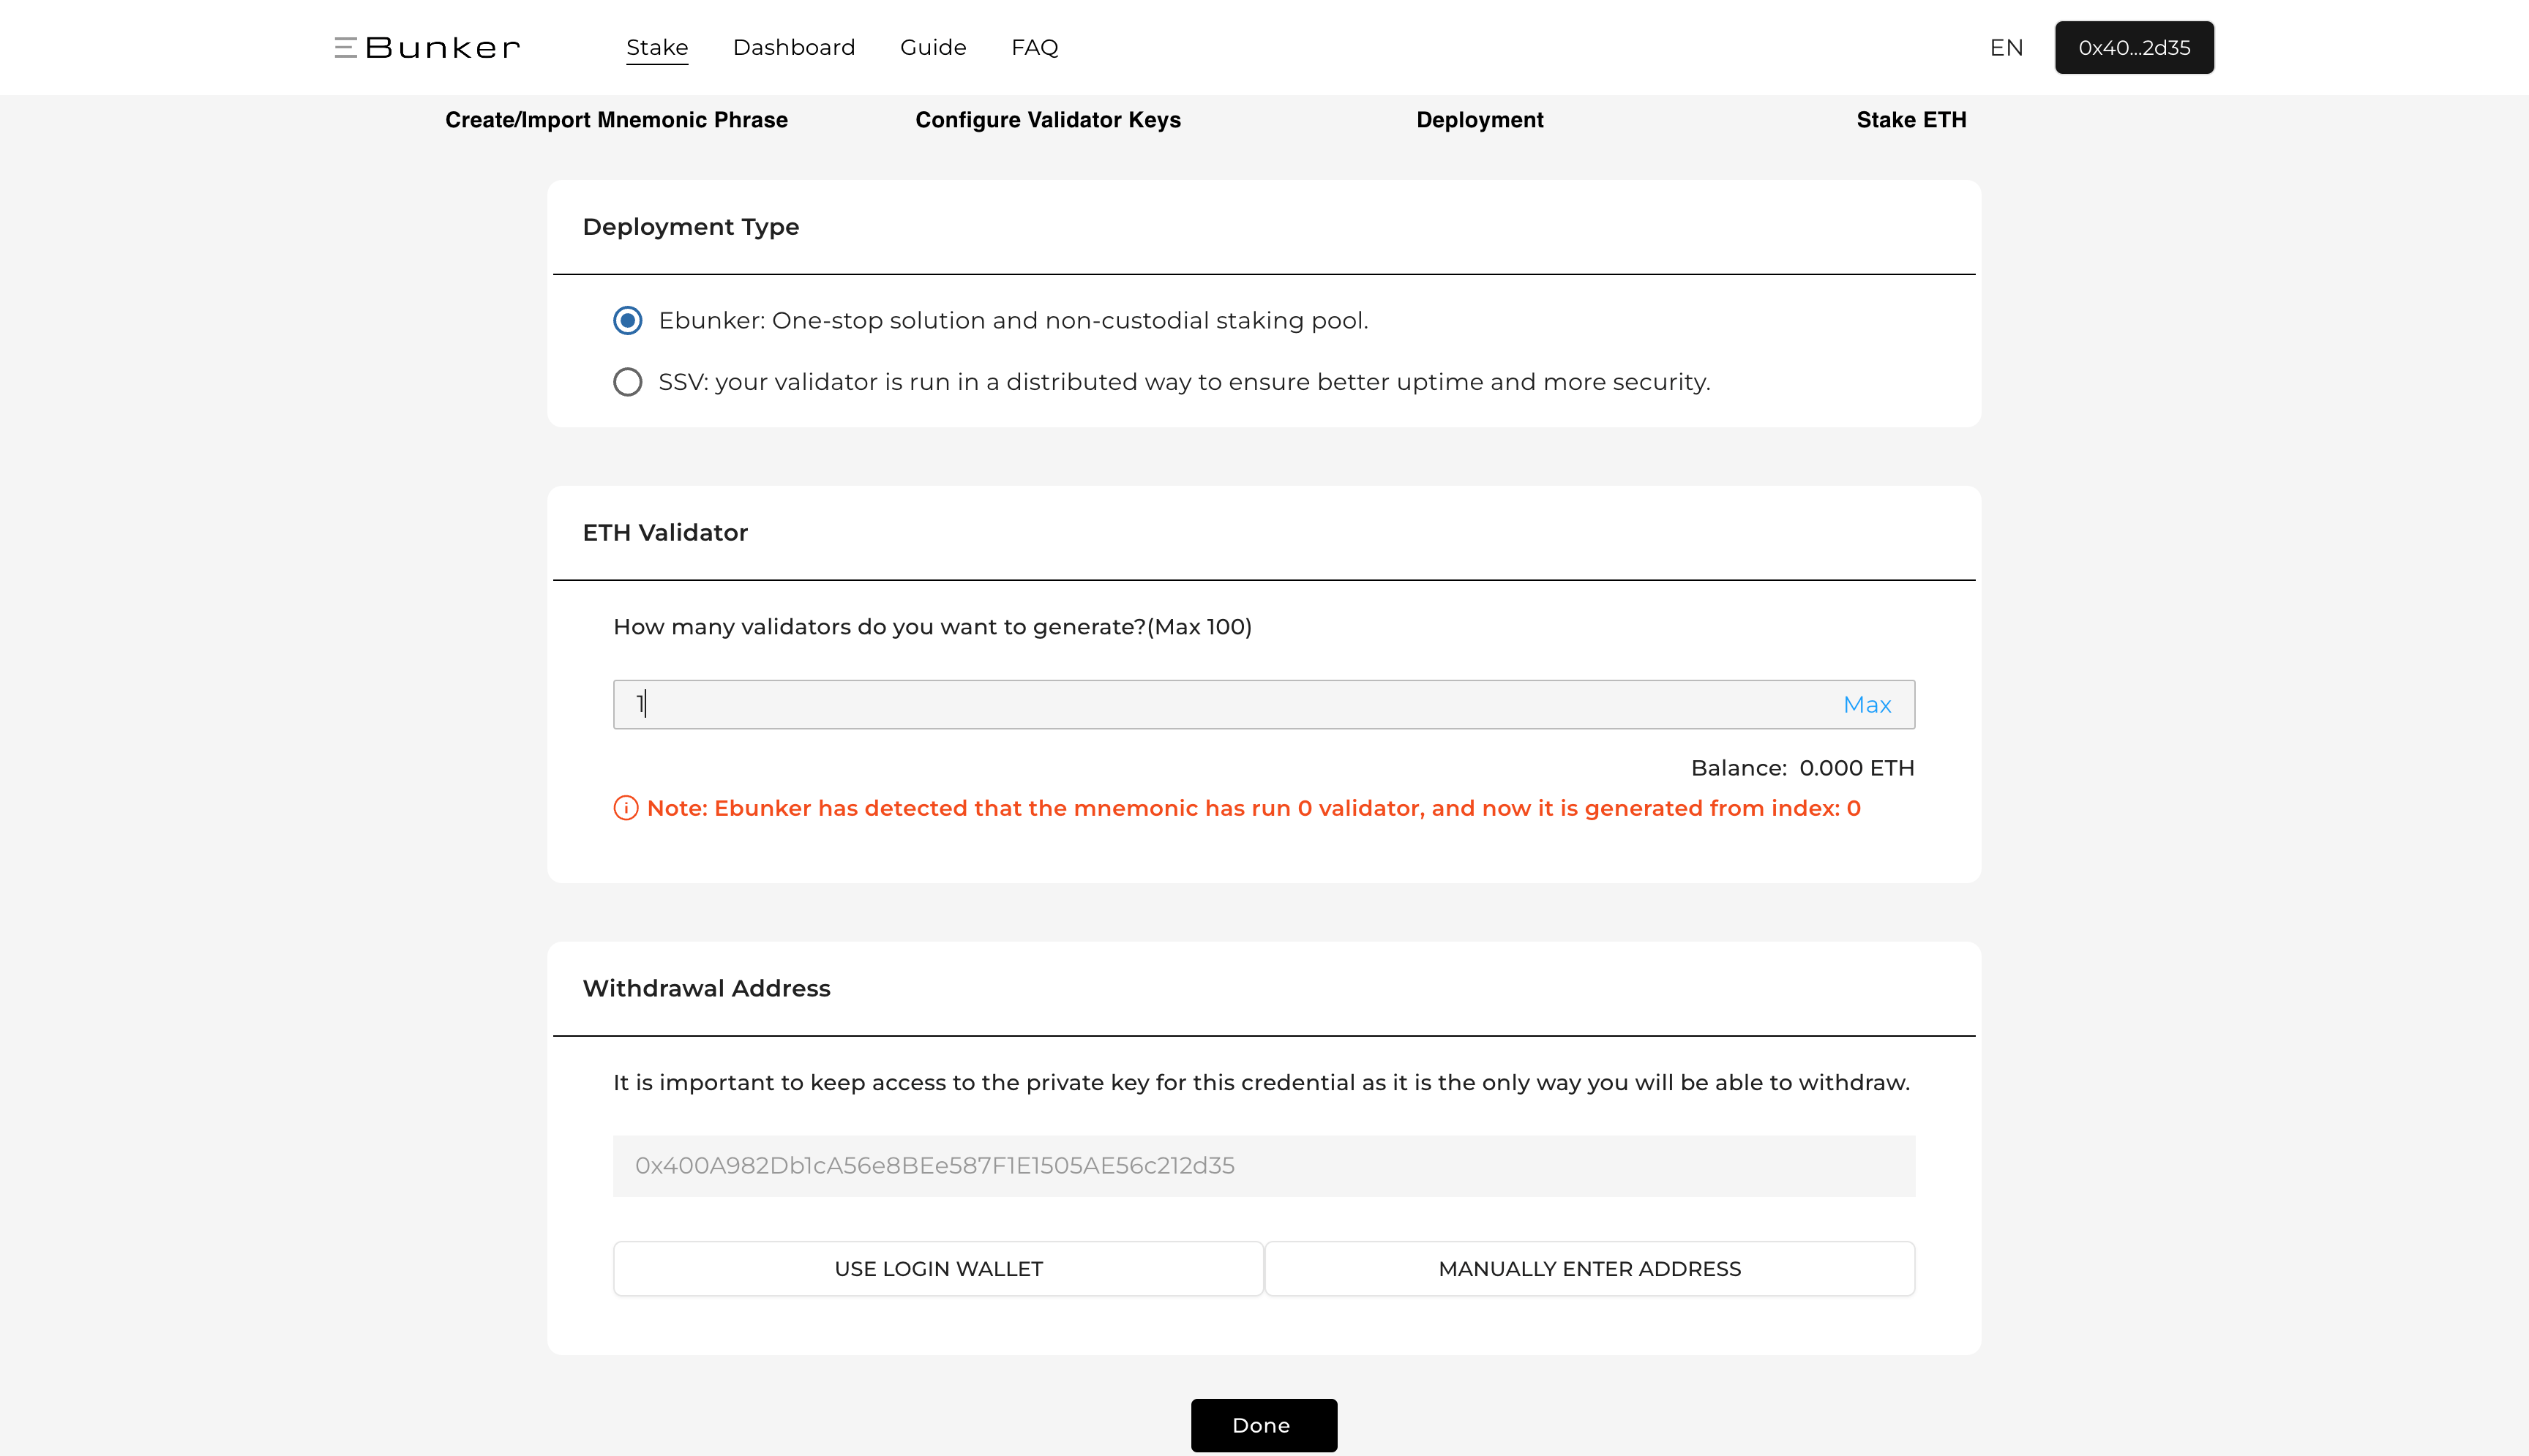
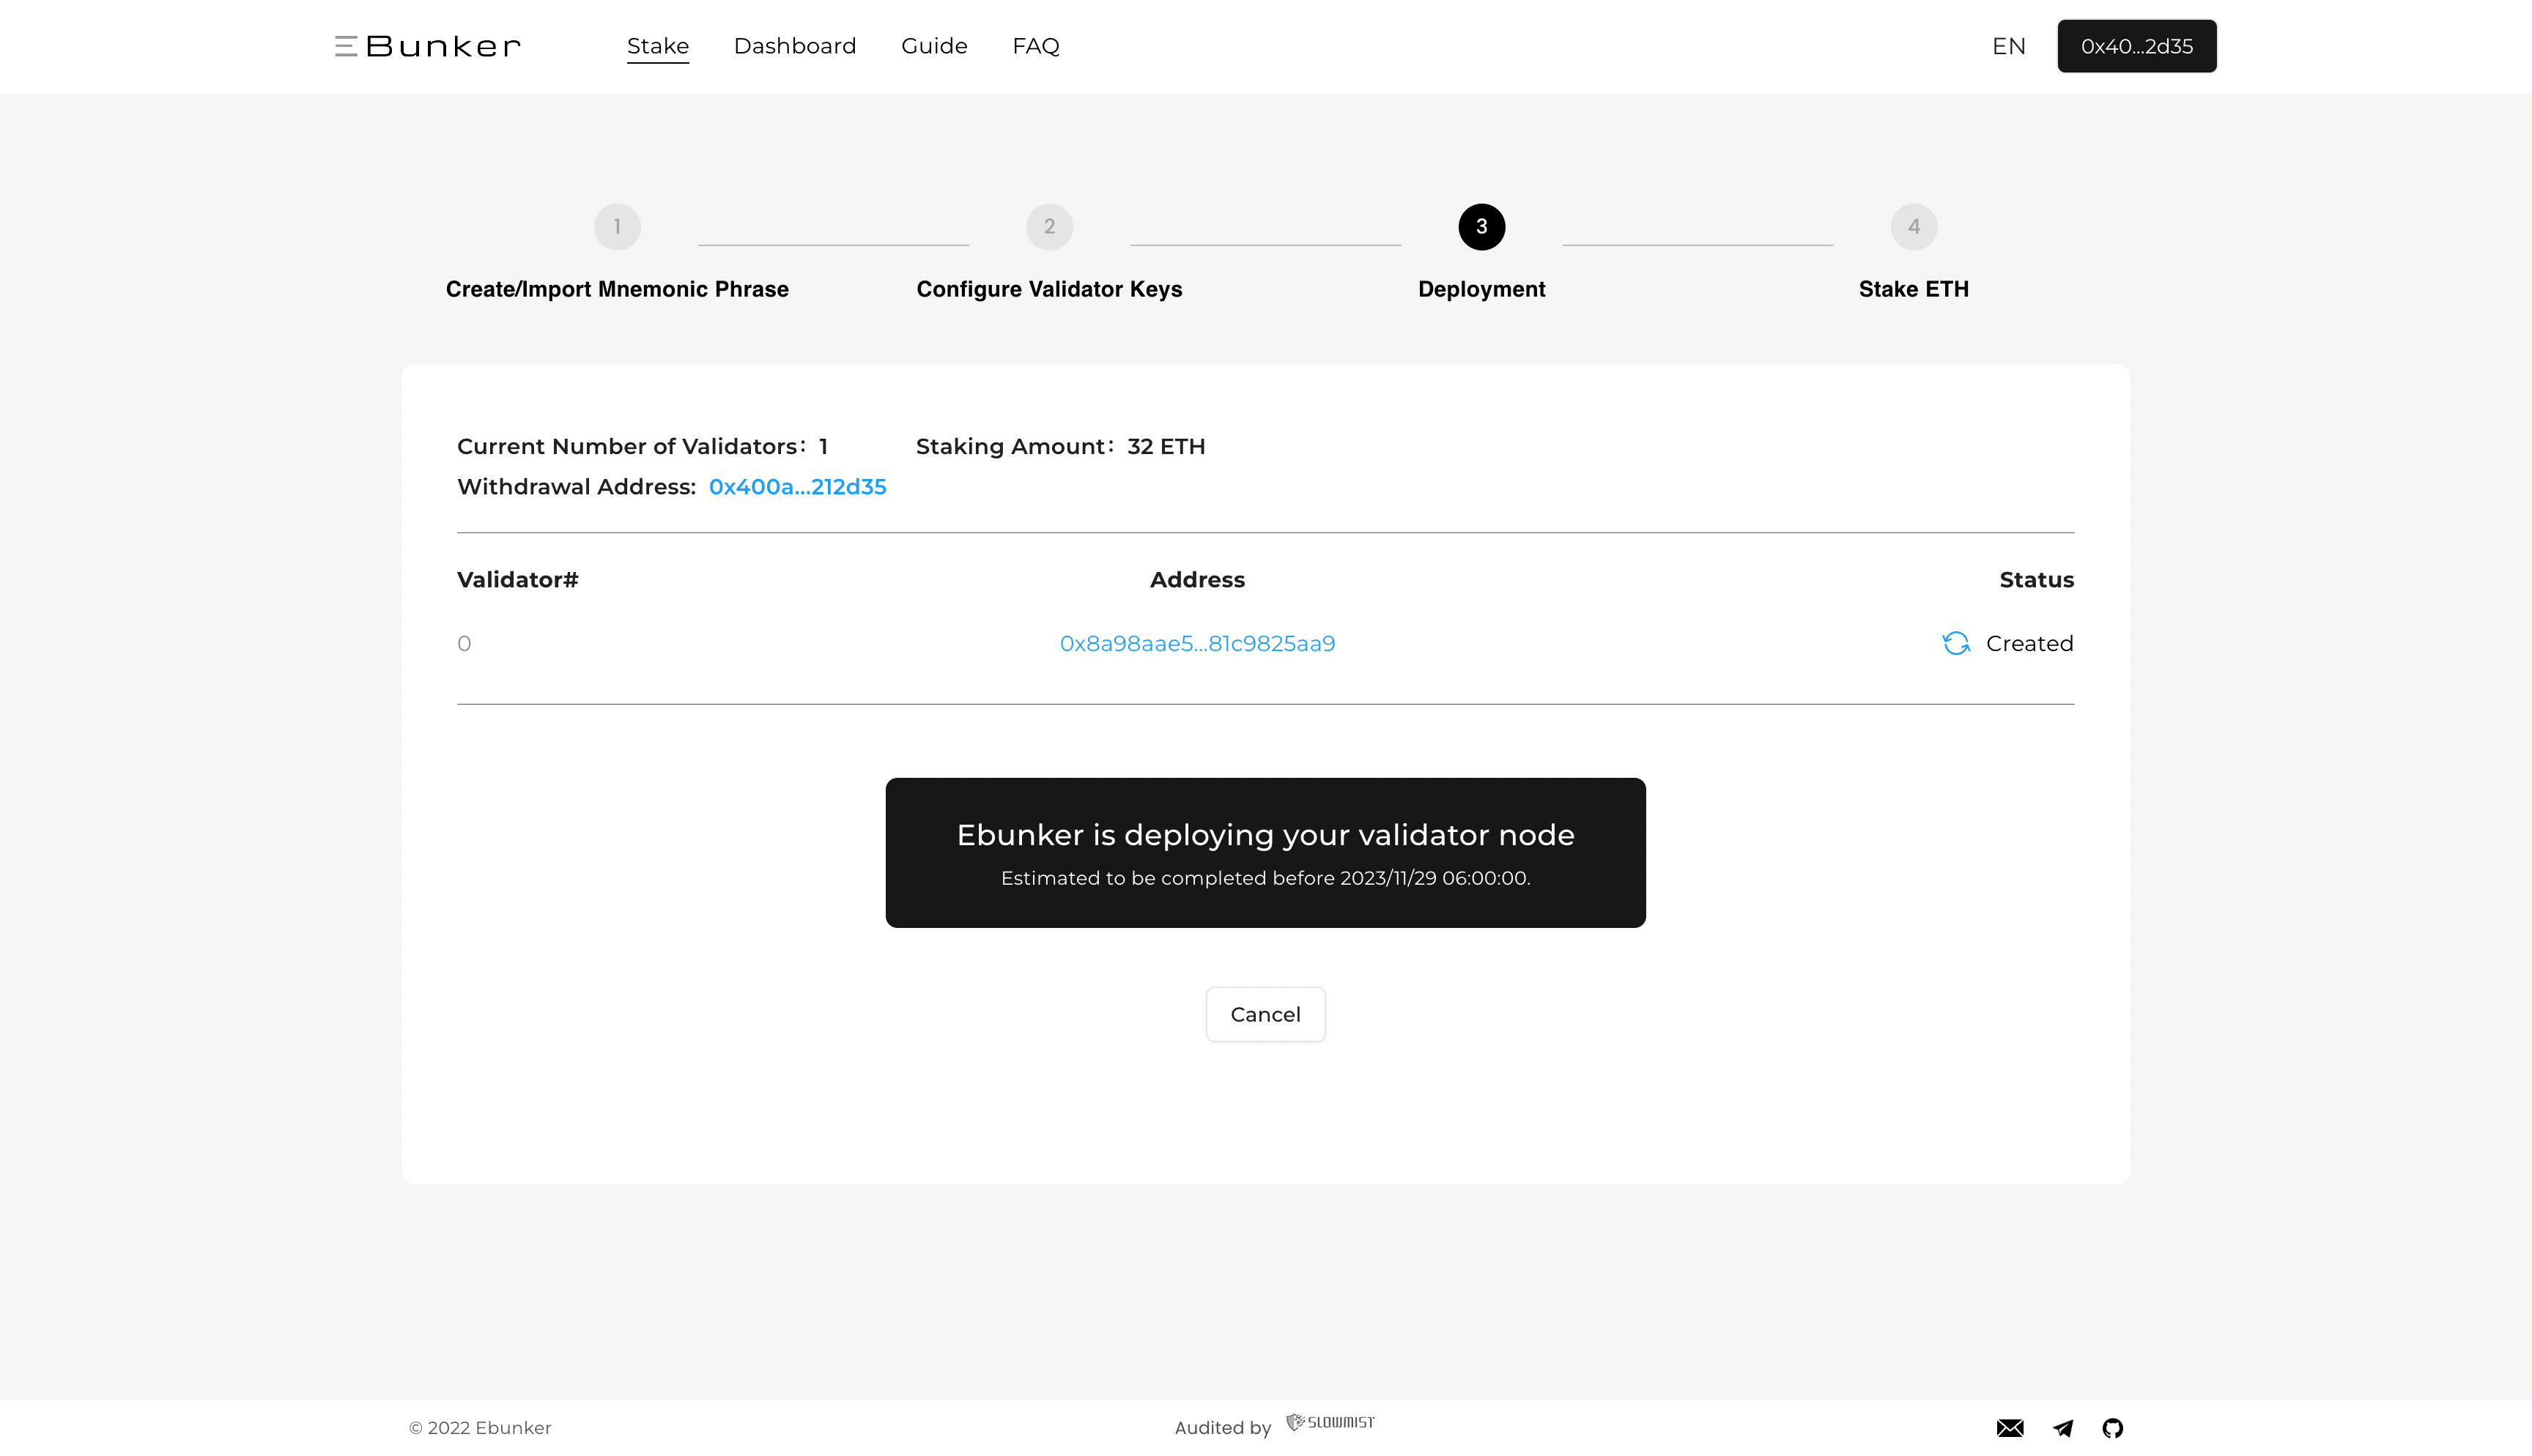
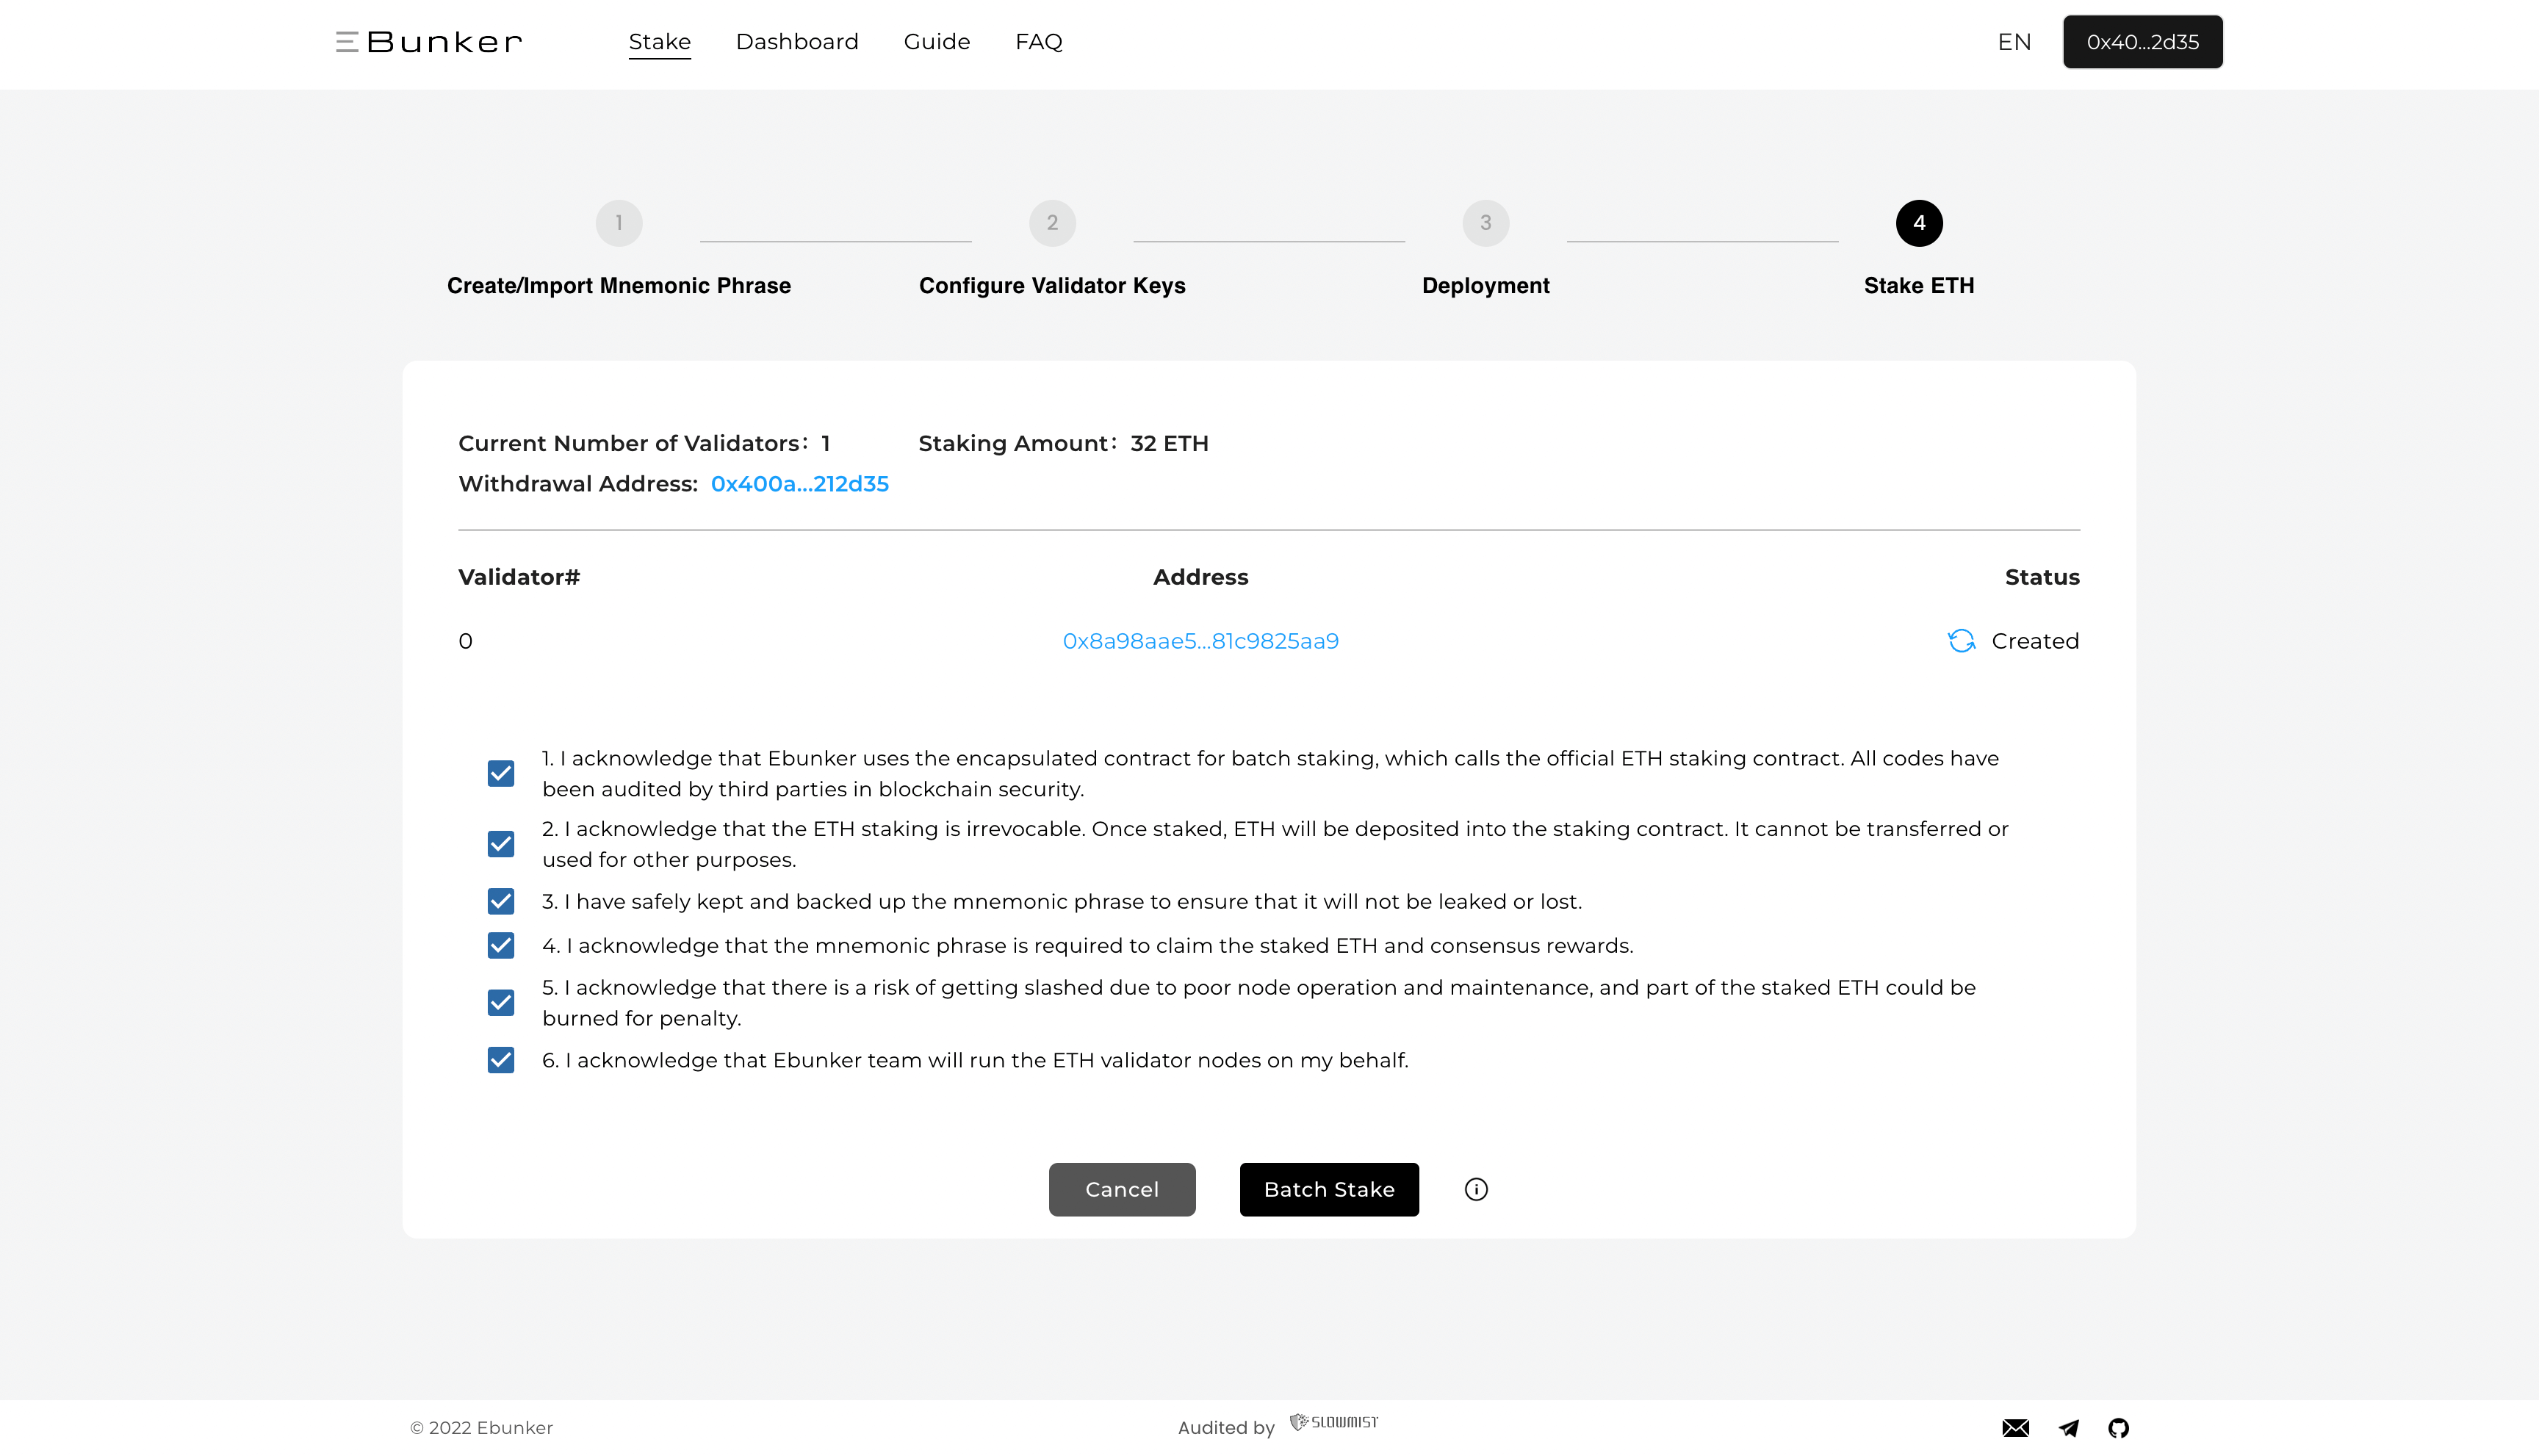
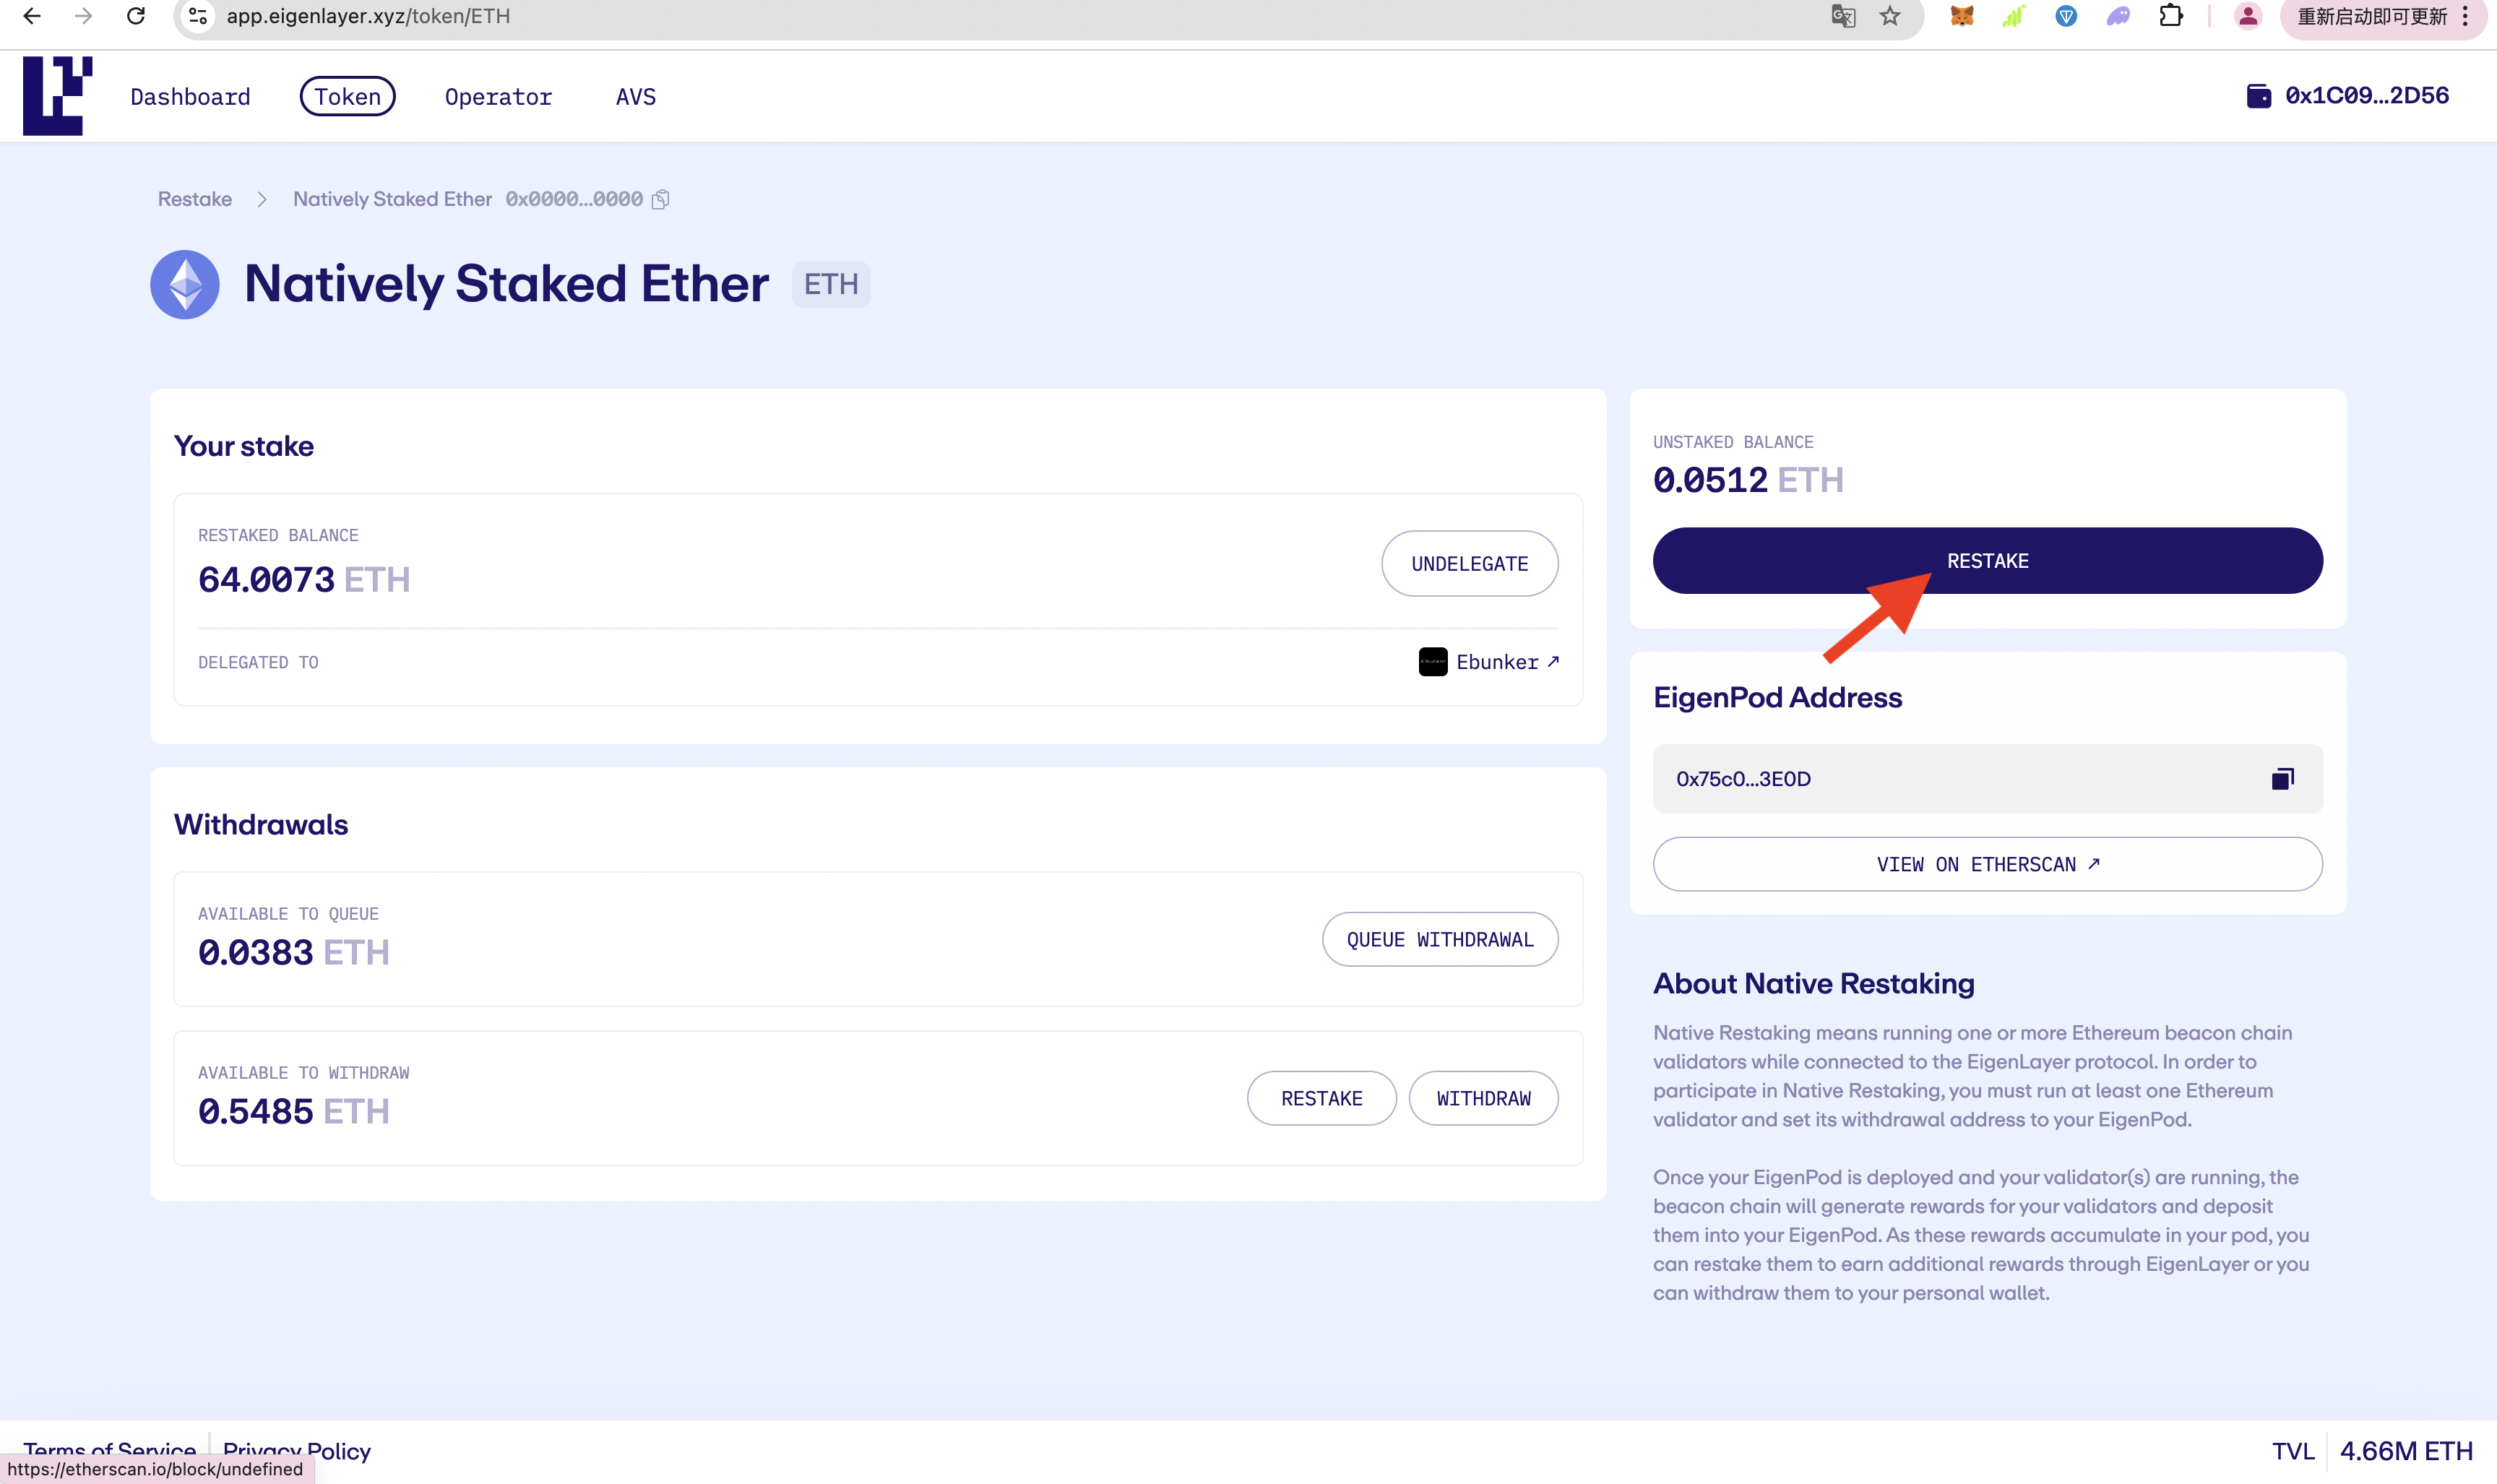
2. Create Node: Visit Ebunker Official Website Connect Wallet (It is recommended to use Wallet A, which needs to complete ETH staking) and sign Click [Ebunker One-Click Staking] - Create and back up mnemonic phrase. Detailed steps: One-Click Staking Fill in the deployment method (default to use Ebunker) Fill in the number of validators to be created Fill in the withdrawal address - click [Manually Enter Address] - enter the Eigenpod address (created in the first step) as withdraw address Click [Done] to create the node Detailed instructions: Create Node 4. Wait for Ebunker to Deploy the Validator 5. Stake ETH After the validator deployment is complete, click [Batch Stake] to stake ETH Detailed instructions: Node Staking 6. Wait for Validator Activation It takes approximately 16-24 hours for ETH validators to activate, and Eigenlayer's website cannot view Restake information before activation. After the validator is activated, return to Eigenlayer Official Website to view that the node has been Restaked.
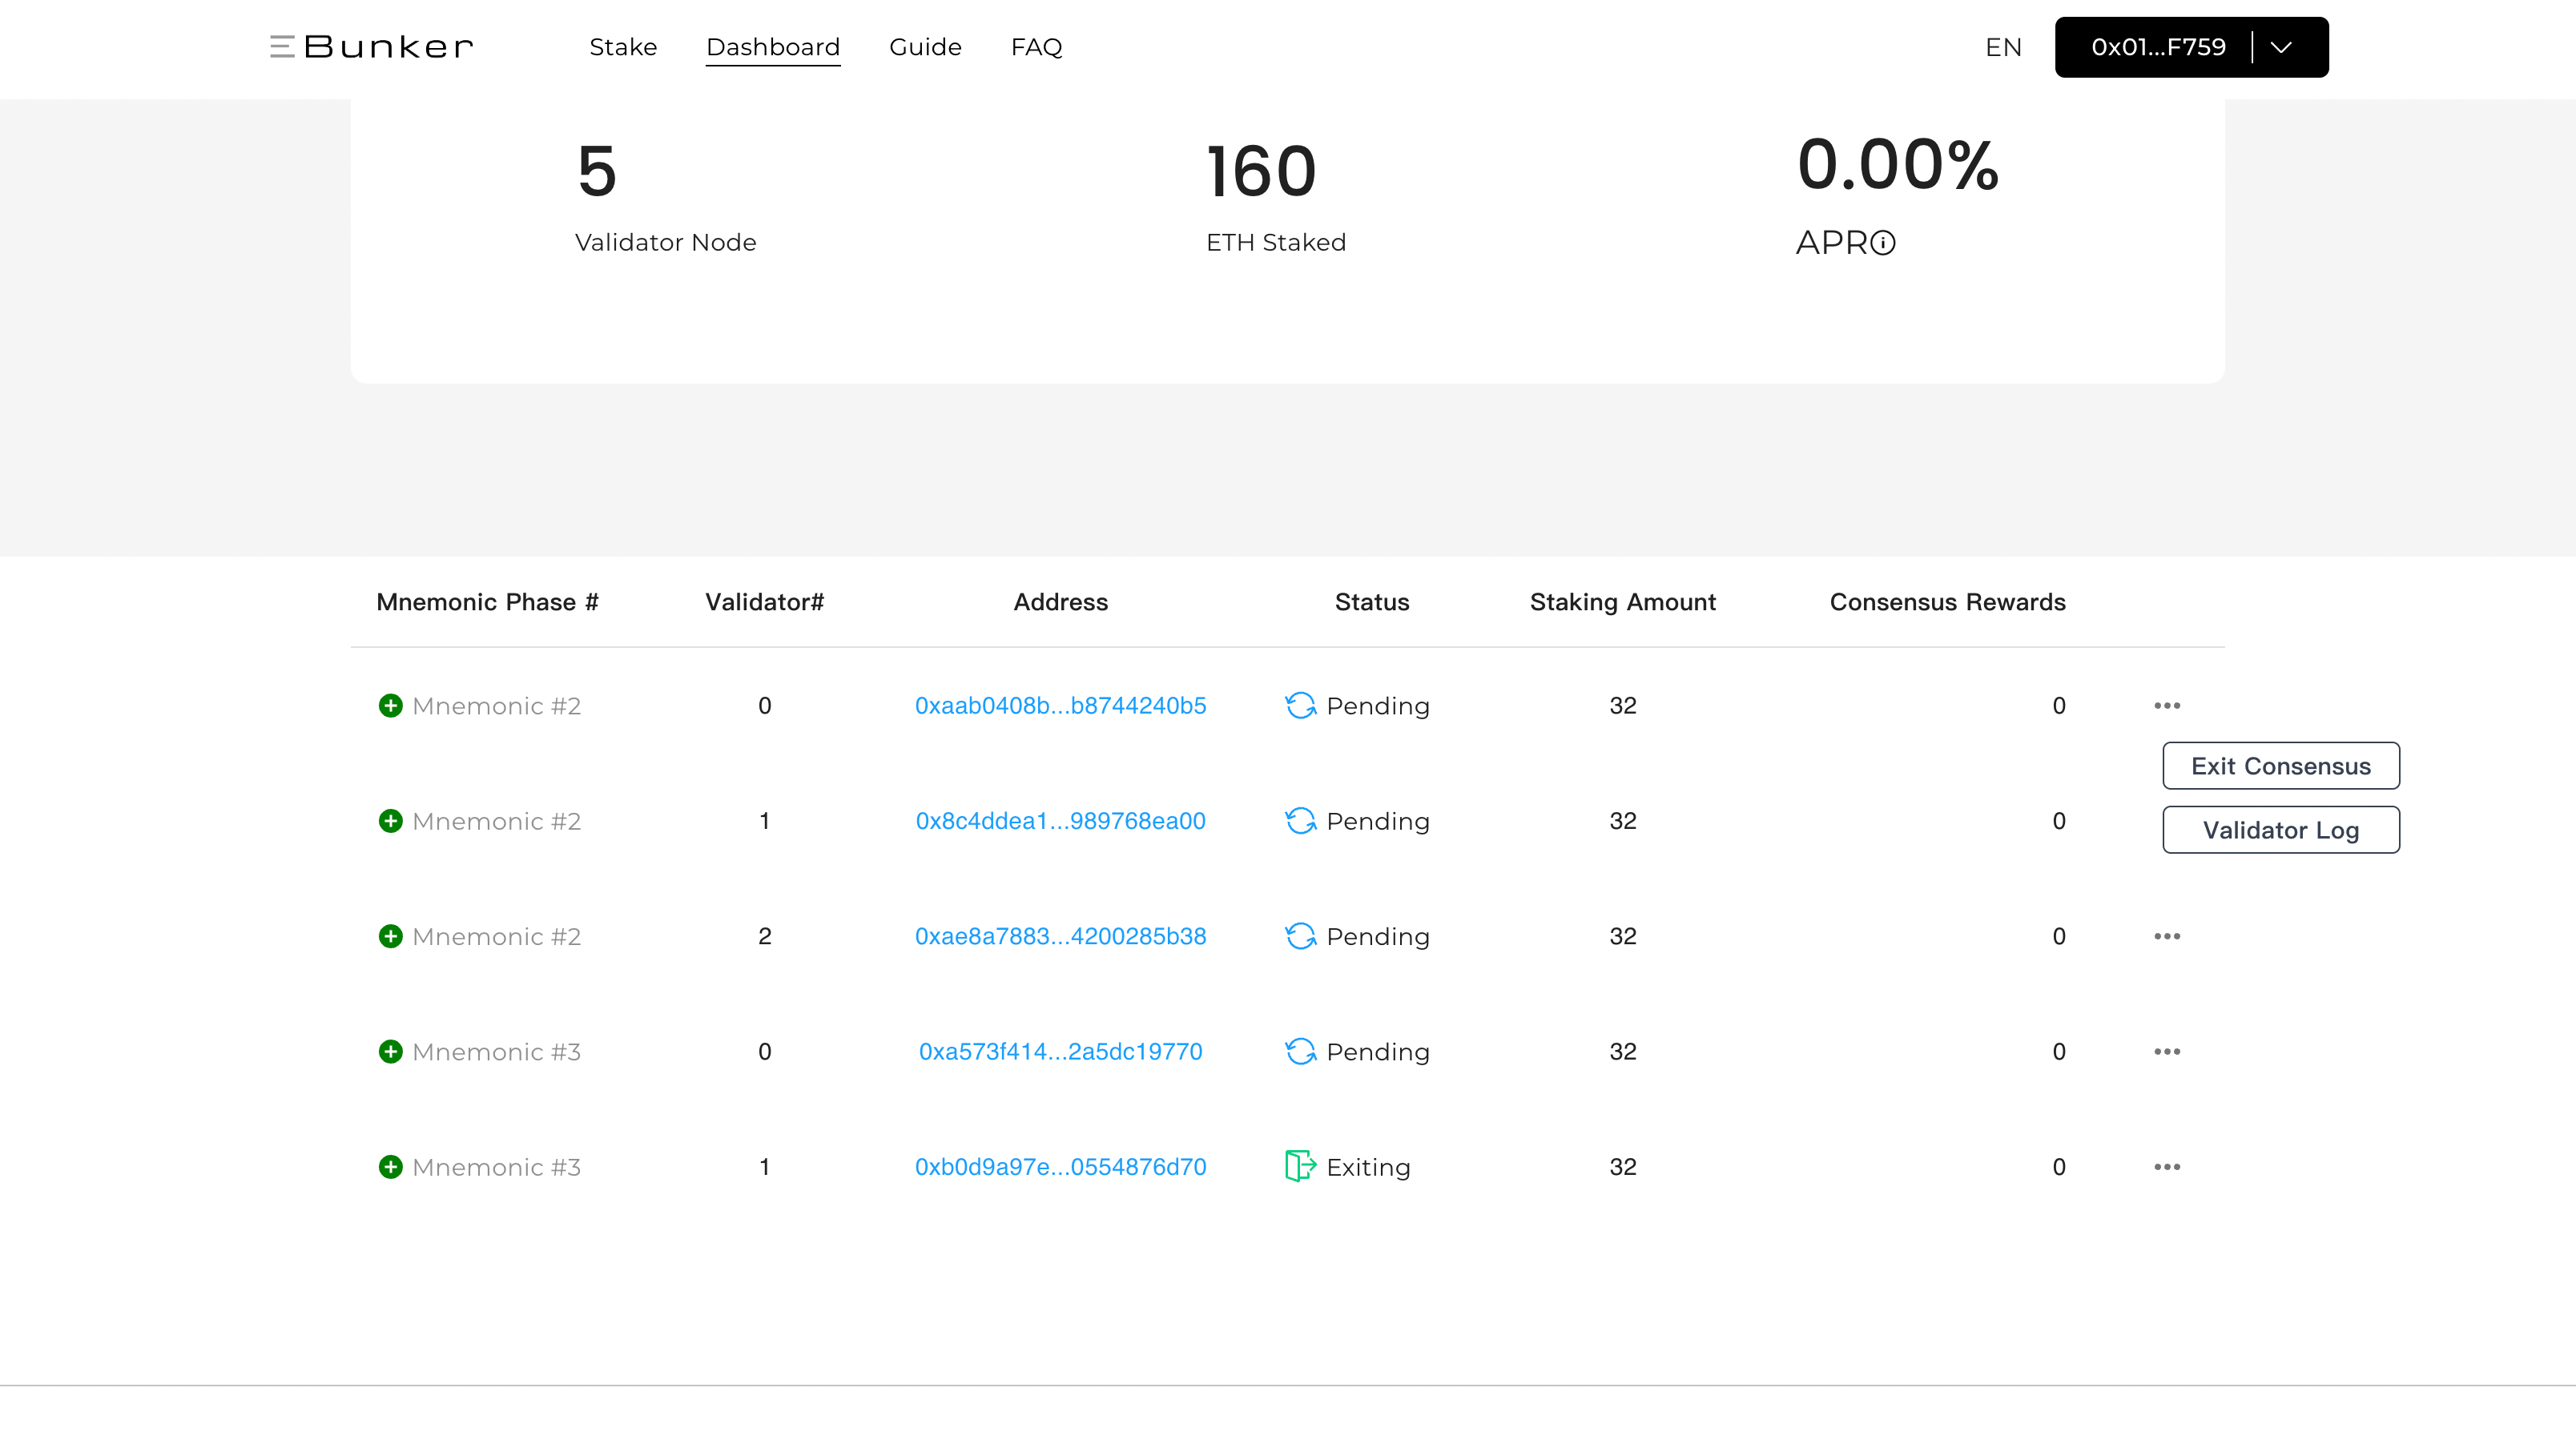
7. Validator Exit Open Ebunker Dashboard View your validator, click the ··· icon on the right side of the node, click Exit Consensus, check the validator exit information, and sign. After the validator exits, ETH will be transferred to Eigenpod Open Eigenlayer Official Website , click [Unstake], and complete the cancel restaking operation. Eigenpod has a lock-up period of 7 days. After 7 days, click [Withdraw] to withdraw ETH.