Step 4: Staking Contract
After the deployment is complete, For users who upload node files, you have the following two ways to Stake ETH:
- Batch staking with Ebunker。
- Use ETH official launchpad to stake ETH
Ebunker Batch Staking
Once the validator deployment is complete, users will have the following two ways to stake ETH:
- Use Ebunker for batch staking, please click https://www.ebunker.io/stake to enter Ebunker for staking.
- Use the official ETH launchpad to stake ETH, please read the next section.
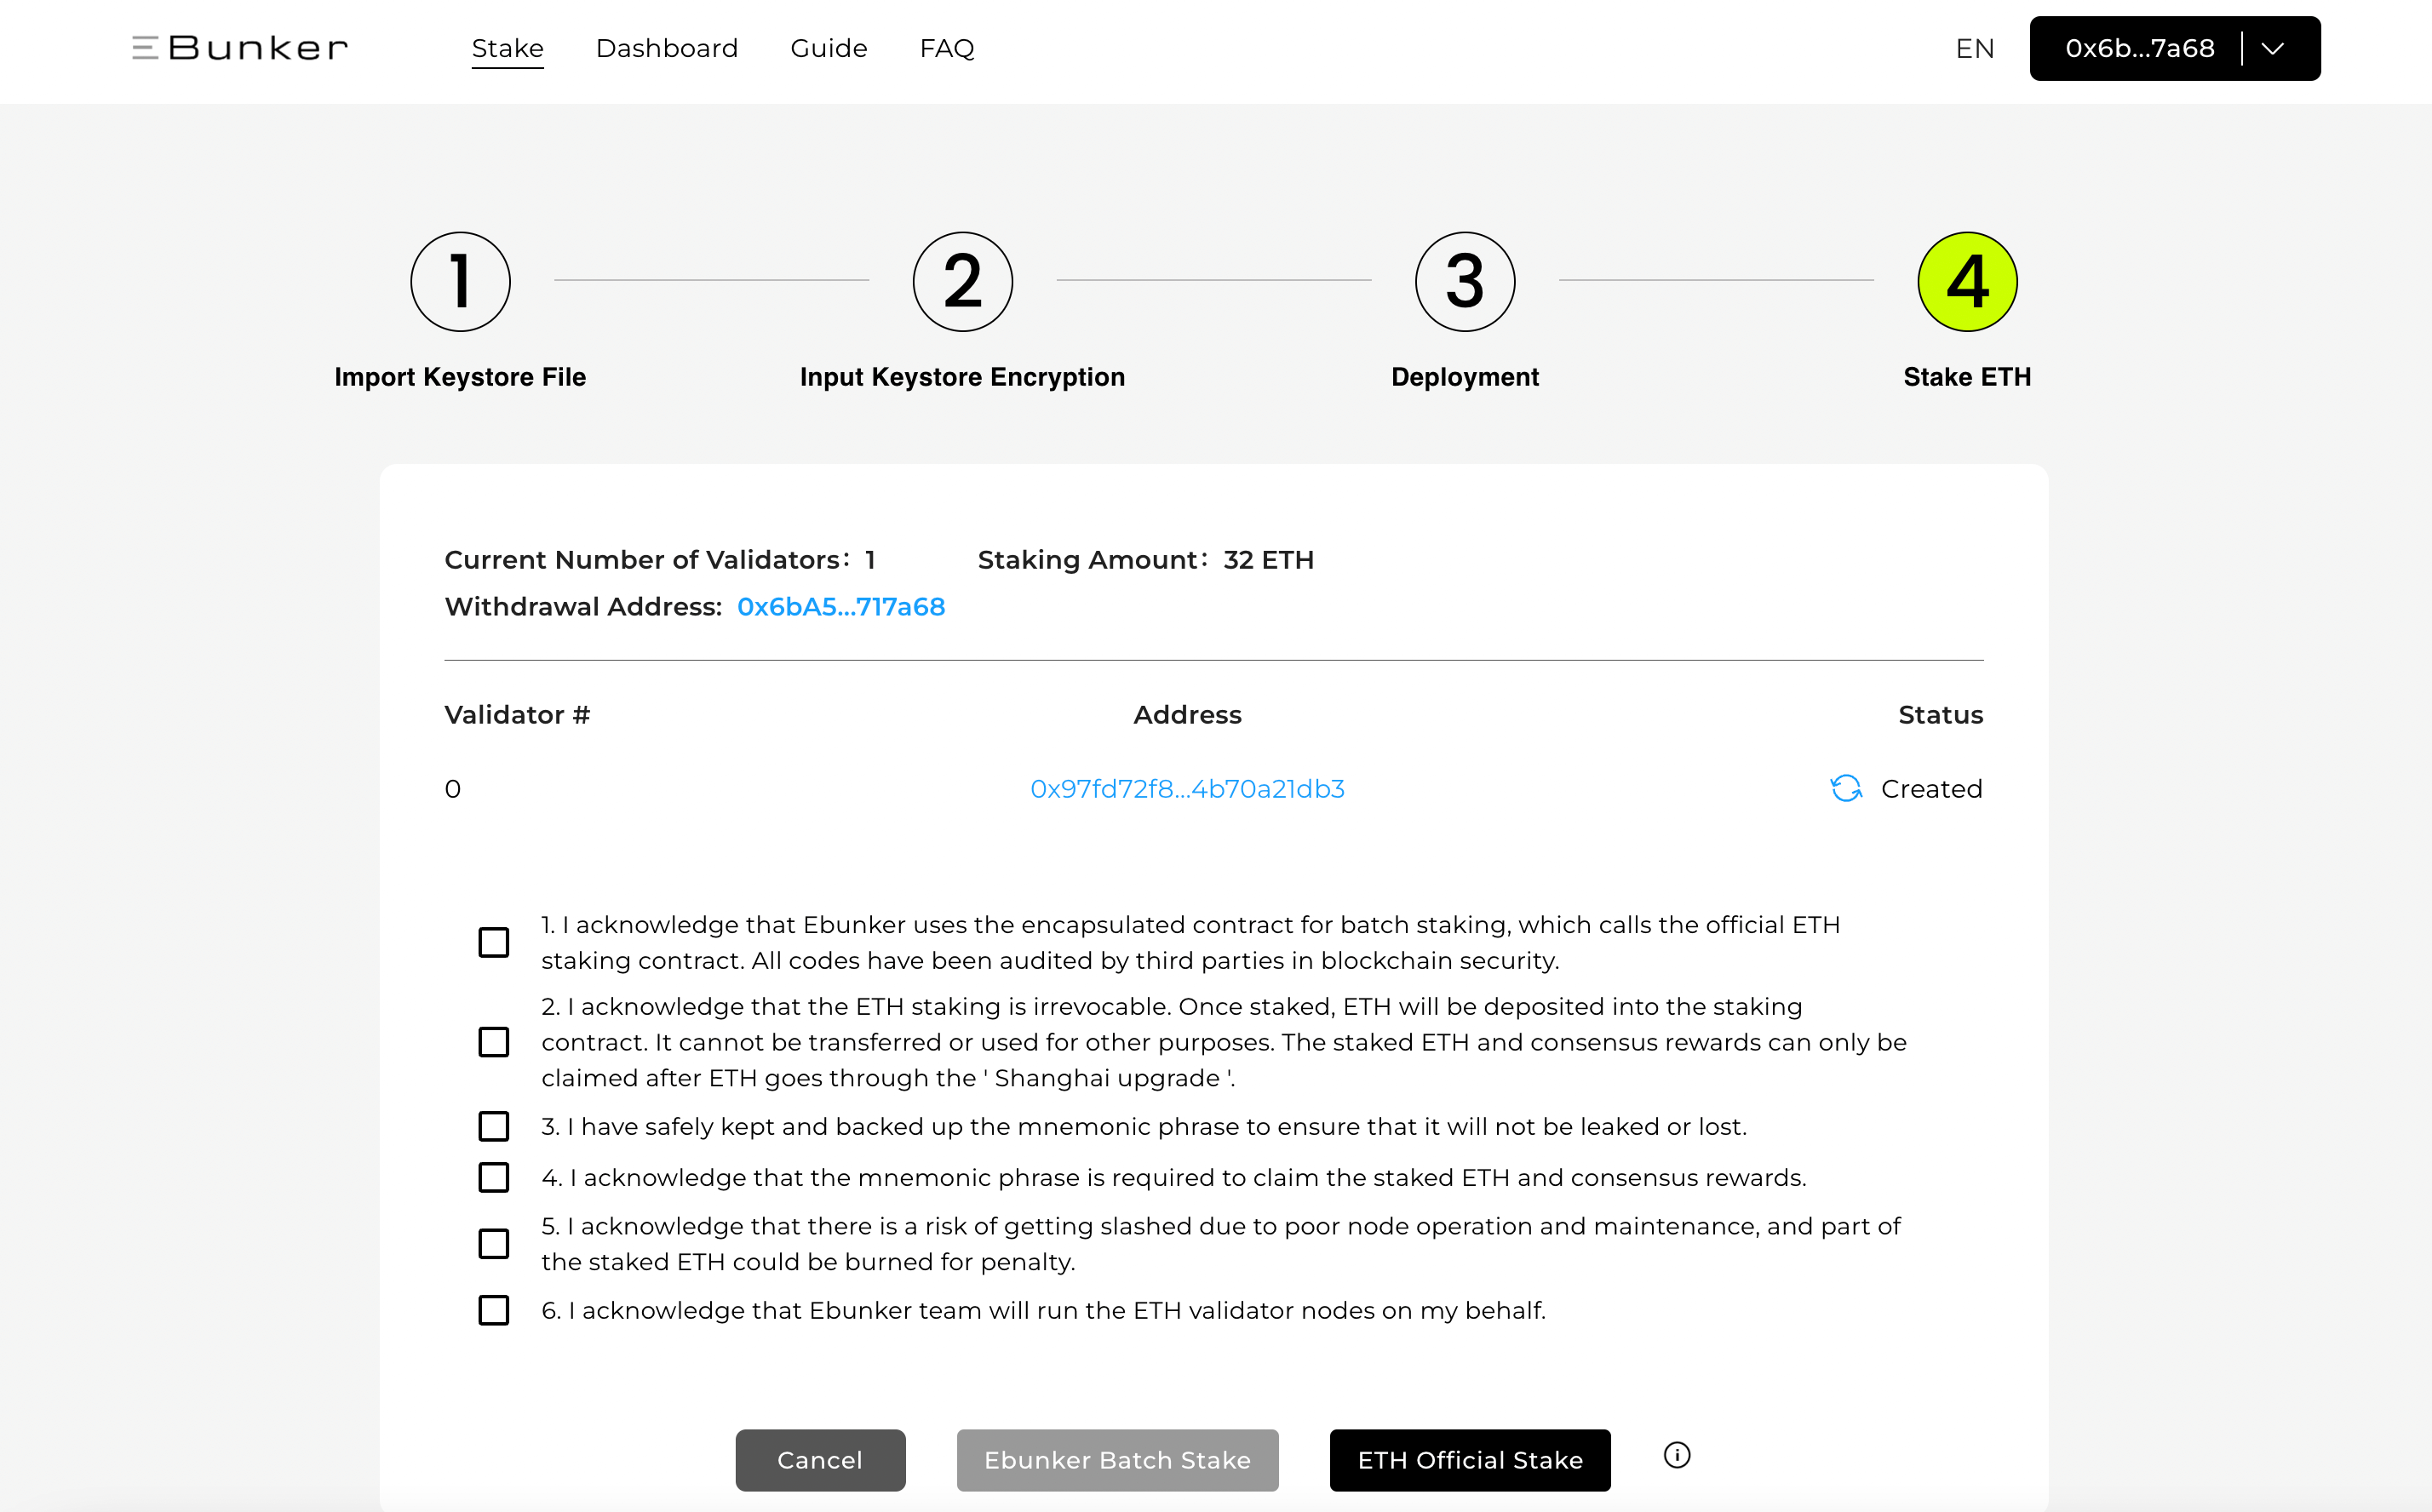
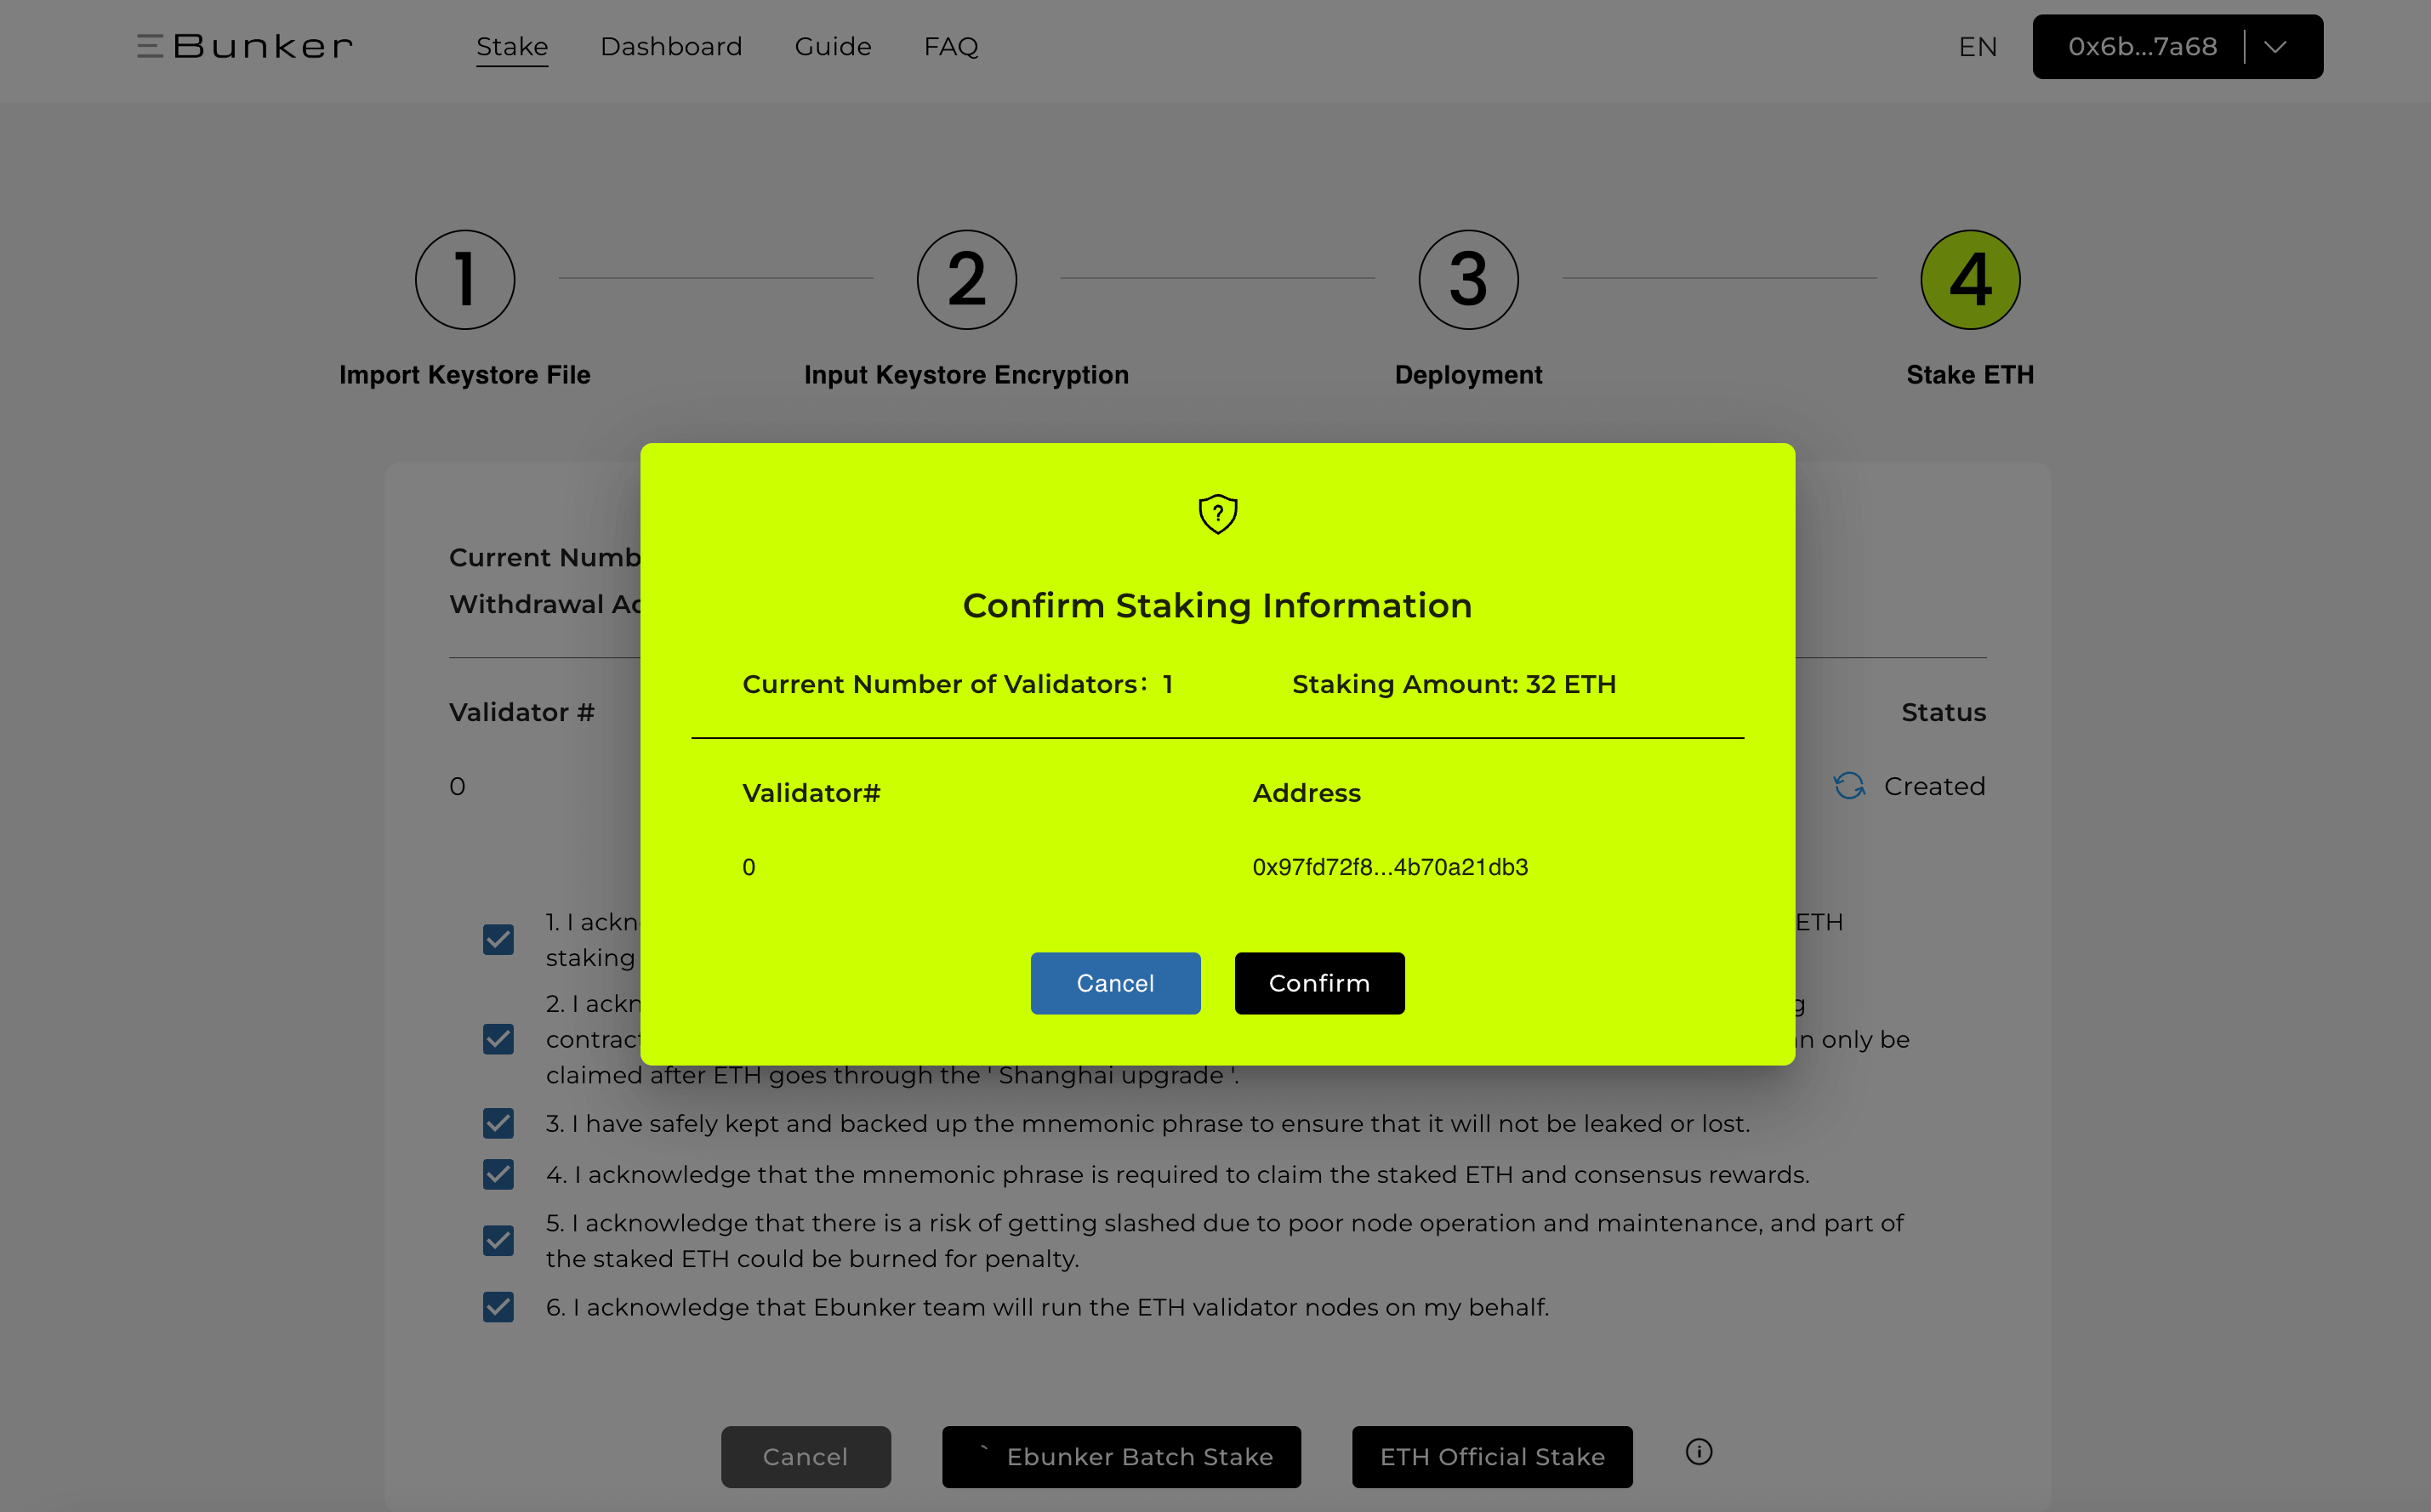
Click Ebunker Batch Stake to confirm the staking information to complete the ETH staking.
ETH Official Staking
- Launchpad:Ethereum's official staking tool.
- Official Website:Launchpad
Steps
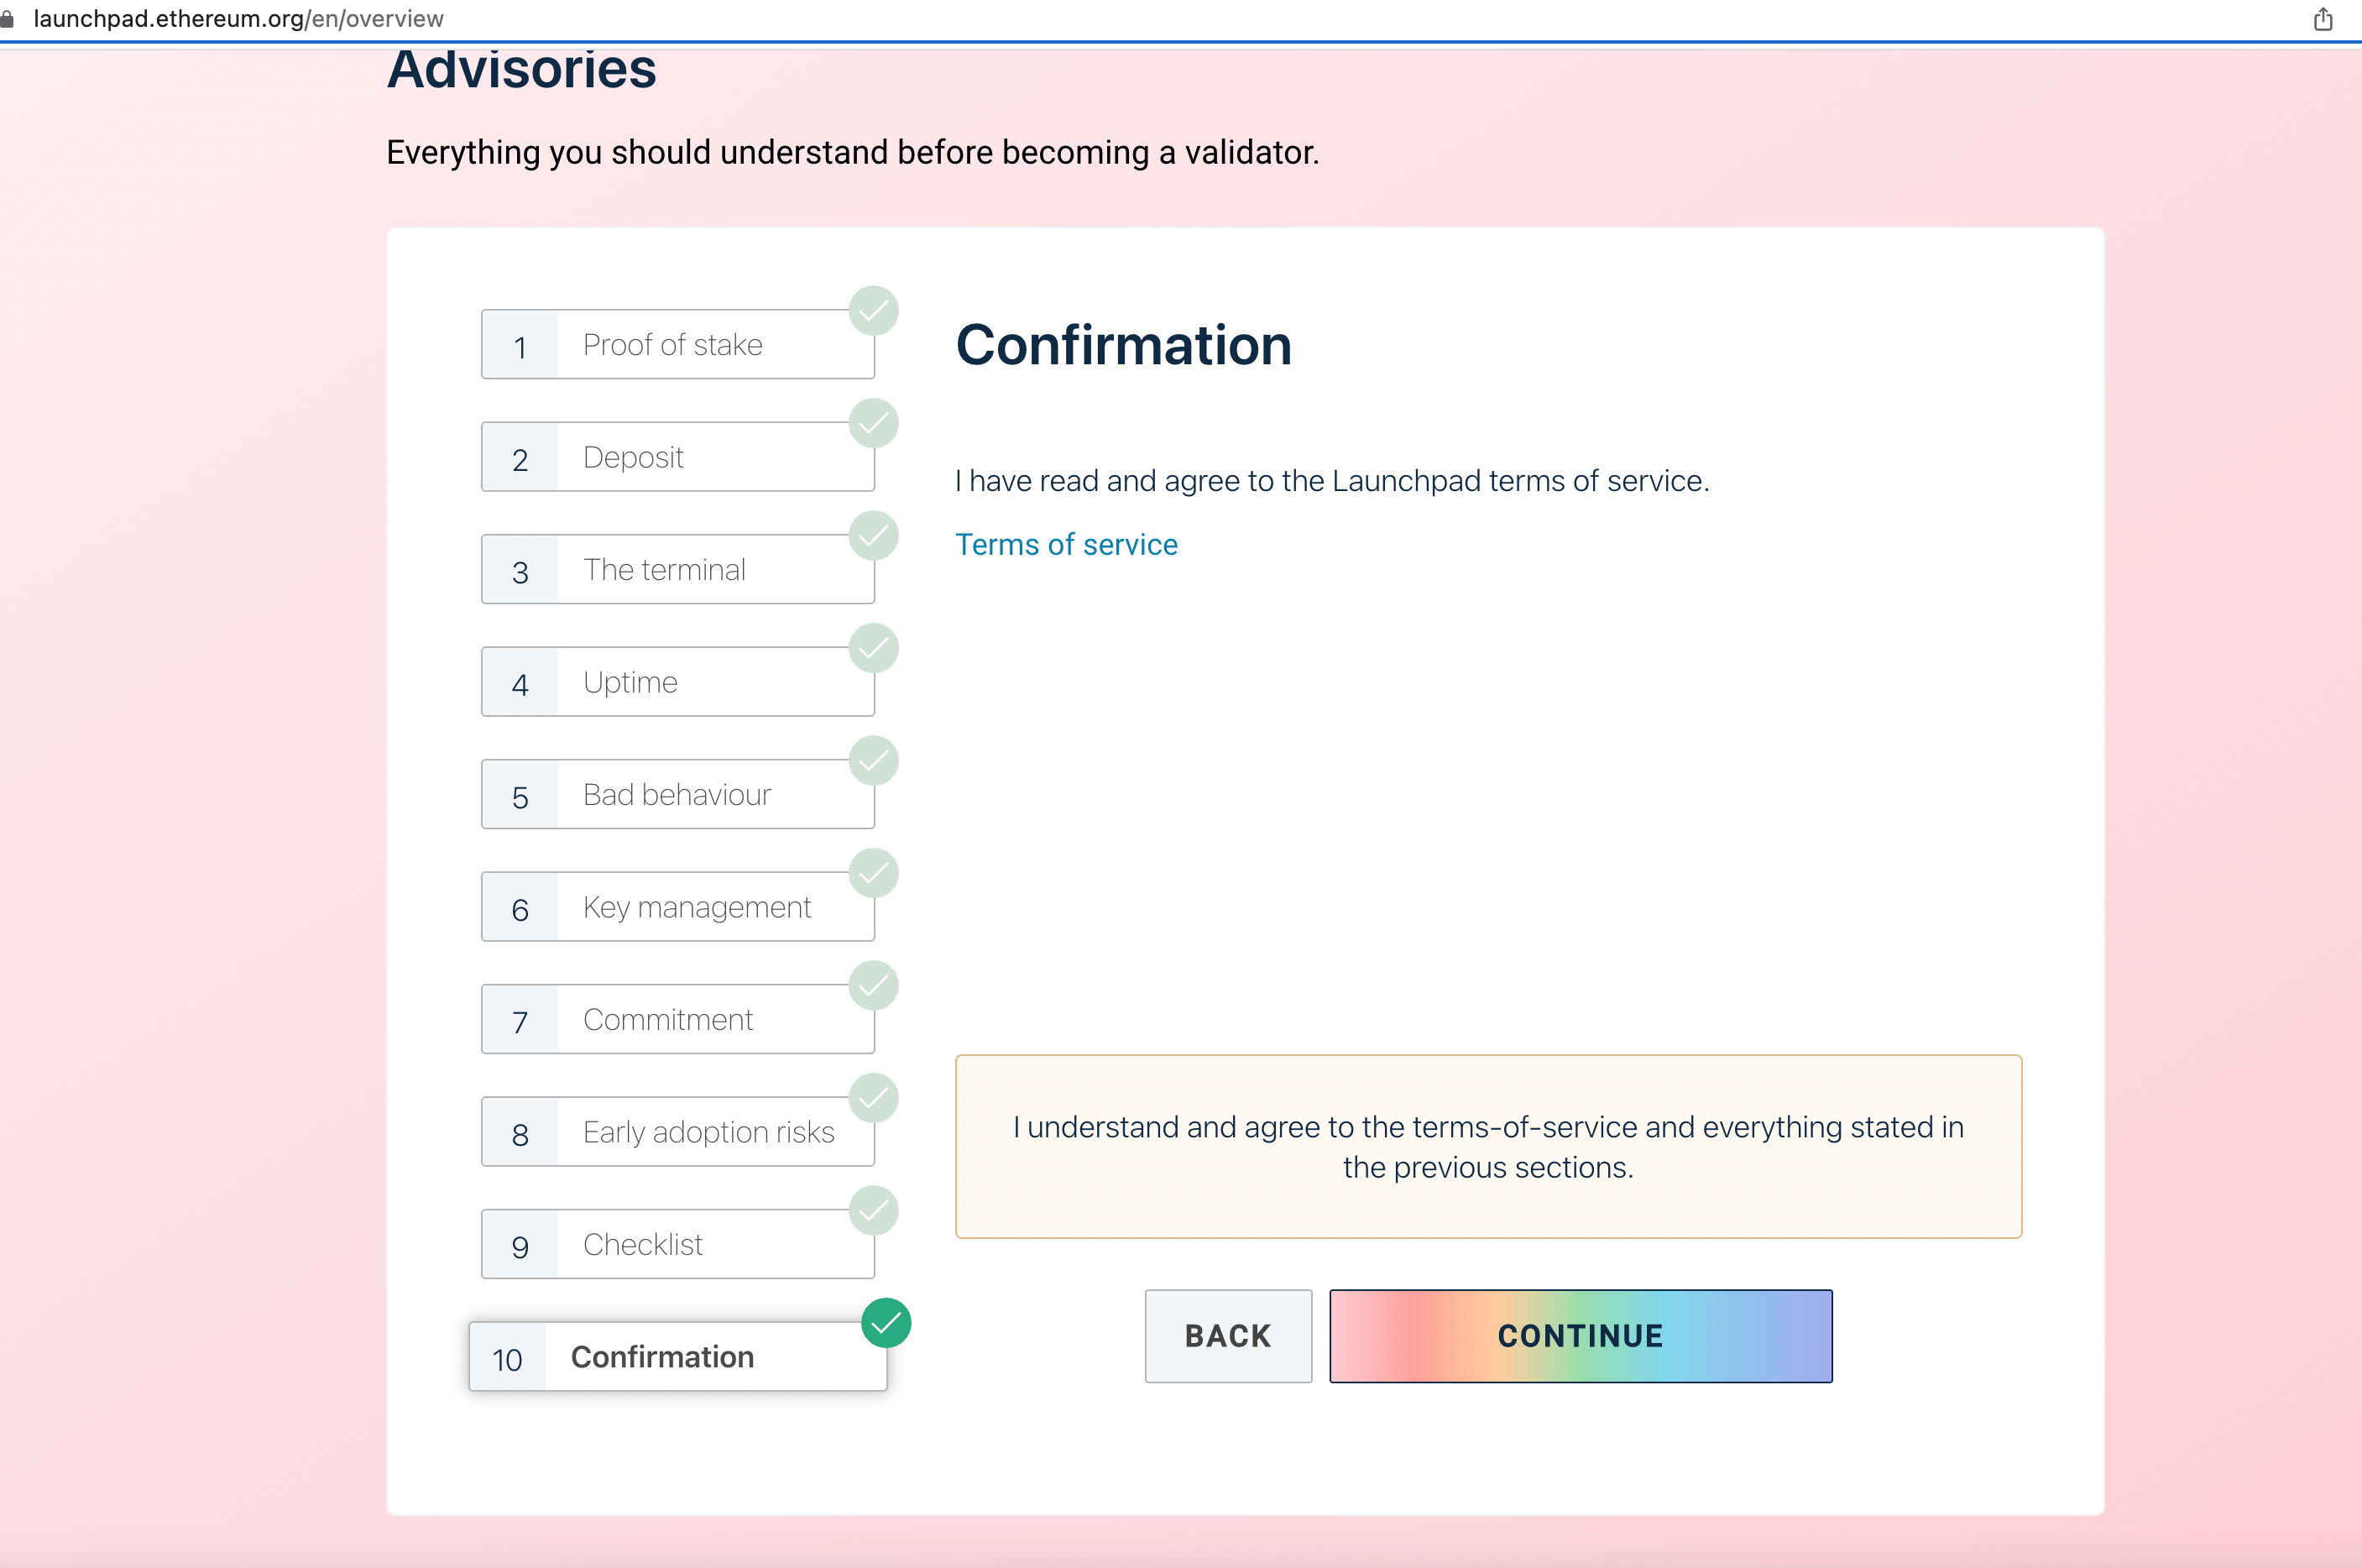
Read the Announcements
- Click
ETH Official Stake - Click the official website to enter Launchpad, click
BECOME A VALIDATOR, please read the announcements carefully, and click CONTINUE once finished reading theProof of stakepage and click I ACCEPT on theDepositpage.
Select Execution Client & Select Consensus Client
- This step is to set up the validator, and the Ebunker devs will complete the validator creation, operation and maintenance.
- The validator will be bound with the keystore you sent to create your validator. Note: This file only has the authorization to generate blocks signature and cannot be used to operate your staked assets.
- Choose to execute the client, keep the default setting and do not operate, click
NEXT - Select the consensus client, keep the default setting and click
NEXT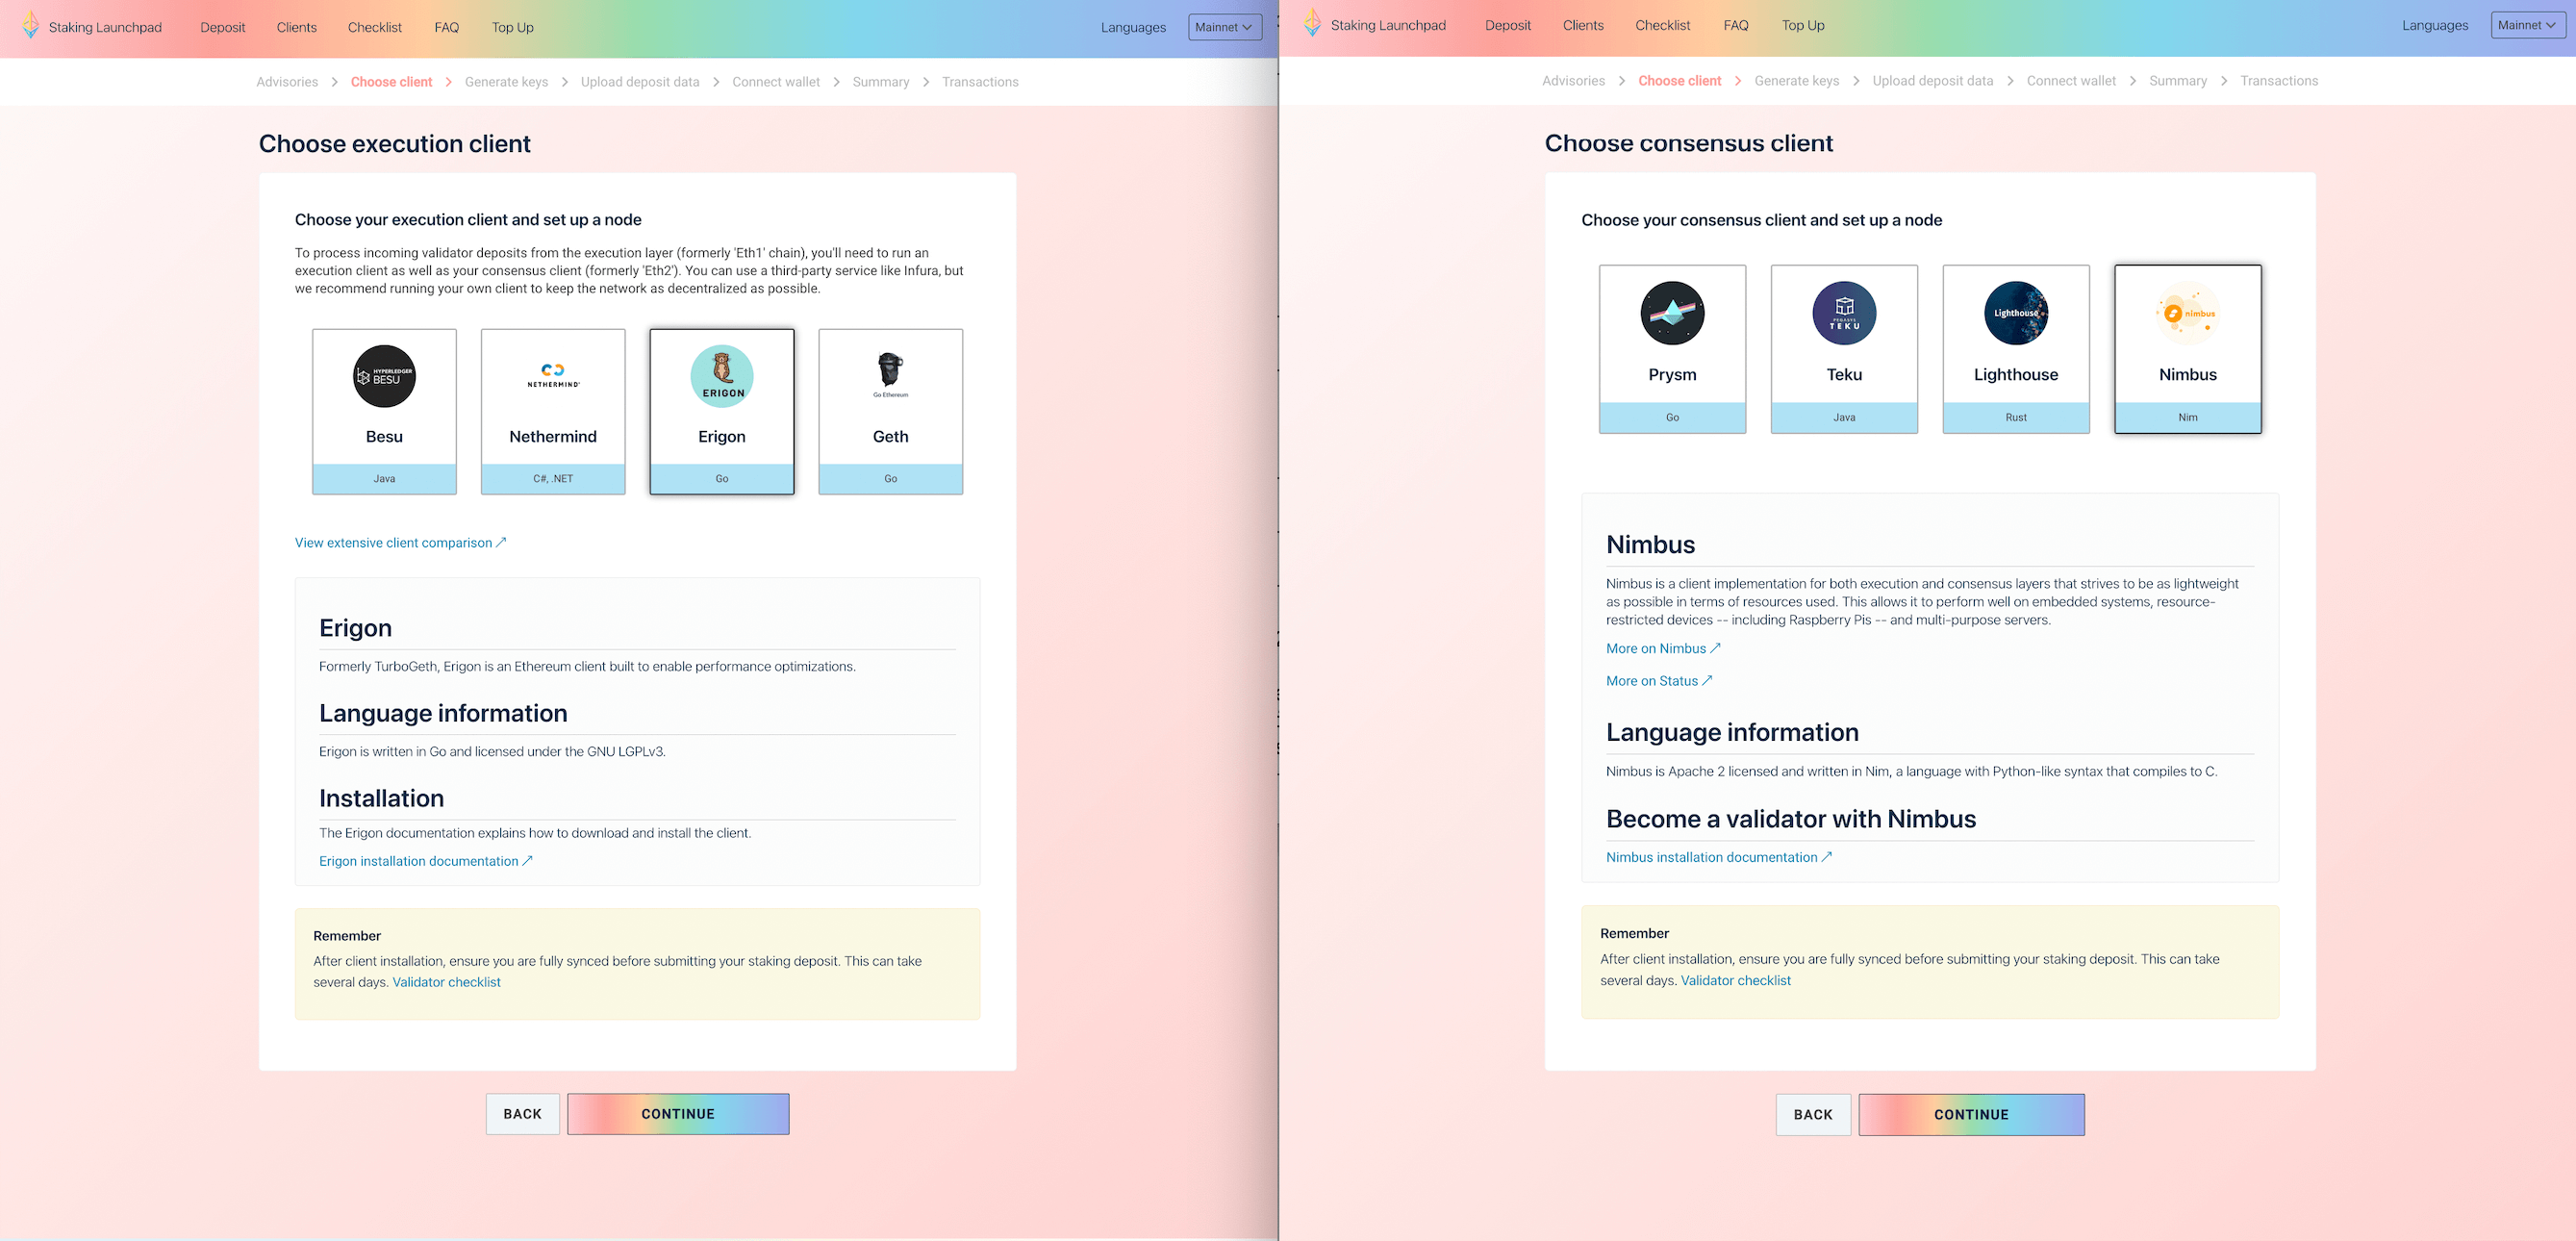
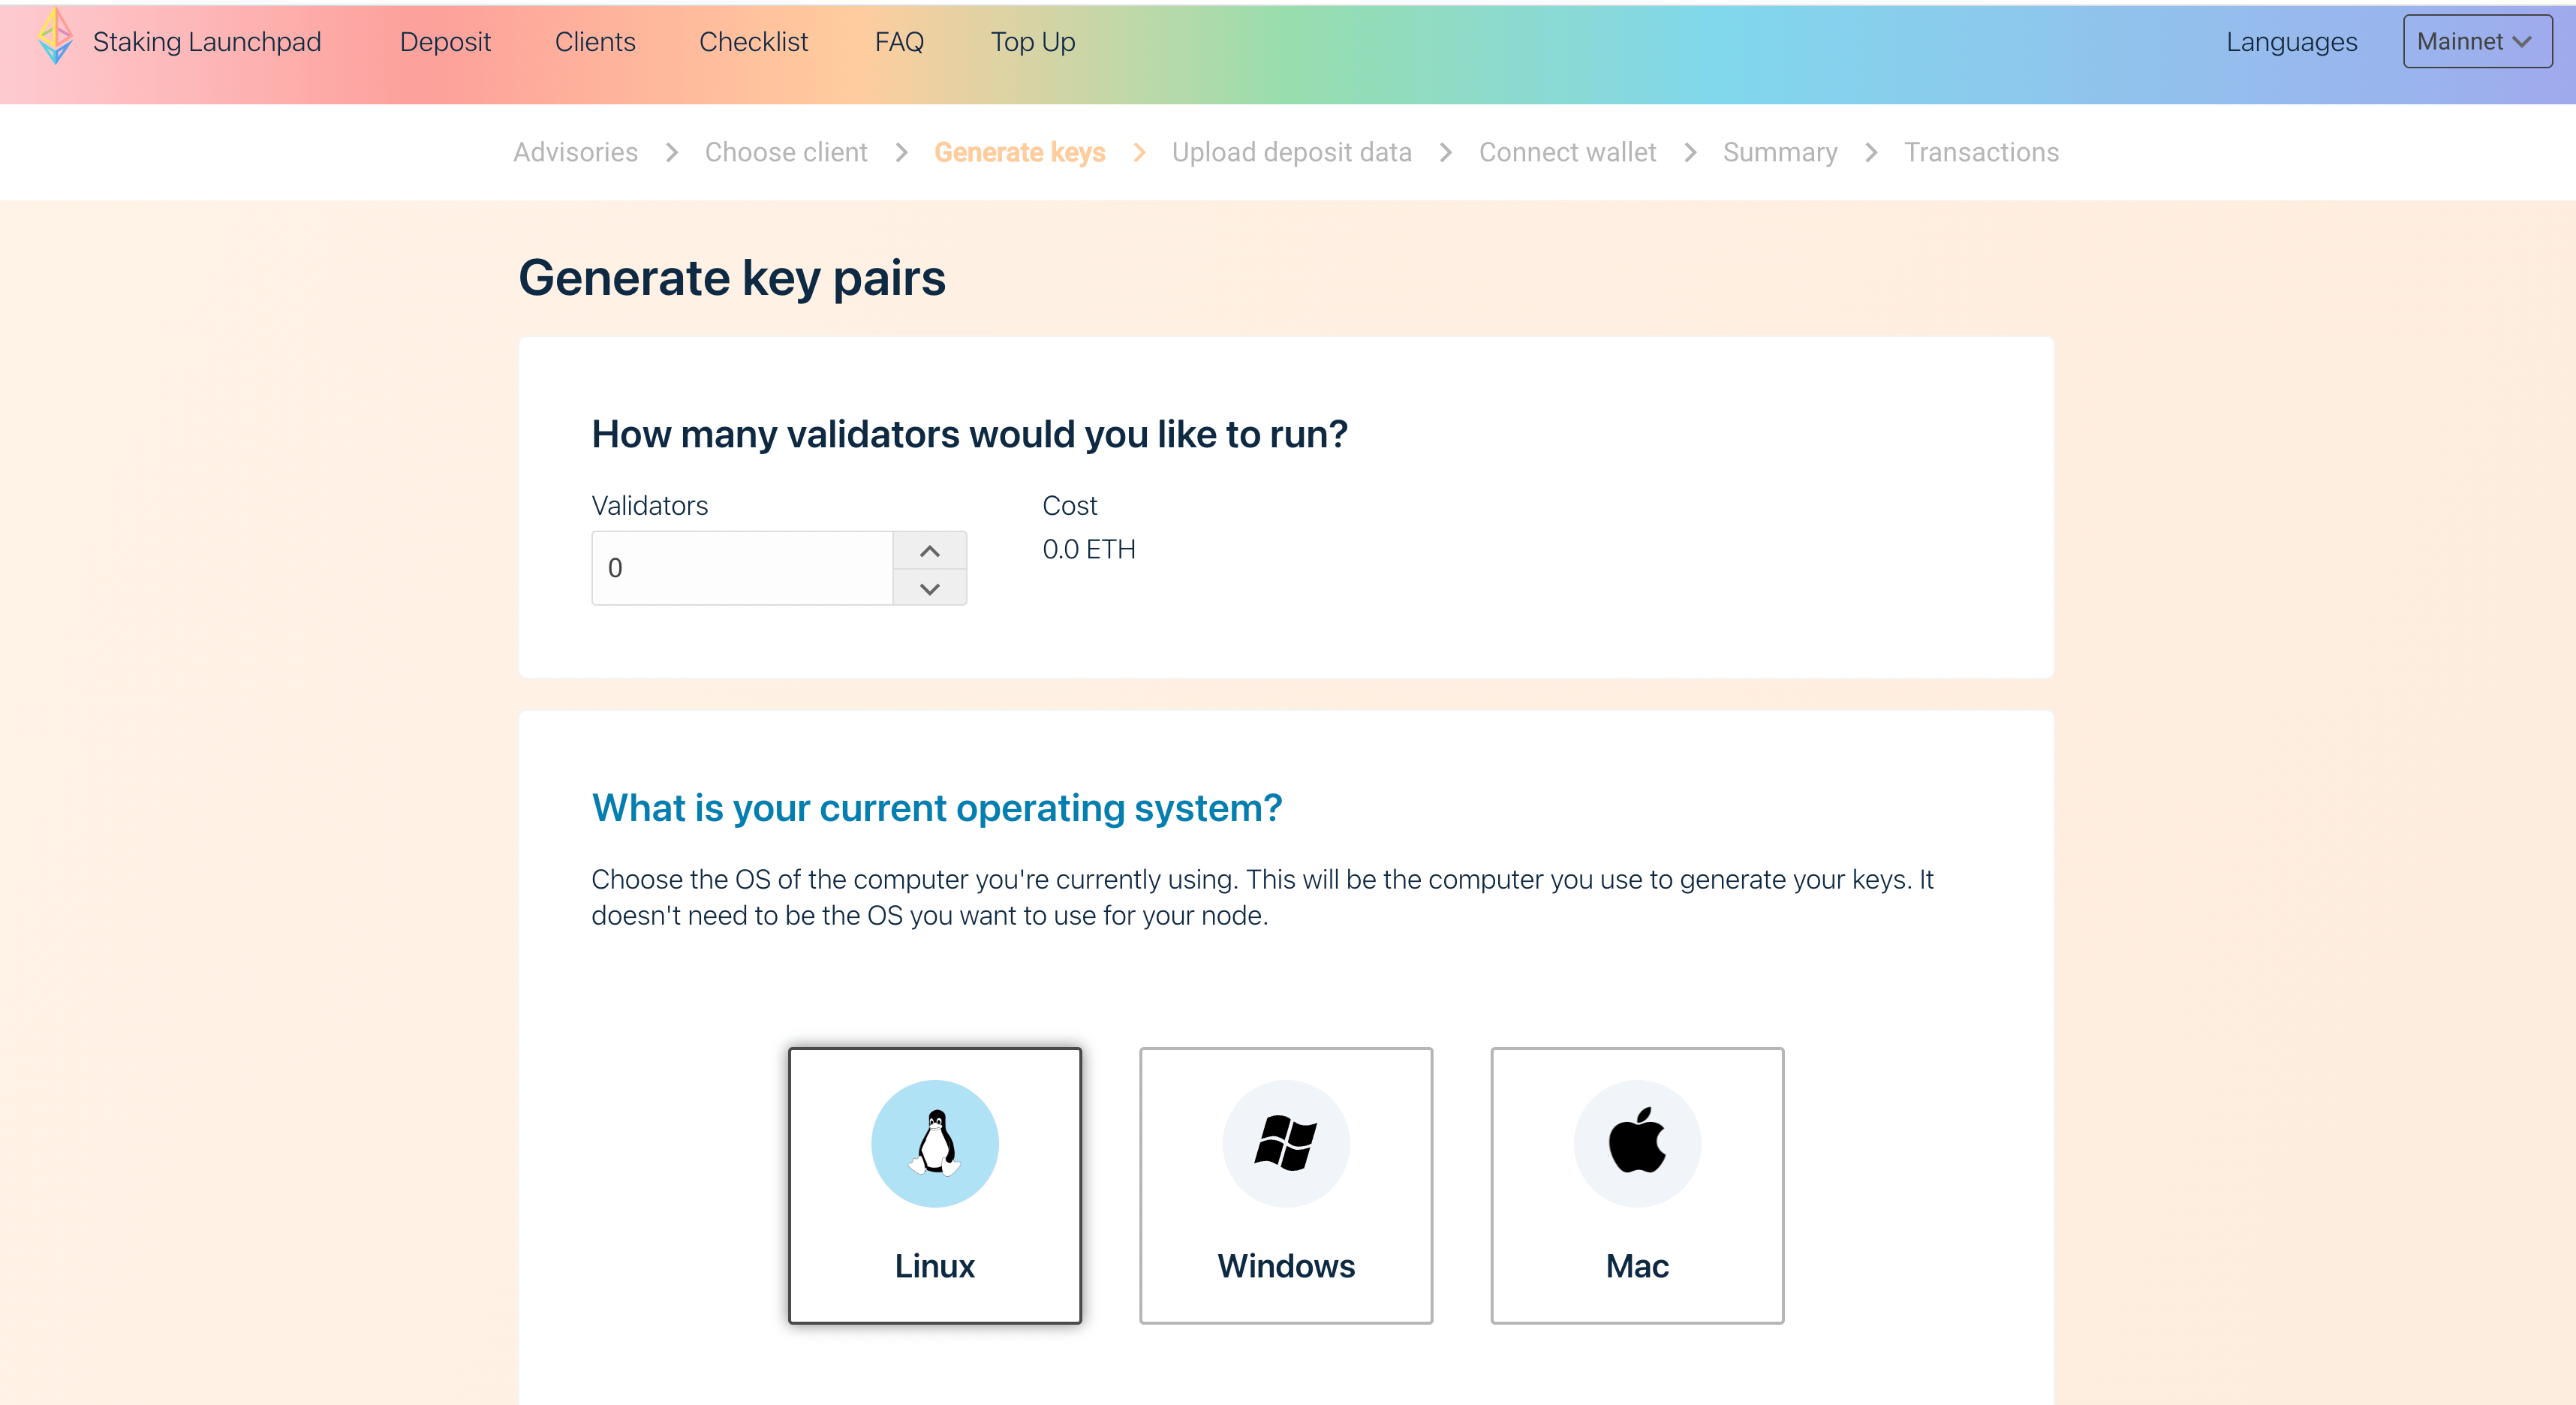
Generate a Key Pair
- In the first step, you have completed the key generation, you can click
I am keeping my key(s) safe and have written down my mnemonic phrase,and clickNEXT
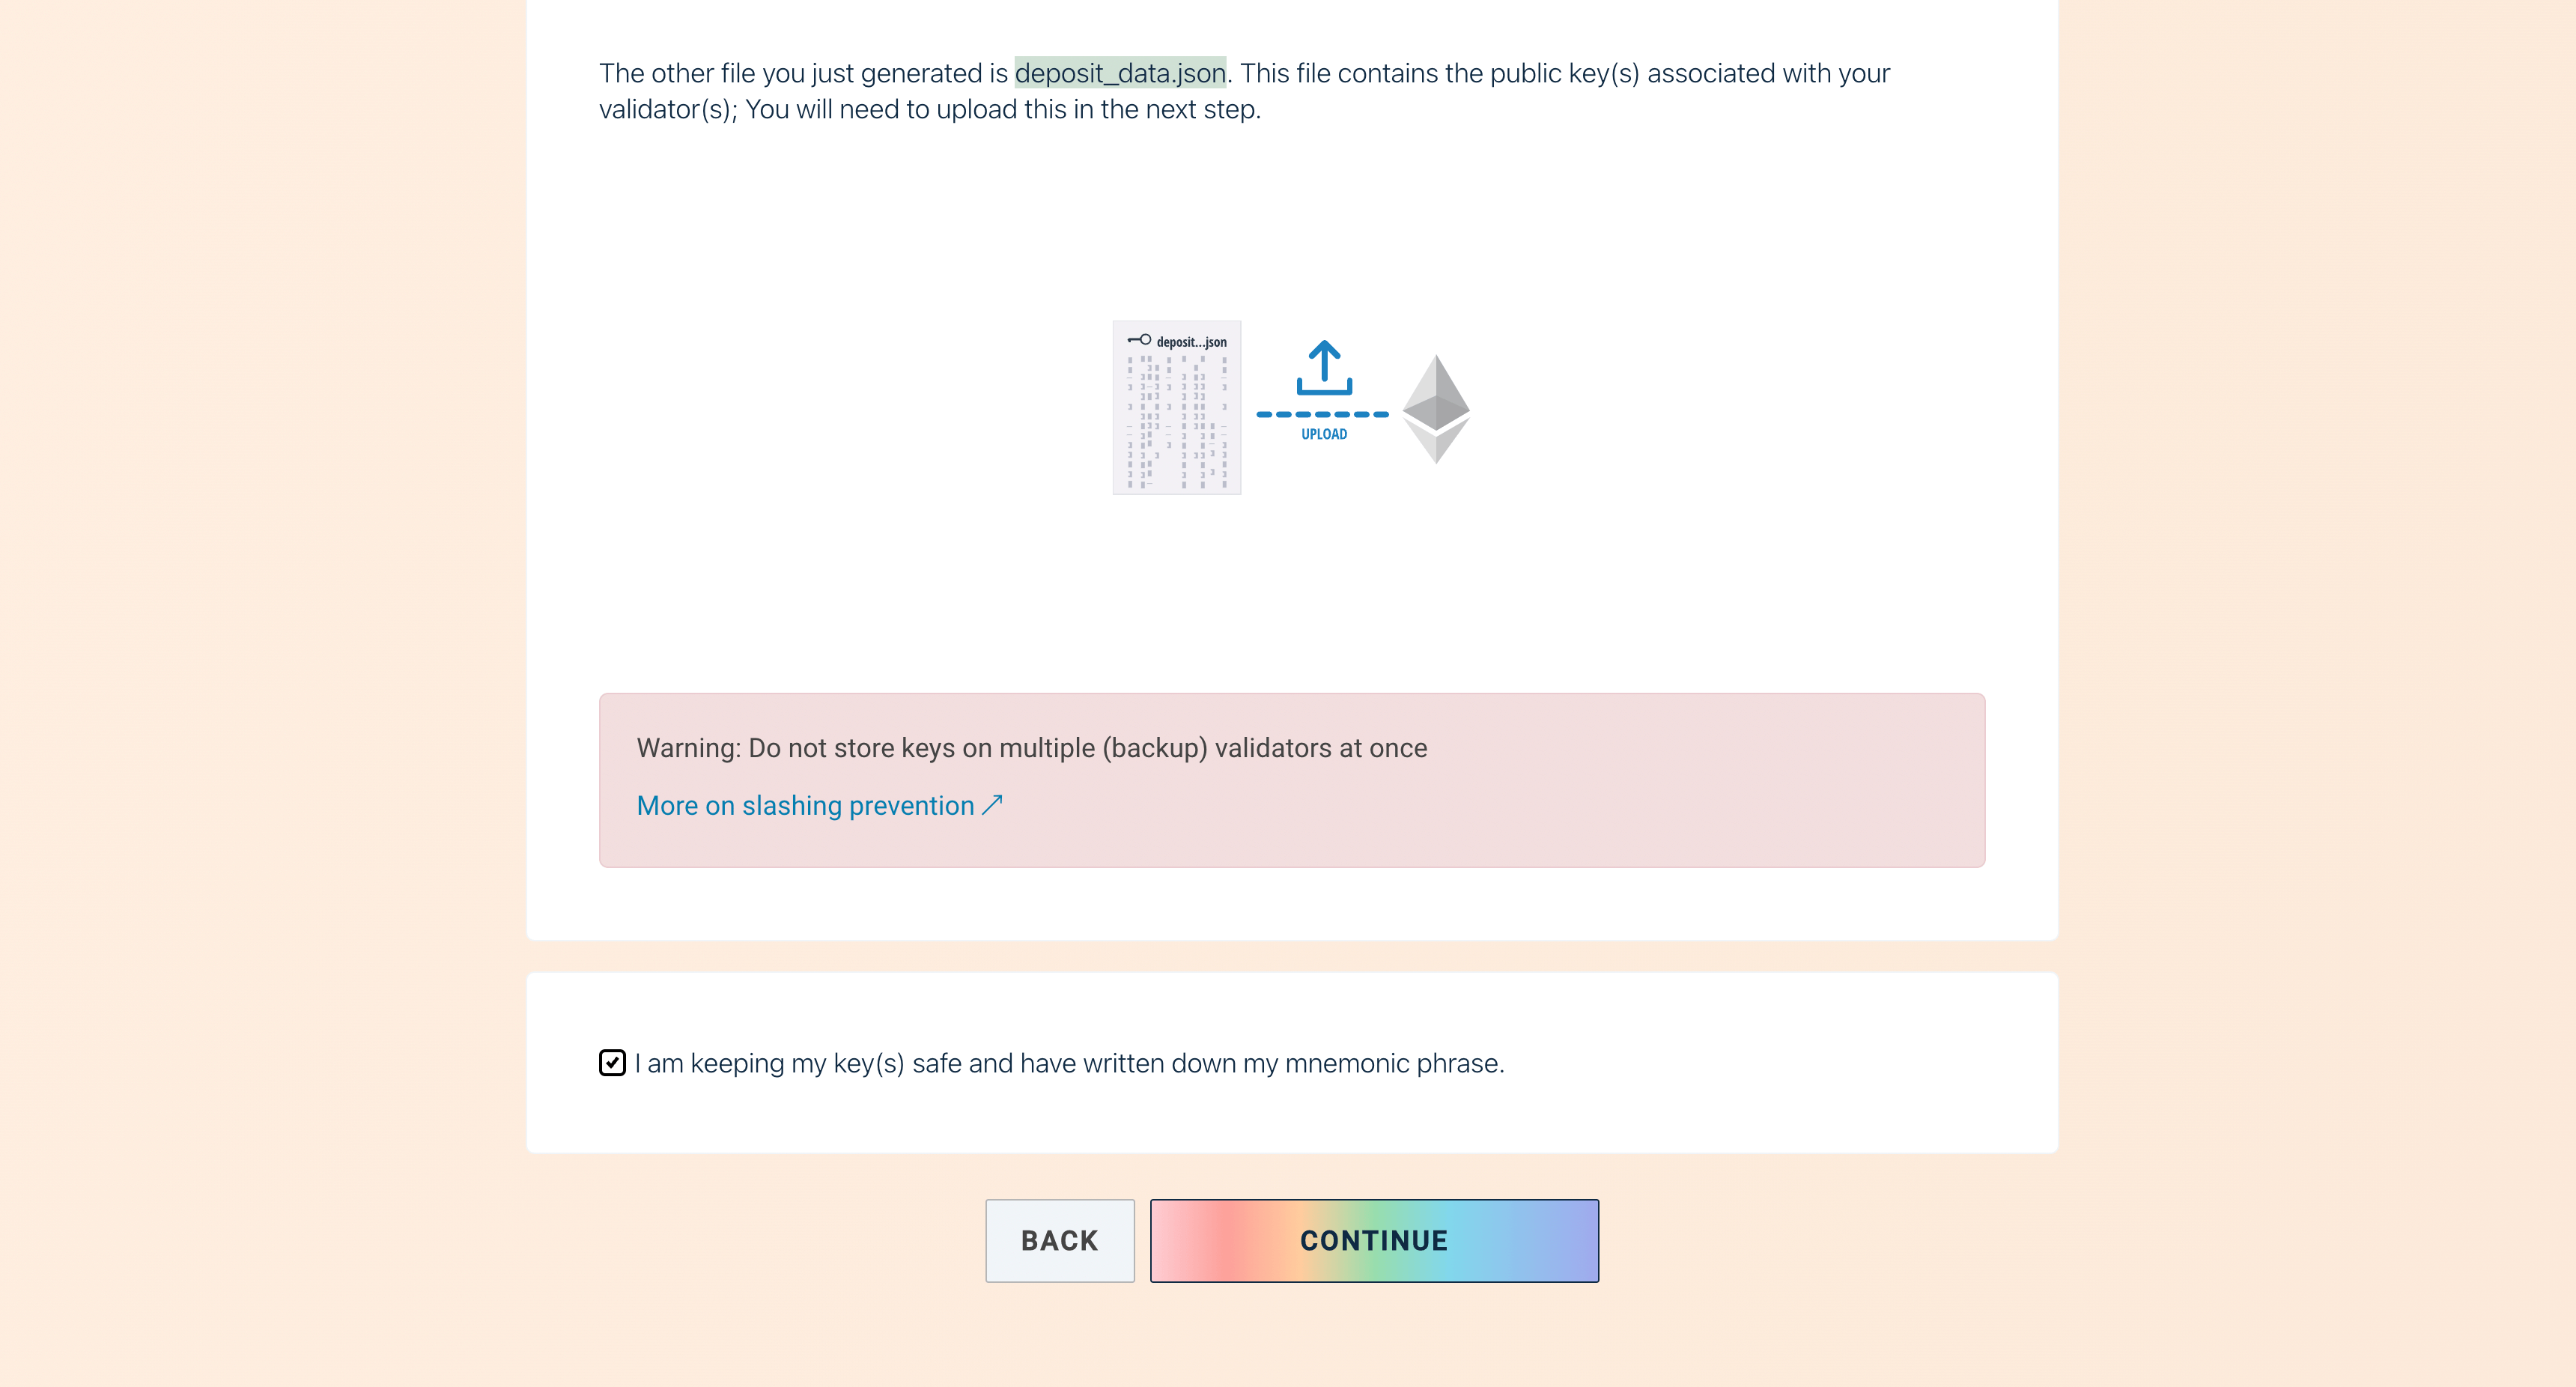
Upload deposit data file
- This file represents public information about your validator and is used to deposit ETH. Select the "deposit_data-xxxxxx.json" file under the Ebunker folder where you store the key file and drag it to the box. Once the verification process is complete, click
NEXT
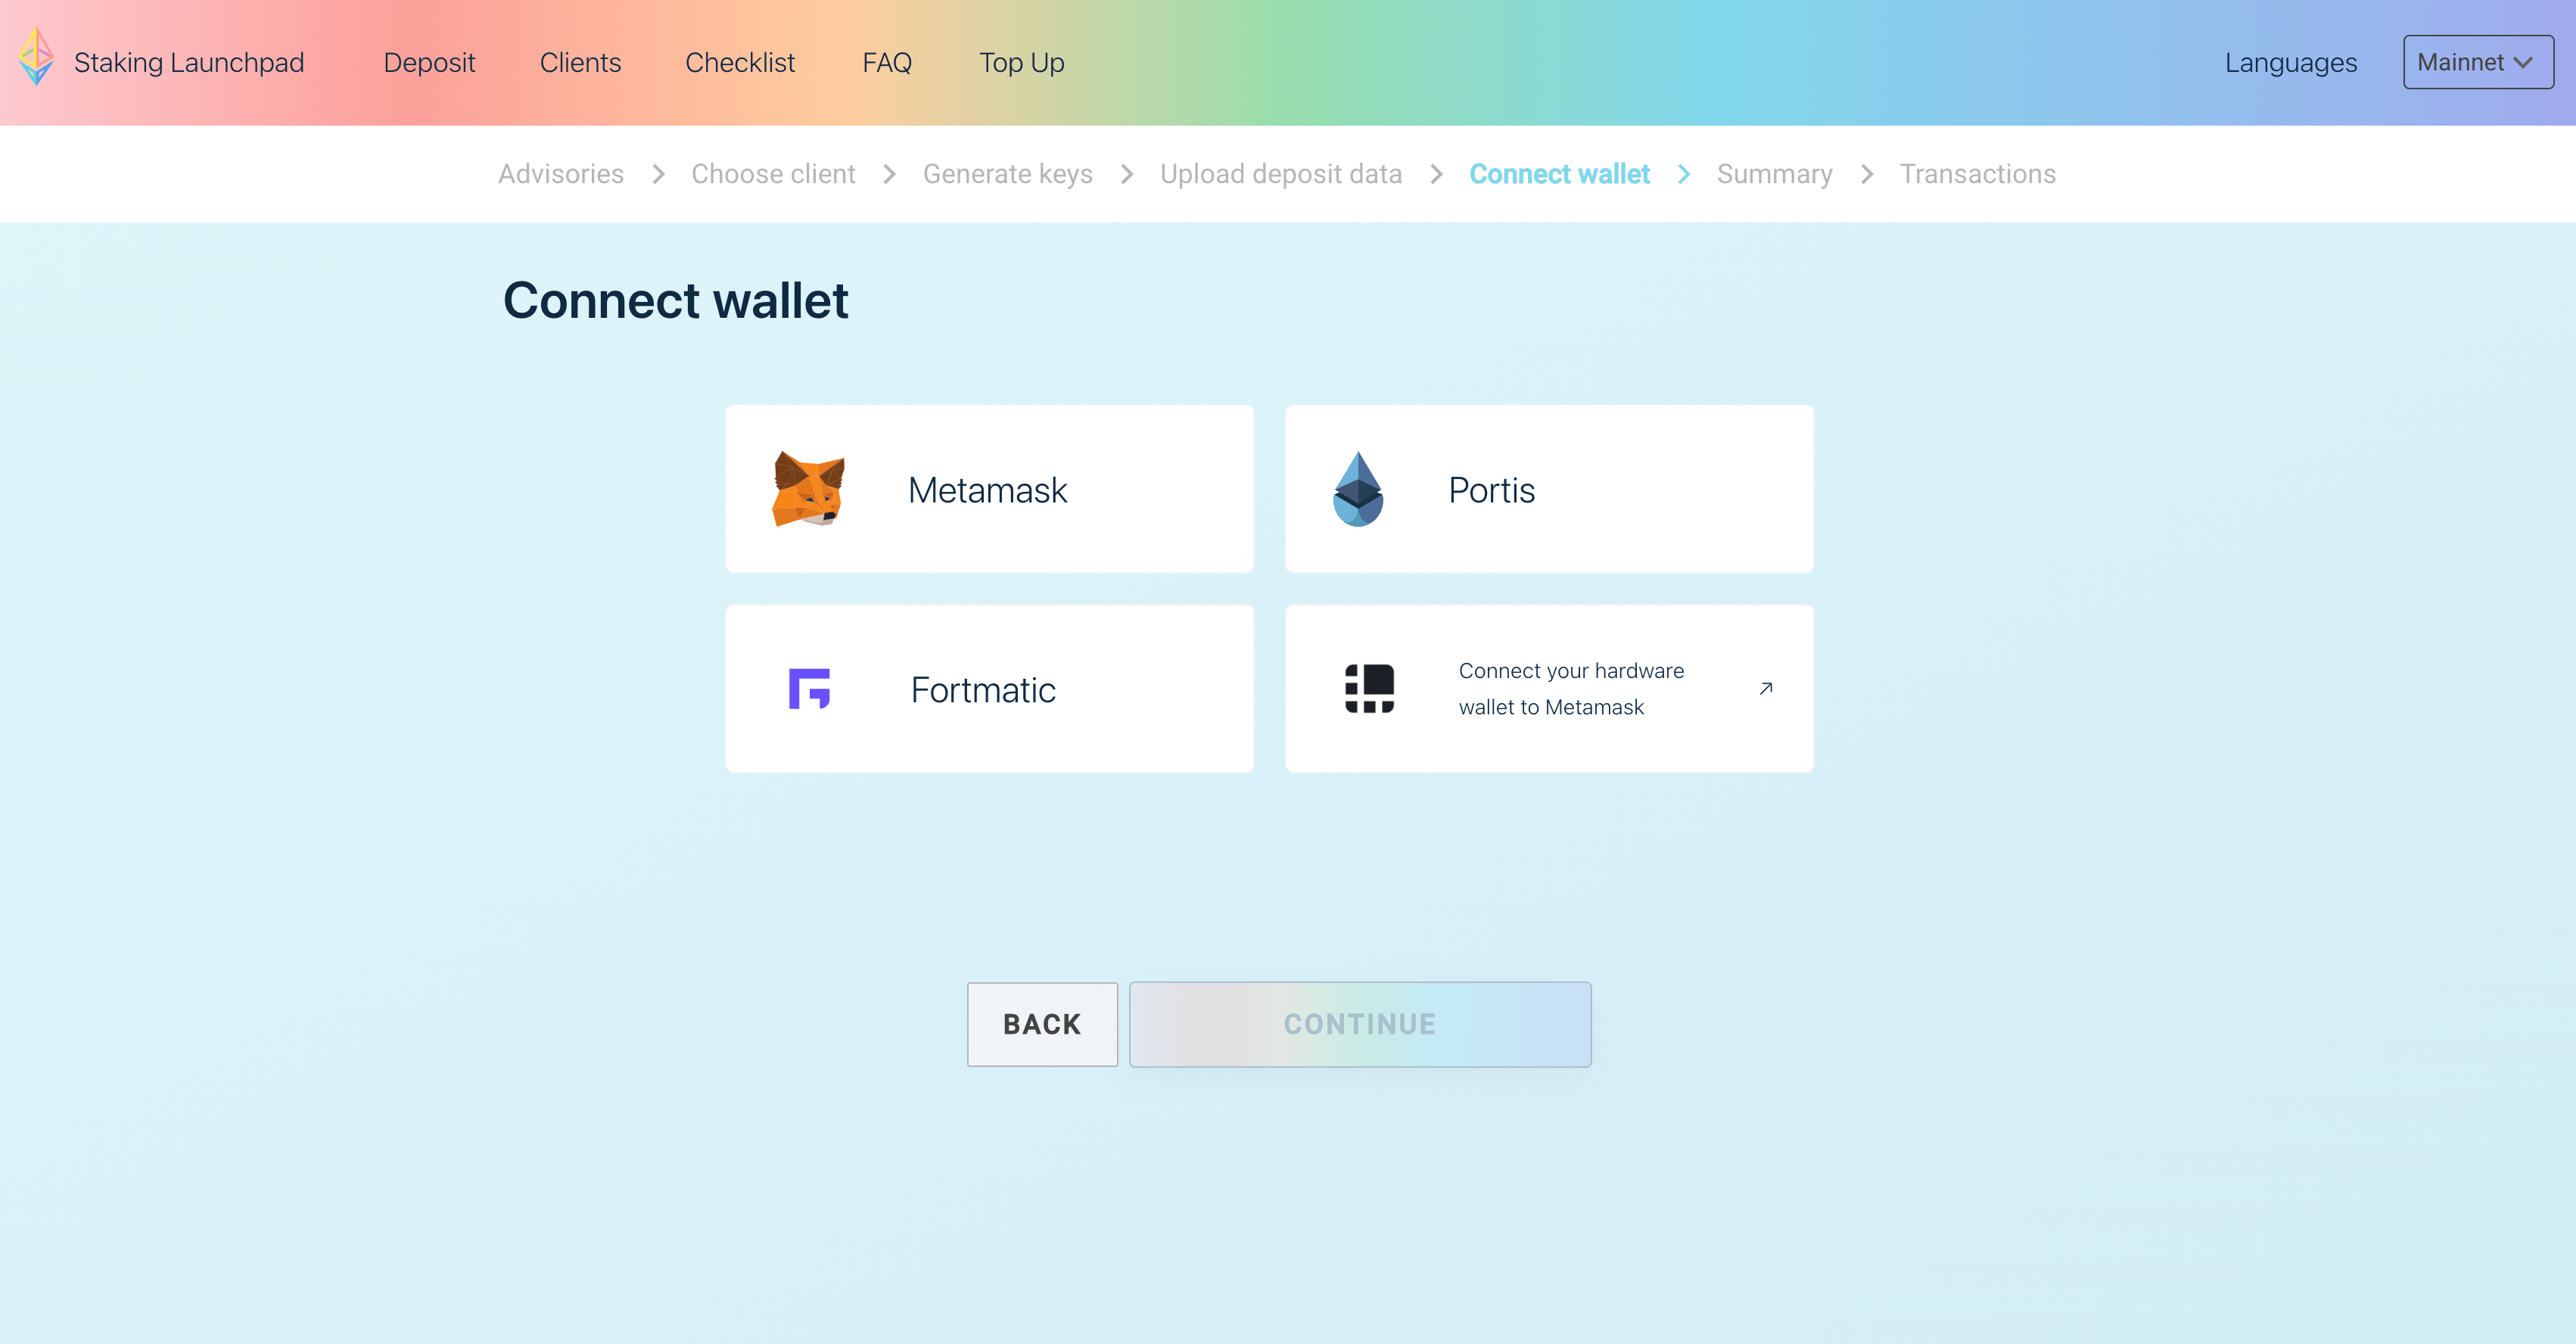
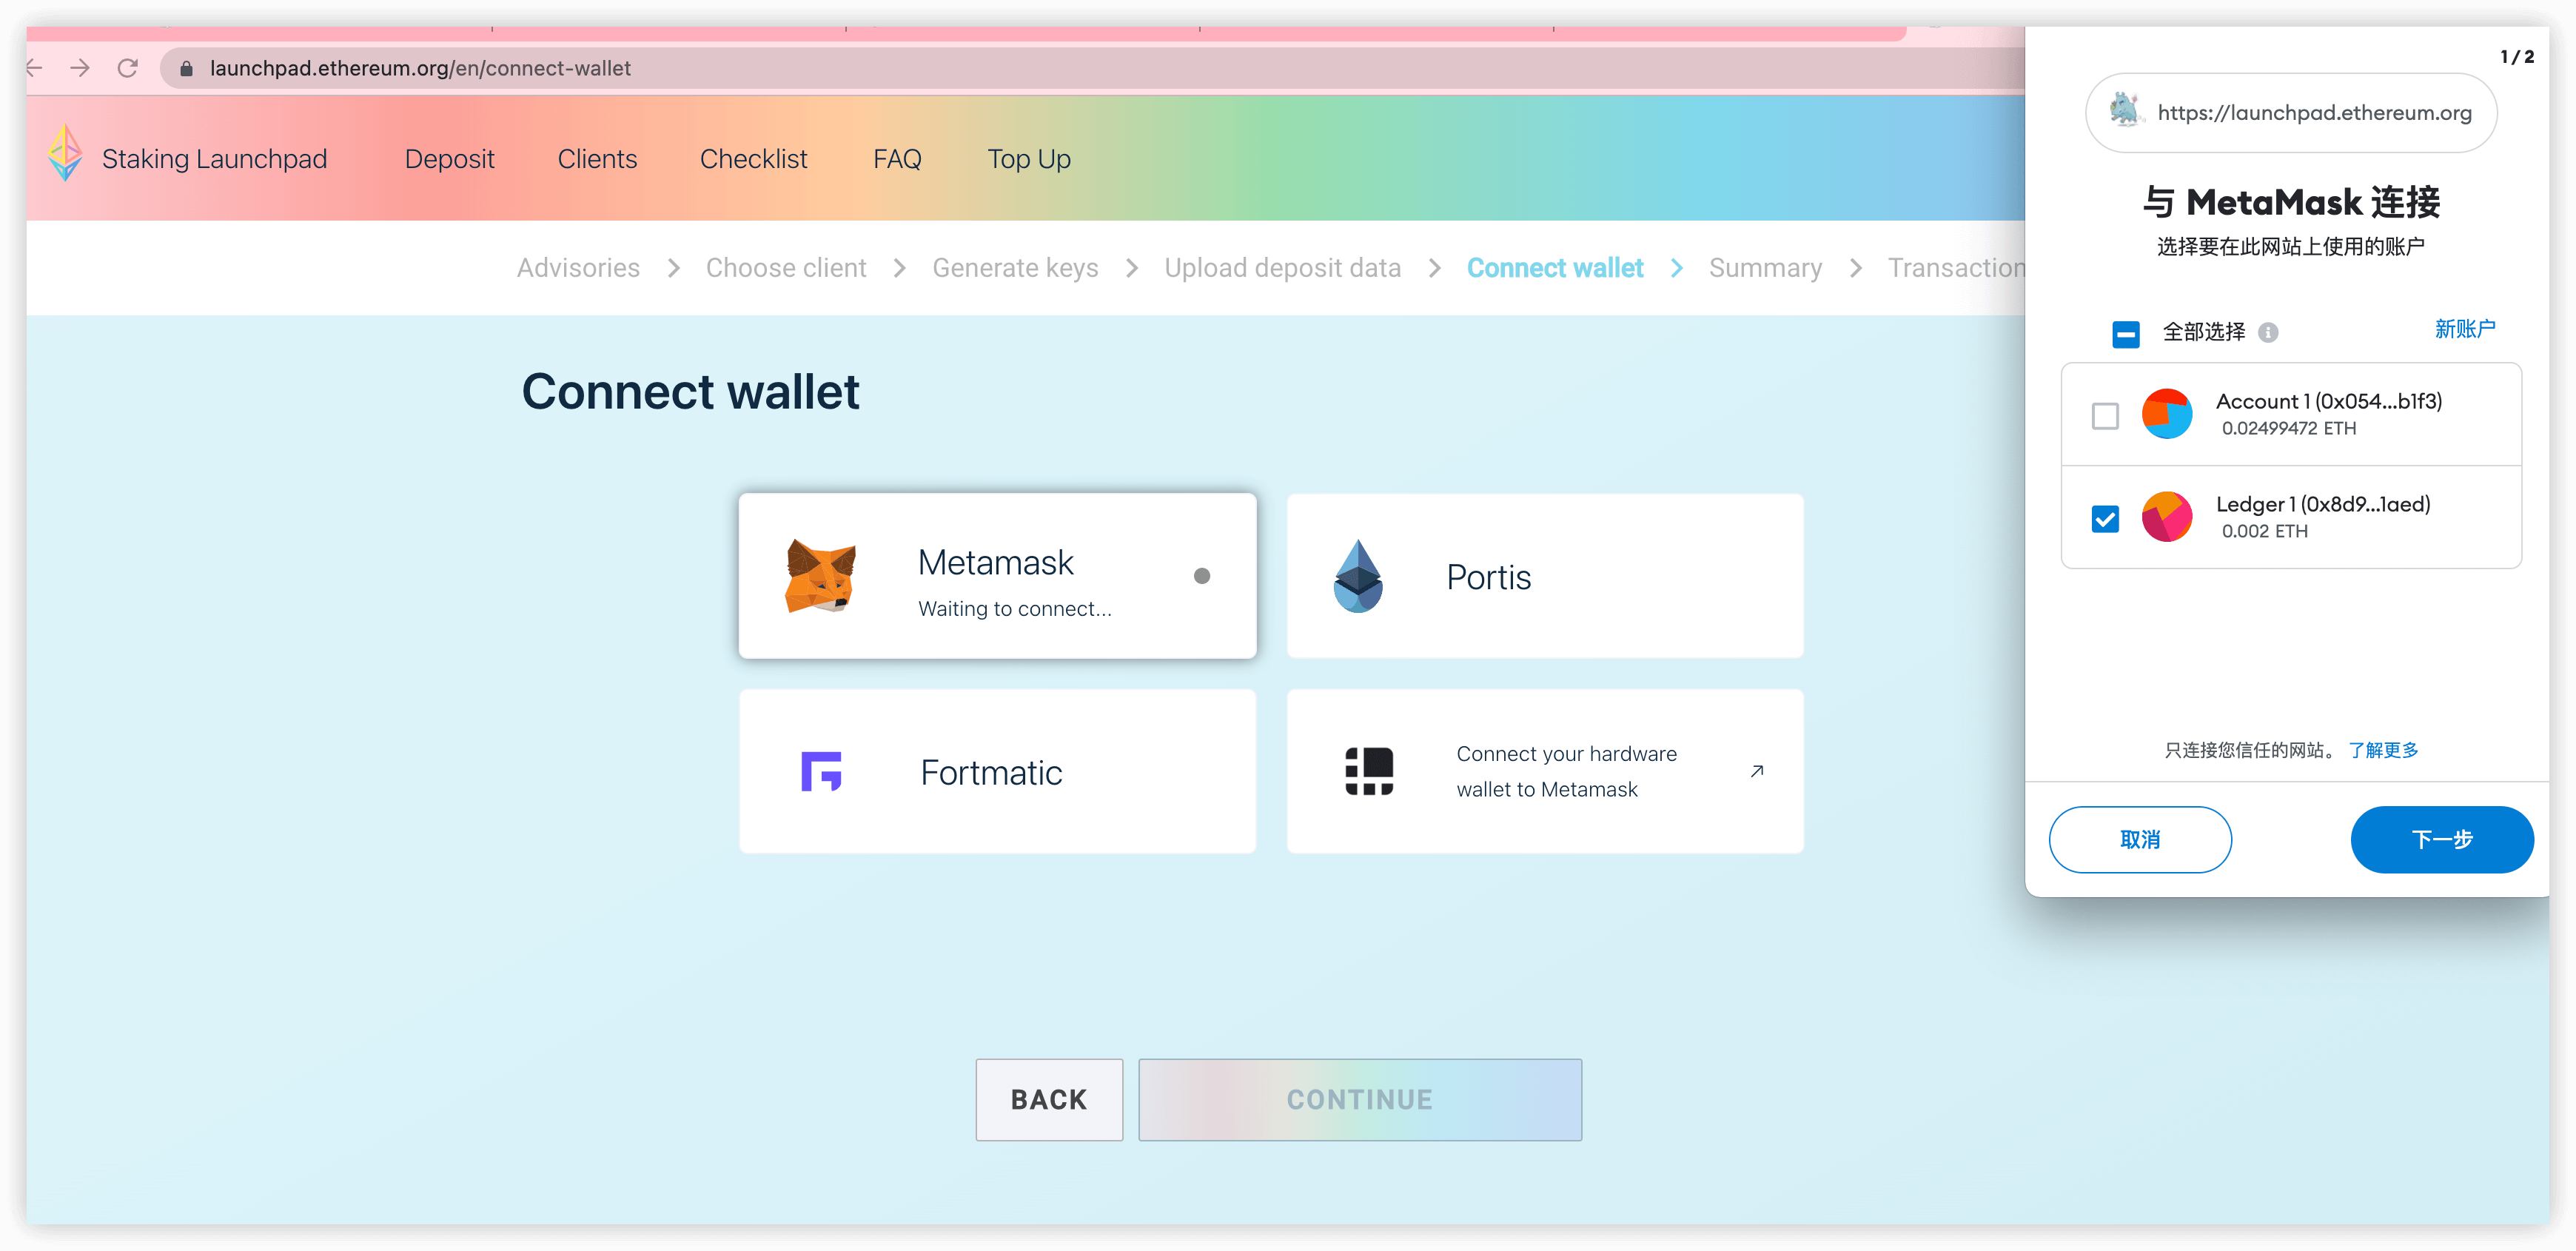
Connect Wallet
- Connect to the wallet you are going to use for ETH staking. There must be enough ETH in the wallet to participate in the staking. Choose your wallet type and connect.
Instructions for using Metamask+Ledger hardware wallet staking (if you do not use Ledger, please ignore this step)
- This method requires installing Metamask in the browser and downloading Ledger Live. If you have not installed or do not know how to use them, please read
- Enable blind signing and open Debug mode, the steps are as follows:
- Connect and unlock your Ledger device.
- Open the Ethereum application.
- Press the right button to navigate to
Settings. Then press both buttons at the same time to select. - In the
Blind signingsetting, pressing both buttons simultaneously will changeNOT EnabledtoEnabledto enable blind signing transactions. - Press the right button to view the
Debug datasetting, and pressing both buttons simultaneously will changeNOT DisplayedtoDisplayedto enable troubleshooting data. - After the above change is completed, press the right button twice to display
Back, and press the two buttons at the same time to return to the home page.
- 2.Ledger connects to Metamask wallet
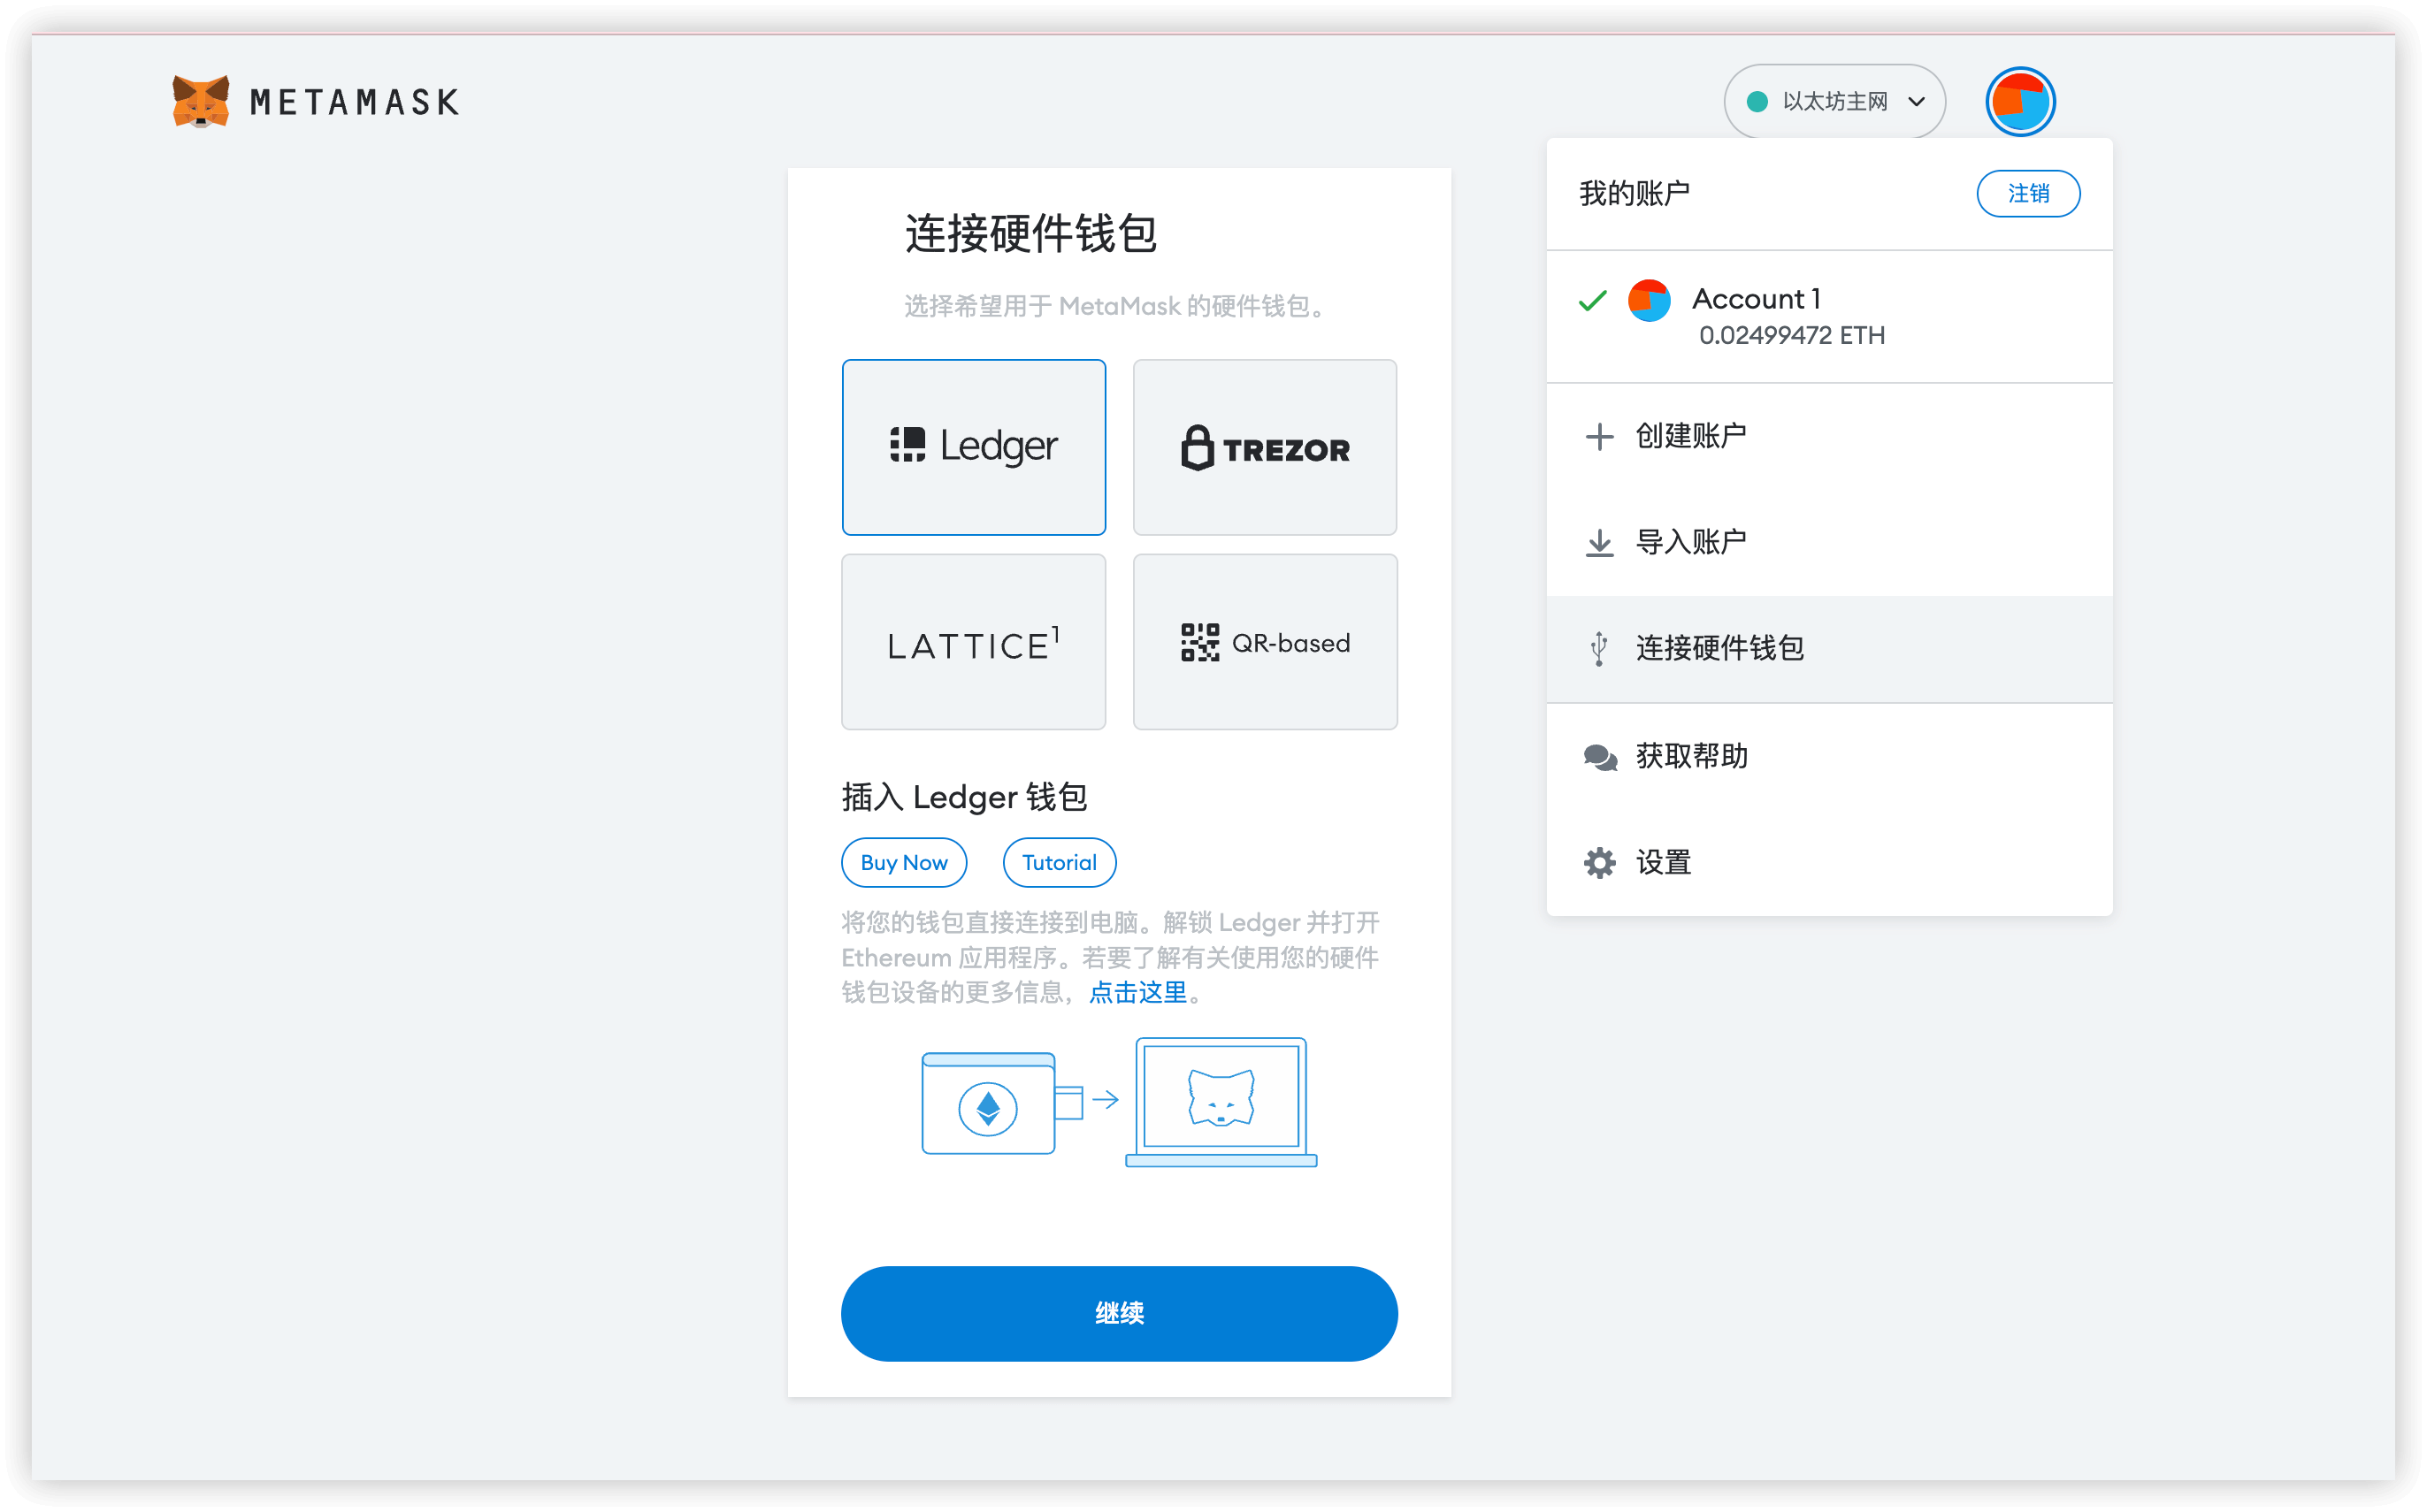
- Click the Metamask wallet plug-in, click the icon in the upper right corner
- Connect to the hardware wallet, select Ledger and click continue
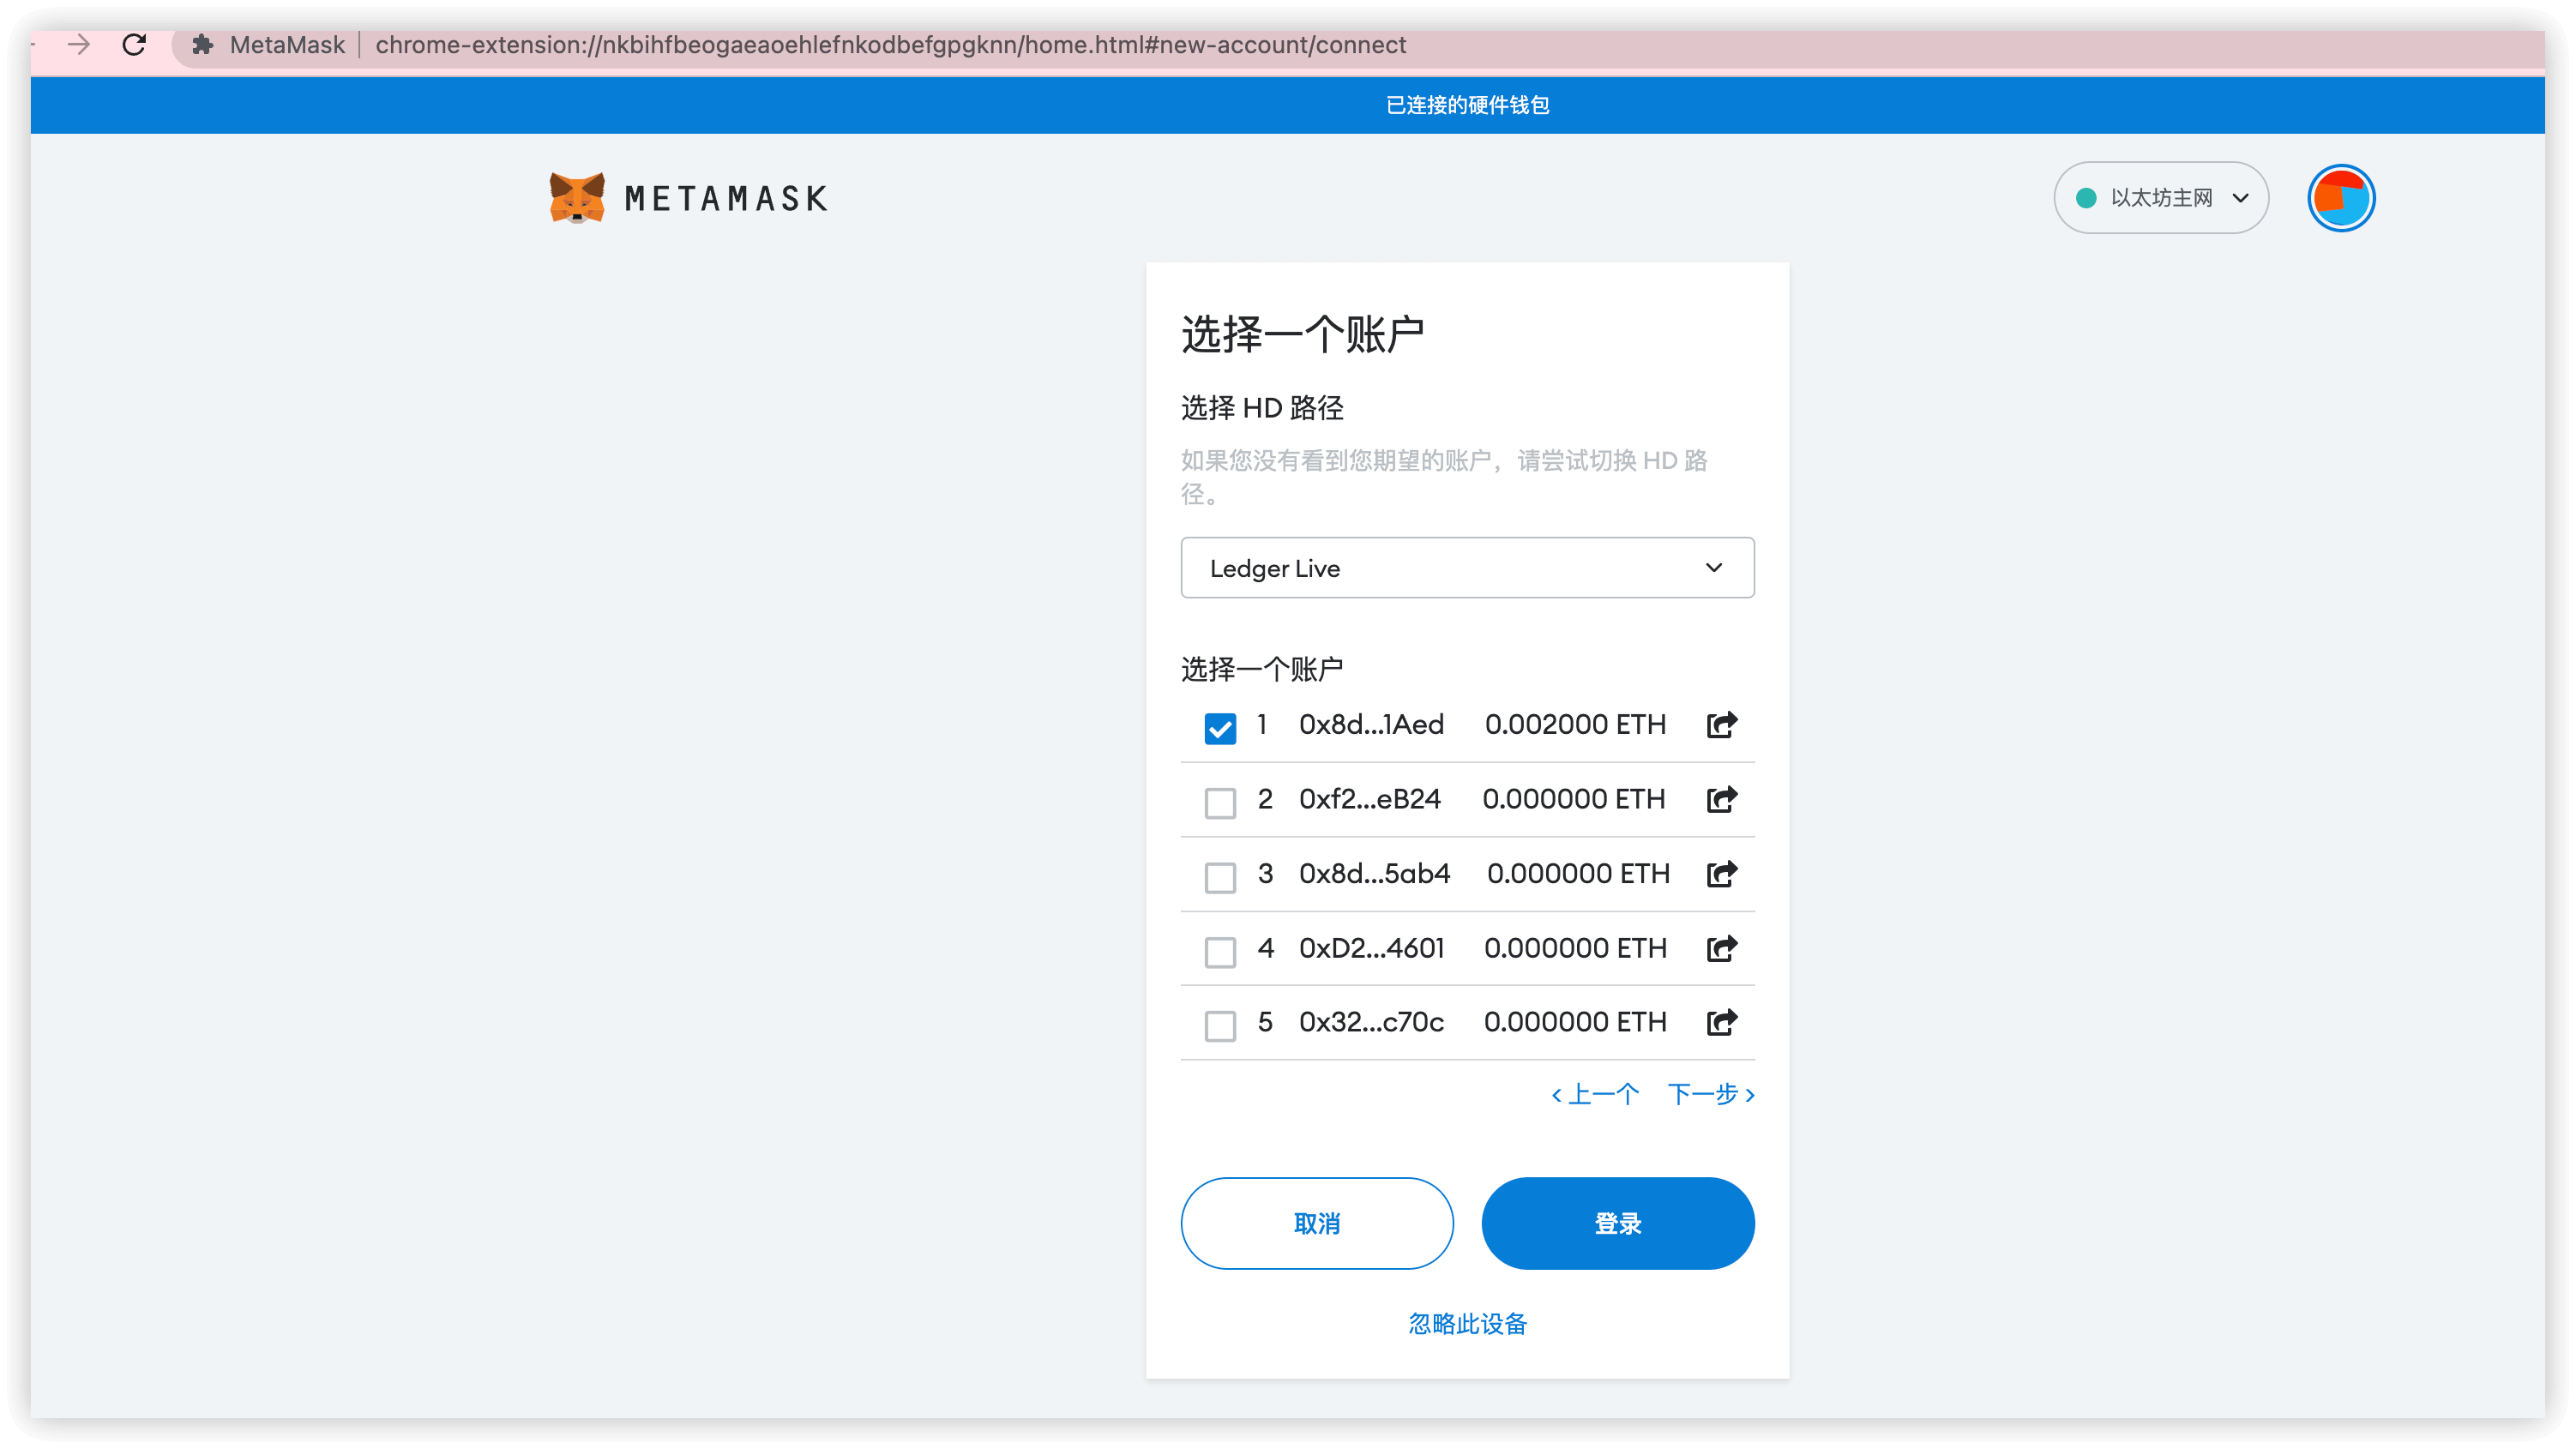
- Select your ledger wallet account that pays ETH to connect to Metamask.
- 3.Open the Launchpad staking page, click Connect to Metamask wallet, select the ledger hardware wallet address to connect to Launchpad to sign.
Understand Risks & Confirm Information
- The number of validators displayed on this page is the number you choose to create when creating the validator key, which is identified and confirmed in the "deposit_data-xxxxxx.json" you uploaded. Read carefully and click
NEXTonce confirmed.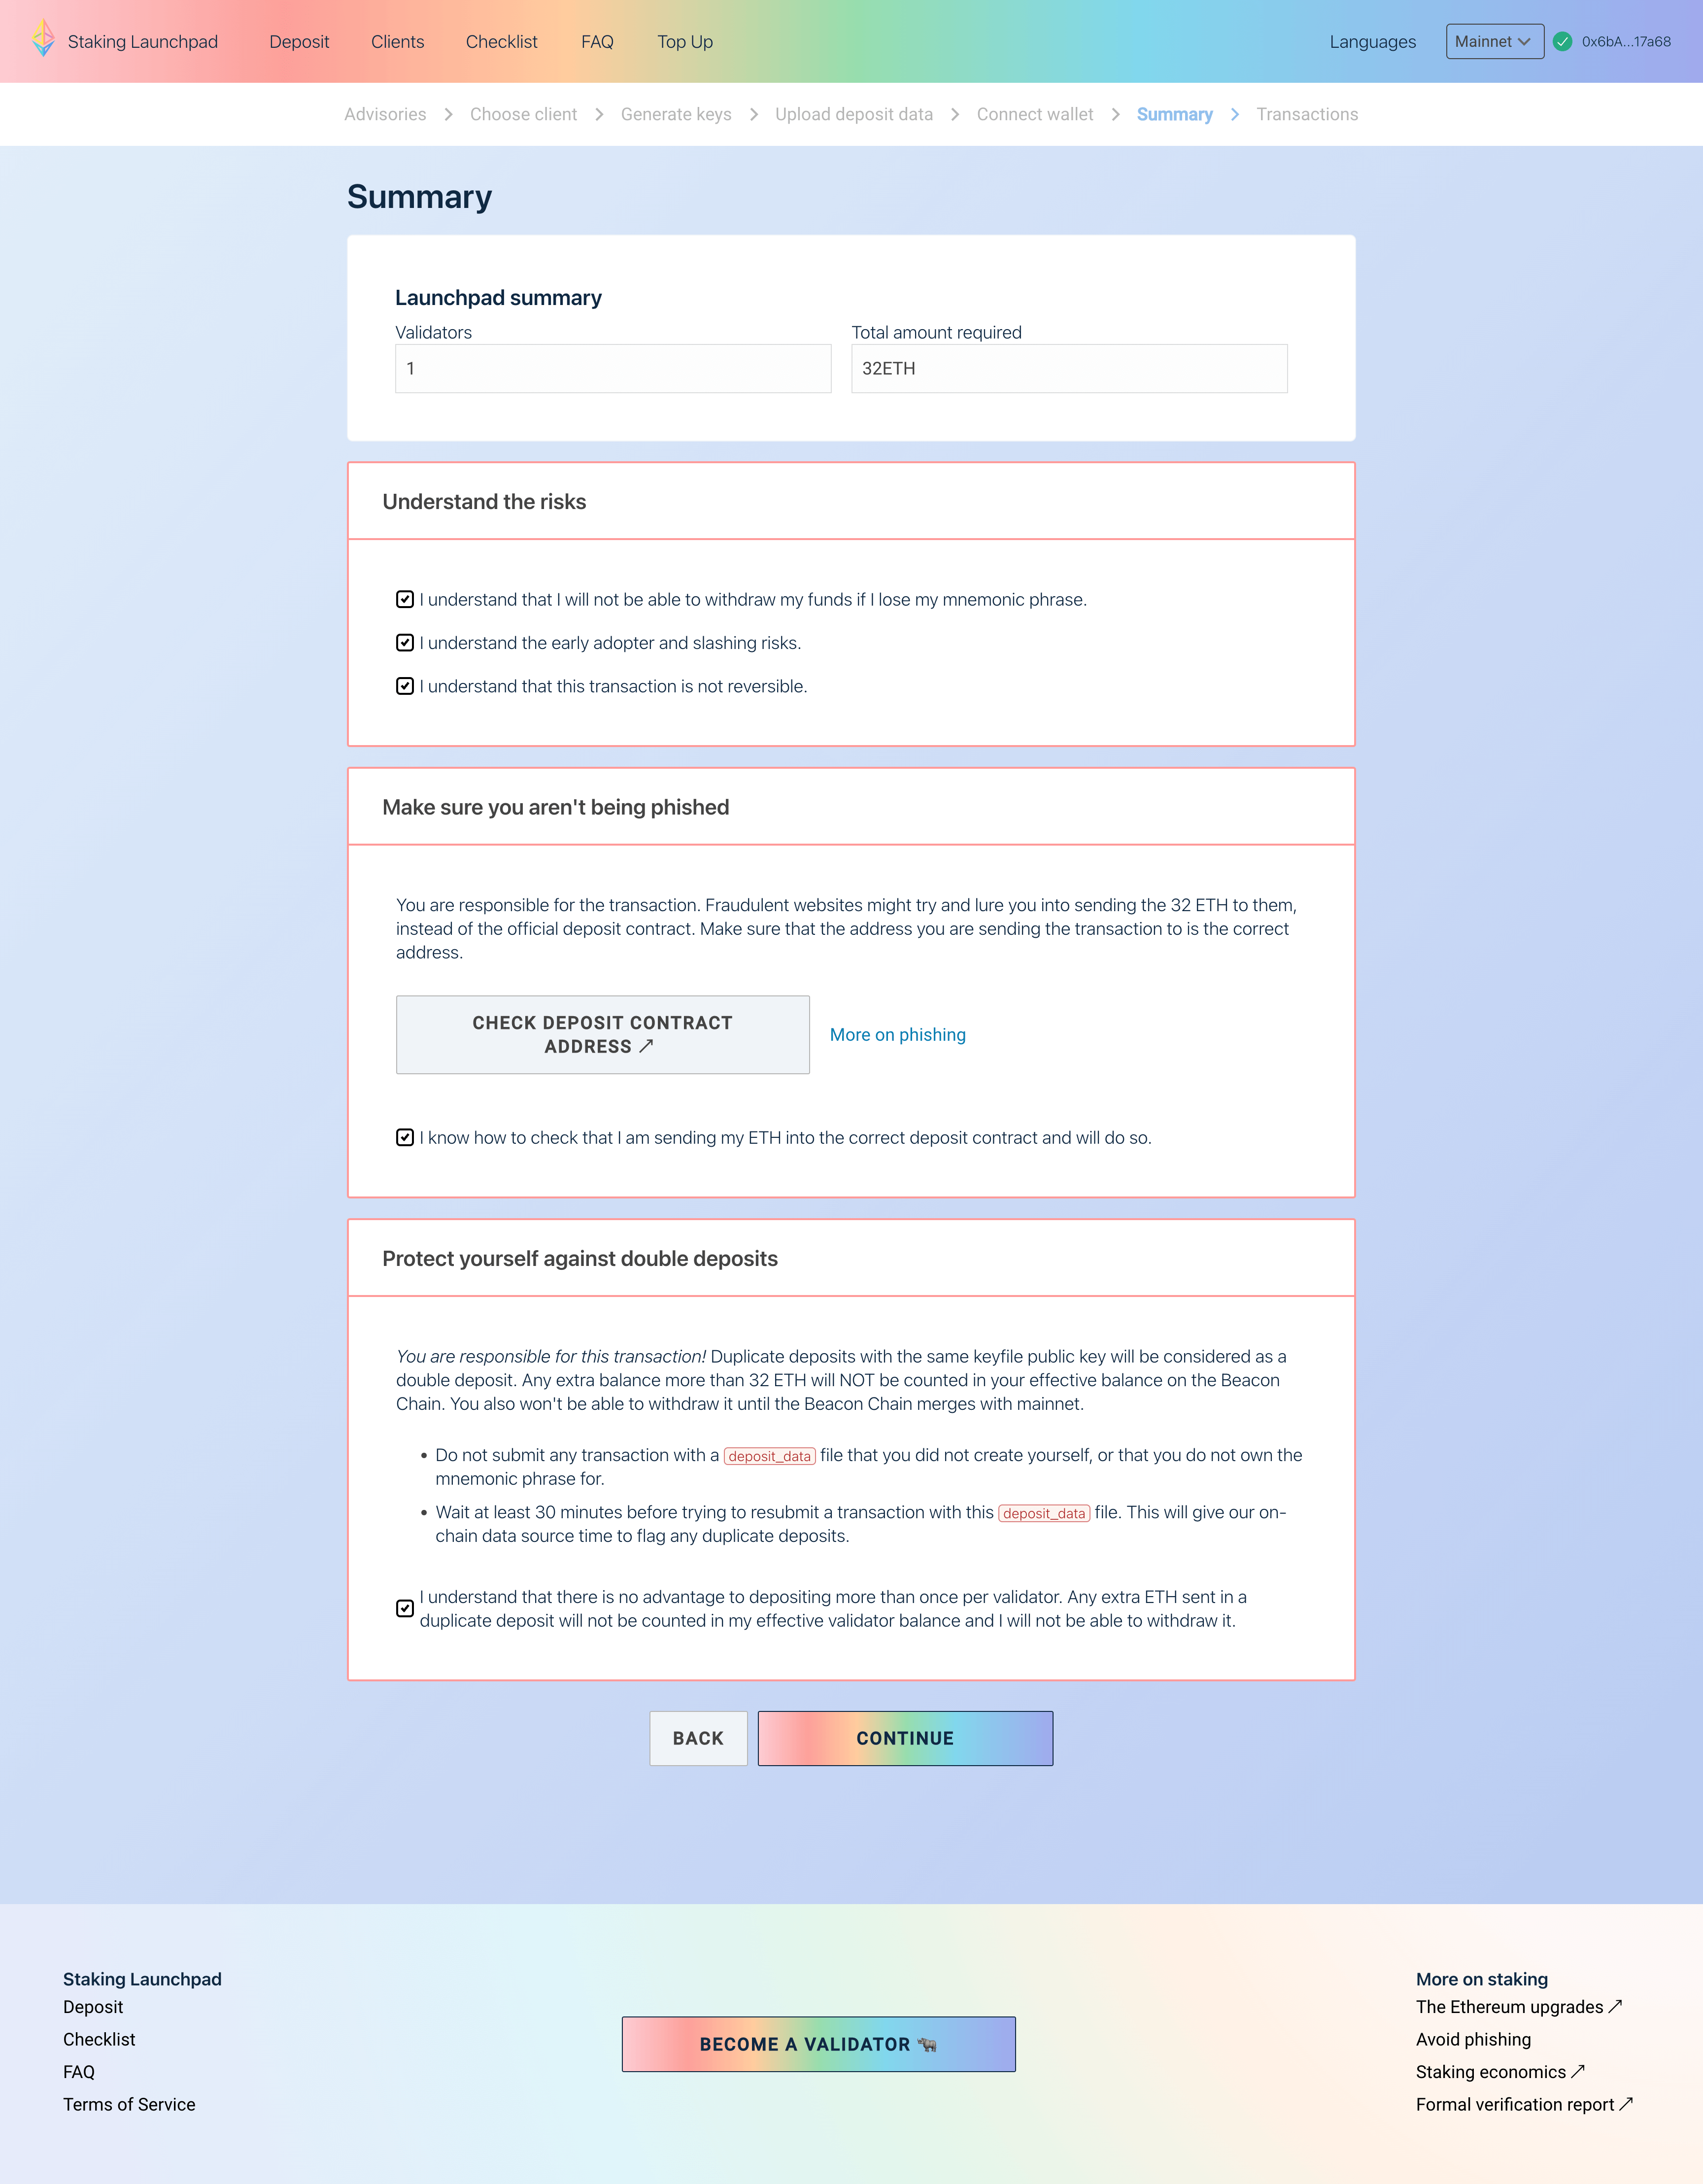
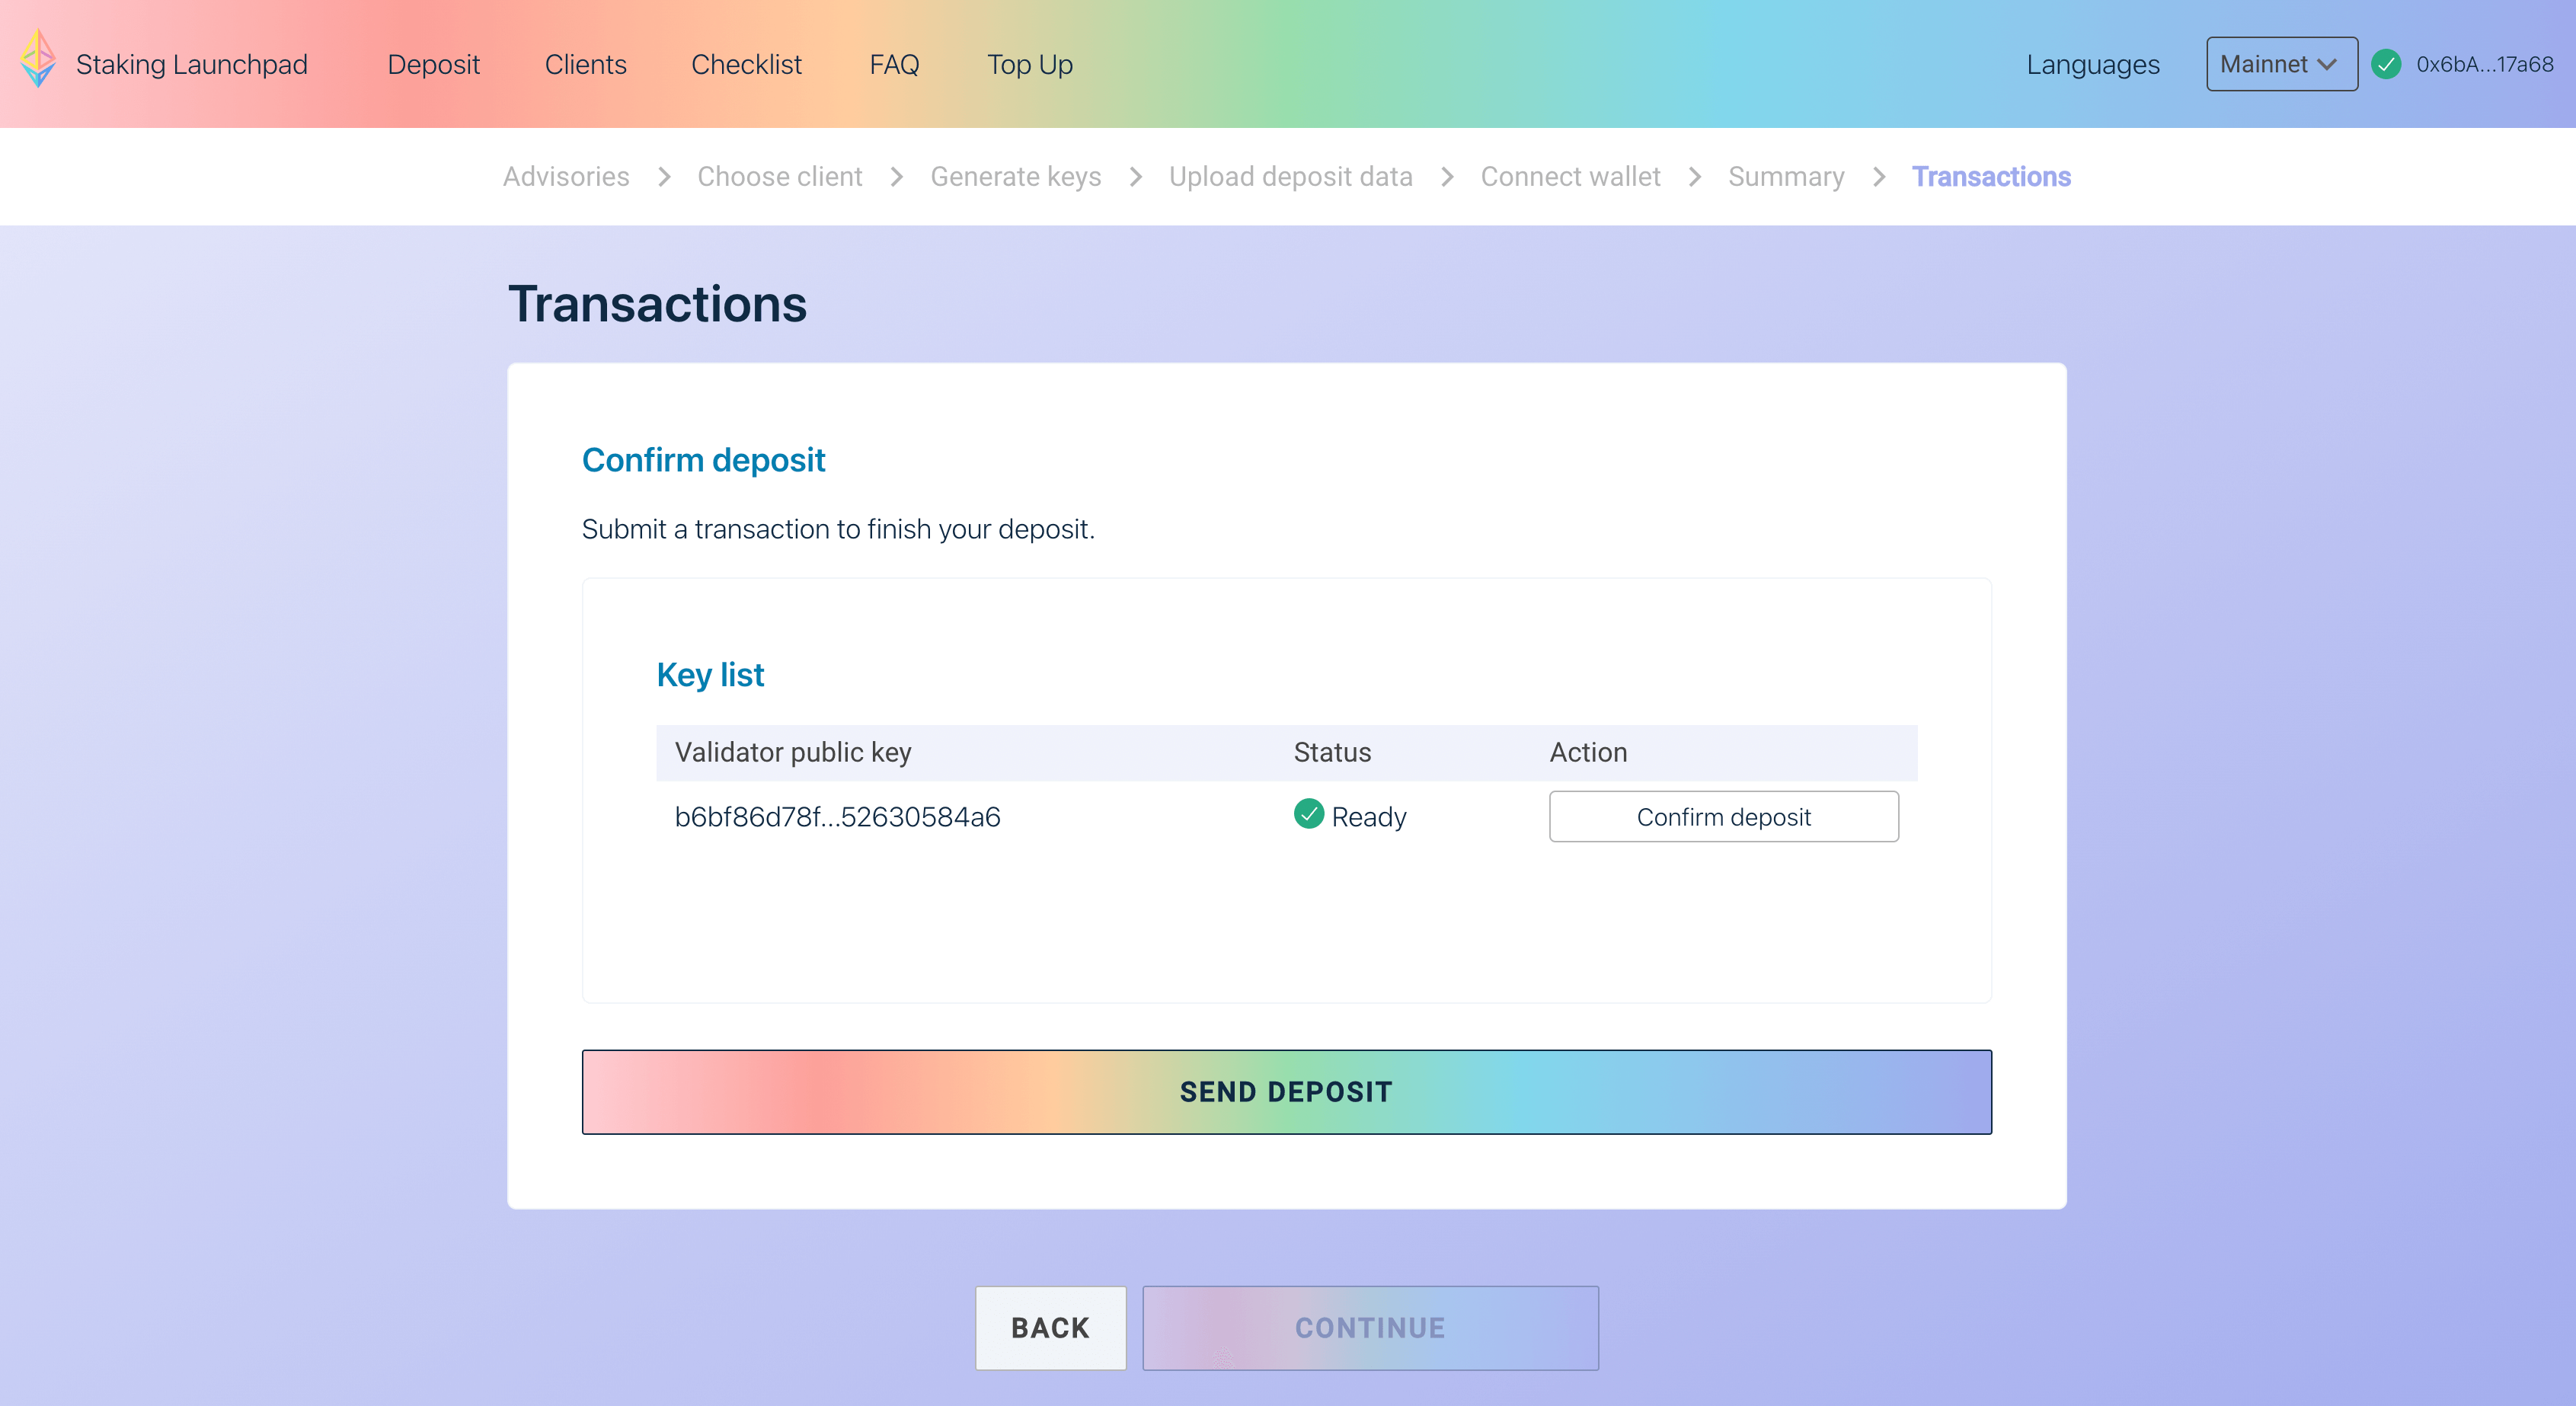
Deposit ETH to Stake.
The ETH staking for your validators will be completed once you deposit 32 ETH for each validator.
Click "ETH Official Browser" to check the validators public key again. The staked assets will be used for validator staking. After confirmation, click
DEPOSITto make payment.Users who use ledger wallets need to complete signature confirmation on ledger.
The funds can only be handled by you. When you choose to cancel the staking, the funds will be transferred back to the ETH withdrawal address。 you filled in when you created the key .
Congratulations! Your ETH has been successfully staked, and you can check your validator information on Ebunker!Click here
You can also use the ETH official browser or Ebunker browser to view the validator status.